| When you want to present a list of items in a document, you will usually want to put each item on its own line rather than burying the items in a paragraph. When the order of items is not importantfor example, for a list of items needed to carry out a taskuse a bulleted list. When the order is importantfor example, for the steps in a procedureuse a numbered list. With Word, you start a bulleted or numbered list as follows: To create a bulleted list, type * (an asterisk) at the beginning of a paragraph, and then press the Spacebar or the Tab key. To create a numbered list, type 1. (the numeral 1 followed by a period) at the beginning of a paragraph, and then press the Spacebar or the Tab key.
In either case, you then type the first item in the list and press Enter. Word starts the new paragraph with a bullet or 2 followed by a period and formats the first and second paragraphs as a numbered list. Typing items and pressing Enter adds subsequent bulleted or numbered items. To end the list, press Enter twice, or press Enter and then Backspace. Troubleshooting If you want to start a paragraph with an asterisk or number but don't want the paragraph to be formatted as a bulleted or numbered list, click the AutoCorrect Options button that appears after Word changes the formatting, and then click the Undo option.
After you create a list, you can modify, format, and customize the list as follows: You can move items around in a list, insert new items, or delete unwanted items. If the list is numbered, Word automatically updates the numbers. You can sort items in a bulleted list into ascending or descending order by clicking the Sort button in the Paragraph group on the Home tab. For a bulleted list, you can change the bullet symbol by clicking the Bullets arrow in the Paragraph group and making a selection from the Bullet Library. You can also define a custom bullet by clicking the Bullets arrow and then clicking Define New Bullet. For a numbered list, you can change the number style by clicking the Numbering arrow in the Paragraph group and making a selection from the Numbering Library. You can also define a custom style by clicking the Numbering arrow and then clicking Define New Number Format. You can create a multilevel bulleted list, numbered list, or outline by clicking the Multilevel List button in the Paragraph group, selecting a style from the List Library, and then typing the list. You press Enter to create a new item at the same level, the Tab key to move down a level, and the Backspace key to move up a level. See Also For information about another way to create an outline, see "Reorganizing a Document Outline" in Chapter 2, "Editing and Proofreading Documents."
You can modify the indentation of the list by dragging the indent markers on the horizontal ruler. Lists are set up with the first line "outdented" to the left from the other lines, and you can change both the overall indentation of the list and the relationship of the first line to the other lines.
In this exercise, you will create a bulleted list and a numbered list and then modify lists in various ways. You will then create a multilevel list with letters instead of numbers. USE the 04_Lists document. This practice file is located in the Chapter03 subfolder under SBS_Word2007. OPEN the 04_Lists document.
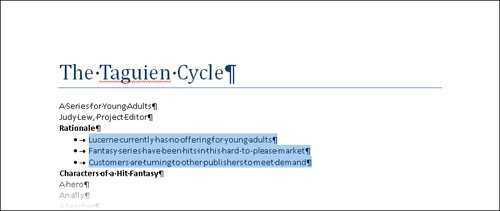
1. | Select the three paragraphs under Rationale, and then on the Home tab, in the Paragraph group, click the Bullets button.
Bullets  The selected paragraphs are reformatted as a bulleted list.
 | 2. | With the three paragraphs still selected, in the Paragraph group, click the Bullets arrow.
The Bullet Library appears.
 | 3. | In the gallery, click the bullet composed of four diamonds.
The bullet character in the selected list changes.
| 4. | Select the four paragraphs under Characters of a Hit Fantasy, and then in the Paragraph group, click the Bullets button.
The new list has the bullet character you selected for the previous list. This character will be the default until you change it.
| 5. | Select the paragraphs under each of the bold headings, and then in the Paragraph group, click the Bullets button.
| 6. | Scroll to the bottom of the page, select the four paragraphs under The Sequence of Events, and then in the Paragraph group, in the Bullets Library, click None.
The bulleted paragraphs revert to normal paragraphs.
| 7. | With the paragraphs still selected, on the Home tab, in the Paragraph group, click the Numbering button.
Numbering  The selected paragraphs are reformatted as a numbered list.
 | 8. | In the Paragraph group, click the Numbering arrow.
The Numbering Library appears.
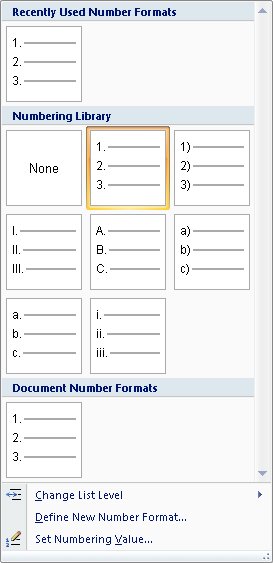 | 9. | In the gallery, click the A. B. C. box.
The numbers change to capital letters.
| 10. | With the numbered paragraphs still selected, in the Paragraph group, click the Decrease Indent button.
Decrease Indent  The numbered list moves to the left margin.
| 11. | In the Paragraph group, click the Increase Indent button to move the list back to its original indent.
Increase Indent  Tip You can also adjust the indent level of a bulleted list by selecting its paragraphs, and on the horizontal ruler, dragging the Left Indent marker to the left or right. The First Line Indent and Hanging Indent markers move with the Left Indent marker. You can move just the Hanging Indent marker to adjust the space between the bullets and their text. | 12. | Scroll the document until you can see the bulleted list under The Hero, select the three bulleted paragraphs, and then on the Home tab, in the Paragraph group, click the Sort button.
Sort  The Sort Text dialog box opens.
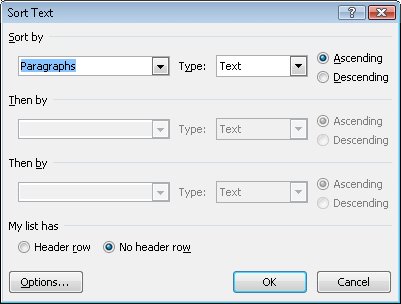 | 13. | With the Ascending option selected, click OK.
The order of the bulleted items changes to ascending alphabetical order.
| 14. | Click the blank paragraph under The Ally, and then on the Home tab, in the Paragraph group, click the Multilevel List button.
Multilevel List  The List Library appears.
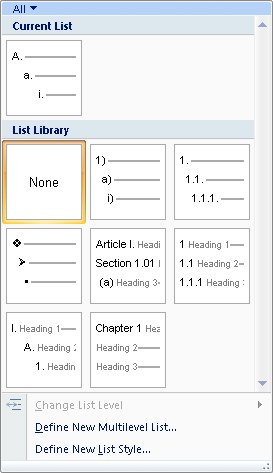 | 15. | In the gallery, click the thumbnail under Current List.
The first item in the new numbered list will have a capital letter as its numbering style.
| 16. | Type Does not have to be human, press  , type Is a stabilizing force, press , and then press , type Is a stabilizing force, press , and then press  . .
The new item is indented to the next level and assigned a different number style.
| 17. | Type A voice of conscience, press , type Not a "yes" person, press , and then press  . .
| 18. | Type Embodies loyalty.
Word takes care of all the formatting of the multilevel list.
 | 19. | Under The Problem, click to the left of the blank paragraph mark, type * (an asterisk), press , type A difficult choice, and then press .
Word converts the asterisk into a bullet and formats the next paragraph as a bulleted item.
 | 20. | Type An injustice, press , and then type A quest.
|
CLOSE the 04_Lists document without saving your changes.
Formatting Text as You Type The Word list formatting capabilities are just one example of the program's ability to intuit how you want to format an element based on what you type. You can learn more about these and other AutoFormatting options by exploring the AutoCorrect dialog box. To open this dialog box, click the Microsoft Office Button, click Word Options, click Proofing in the left pane of the Word Options window, and then click AutoCorrect Options in the right pane. On the AutoFormat As You Type tab, you can see the options that Word implements by default, including bulleted and numbered lists. You can select and clear options to control Word's AutoFormatting behavior. One interesting option is Border Lines. When this check box is selected, you can type three consecutive hyphens (-) and press Enter to have Word draw a single line across the page. Or you can type three consecutive equal signs (=) and press Enter to have Word draw a double line. |
|