Managing a System s Font Collection
Managing a System's Font CollectionWindows XP's font management allows you to
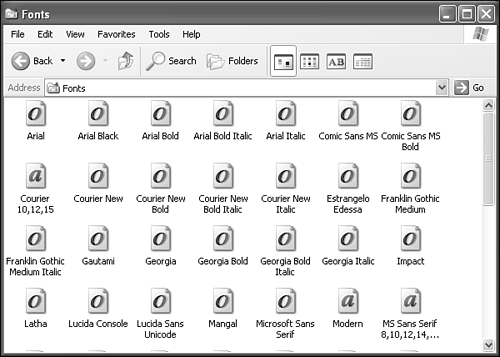
To perform any of these functions, you need to use the Fonts applet found in the Windows XP control panel. Specifically, open the Control Panel through the Start menu, select Appearance and Themes, and then click the Fonts options located in the See Also pane. This opens the windows shown in Figure 26.1. Figure 26.1. The Fonts folder displaying icons and names for installed fonts. Adding FontsSome font sets come with an installer. In that case, you can just run it as instructed. The fonts are dumped into the Fonts directory, and the system adds them to the Font Registry, whereupon they can be used from your applications. If no installation program came with your fonts, or if you want to add some fonts to your system that you downloaded from the Internet or otherwise acquired, just follow these steps:
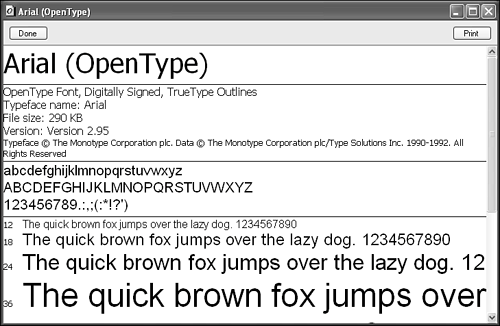
TIP You can copy fonts into the system by dragging the font files into the Fonts folder. This one-step process is quick and dirty. Displaying and Printing Font ExamplesYou can quickly acquire a large selection of fonts, thus easily forgetting what you have on hand. Several utility programs are available to help you keep track of fonts or show a little example of them in font selection lists within applications and such. Check the Web for such programs, by searching for "font," "font tool," or "font view." A few examples of tools to look for include FontShow, LogotypeMaker, and FontShowcase. The Fonts folder has a few tricks of its own to make font management a bit easier. For starters, you can view and/or print the characters of a font easily by following these steps:
TIP The font viewer displays a font's character set regardless of the location of the font. So, if you want to check out the font's look before installing it, just open the floppy disk or other folder containing the font, and double-click it. Hidden System FontsSome fonts are normally hidden because they are required by the system. If a user accidentally deleted them, the system wouldn't work. For example, dialog boxes wouldn't have text in them. Unless you turn on viewing of hidden files via the Folder options in an Explorer window, you won't see these fonts. If you do turn on viewing of hidden files and then view the Fonts folder in Details view, you'll see an H in the Attributes column. Make sure not to delete or move these files.
TIP Programs that are multilingual-aware automatically use a font that contains multiple character sets. If you are using a program that is not multilingual-aware, such as Notepad, the font might appear as black boxes or lines. To make the text appear correctly, you might need to manually select a font that contains multiple character sets. Both Tahoma and Microsoft Sans Serif fonts support multiple character sets. Removing FontsFonts consume space on your hard disk. A typical TrueType font consumes between 50 and 200KB of disk space. If you're a font monger, you could easily chew up a gigabyte or two with fonts you end up never using. TIP A little-known fact is that even if an italic or bold font has been removed, most word processing applications for Windows, such as Microsoft Word, can still emulate it on-the-fly. It won't look as good as the real thing, but it will work. If you get on a spring-cleaning jag and decide to remove some fonts, follow these steps:
TIP You also can drag a font file to another folder, but the default is for that operation to create a copy of the font and not remove it from your arsenal of system fonts. If your aim is to organize your seldom-used fonts into folders, the easiest way would be to right-click and drag them into the new folders, and then choose Move from the resulting context menu. |
EAN: 2147483647
Pages: 450
 To learn how to map a network drive,