Tuning Windows Performance with the System Applet
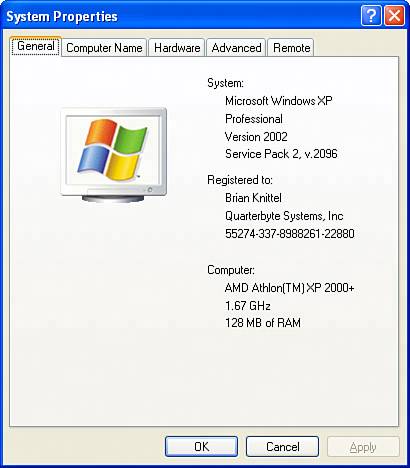
| When you discover how your system is performing, it's time to consider ways to speed up your system if you're not satisfied. The System Applet provides several ways you can improve your system's performance without wielding a screwdriver or opening up your system. To open the System applet, click Start, Control Panel, Performance and Maintenance and System, or just right-click My Computer and select Properties. The System properties sheet's General tab appears in Figure 25.3. The General tab lists the processor type, processor speed, and the amount of physical RAM (memory) installed. Figure 25.3. This system has only the minimum amount of RAM necessary to run Windows XP Professional acceptably.
First of all, if your system has 128MB of RAM or less, your first move to increase performance should be to upgrade your system's RAM to at least 256MB. Windows XP really, really likes to have lots of memory, and with today's prices, you can add an additional 128MB for as little as $20. Memory modules come in larger increments as well, if your computer is designed for them. You'll notice a big improvement in performance when you step up to 256MB. It can't hurt to add even more, although you probably won't notice as great an improvement as the jump from 128MB to 256MB, unless you use memory-hungry applications such as Adobe Photoshop and Microsoft Access. TIP If you're using a computer with its video built in to the motherboard (rather than located on a separate card), your effective memory is reduced by as much as 10MB or more because your system's memory is shared with the video card. For example, a system with 64MB of RAM that uses shared video memory (sometimes referred to as Unified Memory Architecture or UMA) can have as little as 54MB of available RAM, or even less! This is another good reason to consider a memory upgrade, or at least stay away from chipsets with integrated video (except those that use nVIDIA's nForce chipset). If you already have at least 256MB of memory, or if you're looking for ways to fine-tune Windows to find more performance, click the System Applet's Advanced tab. It has five sections:
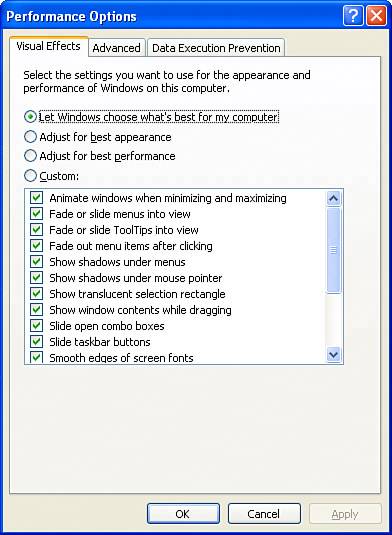
Click the Settings button in the Performance section to get started. Adjusting Visual Effects for PerformanceIf you have a modern, reasonably fast processor (that is, at least 500MHz), you can take full advantage of all the visual niceties provided by Windows XP's Visual Effects menu. However, if you're running with less than 128MB of RAM, have a processor under 500MHz, or have a slow video card (such as a PCI-based video card or typical motherboard-integrated video circuits), you might want to adjust Windows XP's defaults so that less graphics processing is required (see Figure 25.4). Figure 25.4. Windows XP Professional's Visual Effects menu offers several animation and effects settings.
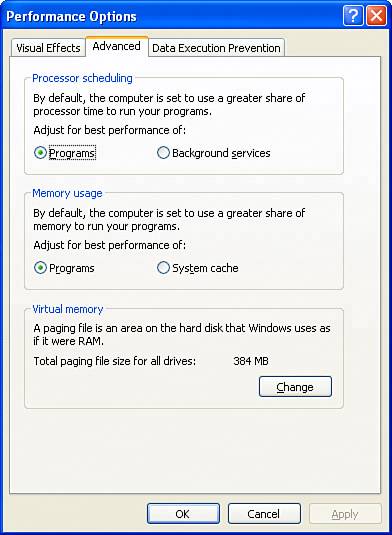
If you select Adjust for Best Performance, all the animations and effects shown in Figure 25.4 are turned off. If you select Adjust for Best Appearance, all the animations and effects are turned on. If you use Let Windows Choose What's Best for My Computer, none, some, or all of the animations and effects will be enabled, depending on the speed of your hardware. For example, on my old 800MHz system with a fast AGP video card, all features were turned on except Smooth Edges of Screen Fonts. Select Custom to choose the options you want turned off or on. You can speed up screen displays by turning off options in the Visual Effects menu. TIP If you enable Smooth Edges of Screen Fonts, you can further fine-tune its behavior through the Appearance tab of the Display properties sheet. Click Effects and select either Standard or ClearType for the smoothing method, or disable it if you prefer. Standard or disabled are best for CRT displays and many presentation projectors. ClearType may be a better choice for LCD displays. (I say "may be," as it's a matter of individual perception whether you think ClearType improves the display or makes it look fuzzier.) Adjusting Processor, Memory, and Virtual Memory UsageTo improve the performance of your computer by adjusting processor, memory, and virtual memory usage, click the Advanced tab of the Performance Options sheet (see Figure 25.5). The Advanced tab provides three ways to affect the performance of your system:
Figure 25.5. The Advanced dialog box enables you to adjust three factors to improve system performance.
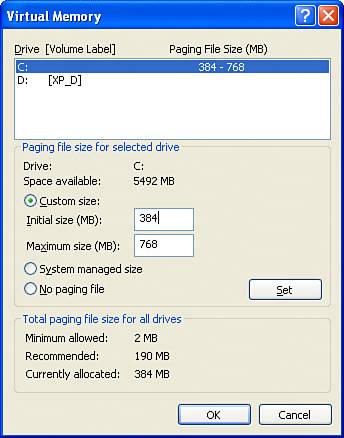
These options are covered in the following sections. Optimizing Virtual Memory (Paging) File SizeWindows XP Professionallike Windows 2000, Windows NT, Windows Me, Windows 9x, and Windows 3.xincorporates a virtual memory scheme. As you might know already, virtual memory is a method for tricking the operating system into thinking it has more apparent RAM for use by applications than is physically present in the computer. Windows XP uses a hard disk file called pagefile.sys to simulate RAM. Windows XP's Virtual Memory Manager (VMM) constantly tracks the amount of free RAM, and when the available RAM is exhausted, the VMM begins swapping out 4KB chunks of data and instruction code to pagefile.sys. As portions of the data or code are needed, they are swapped back into RAM chips, where they can be used by the CPU. This activity is called paging. The upshot is that more applications and services can run simultaneously than would normally be the case. Paging is a big benefit when the memory required by programs that are actually doing real work at any given time is greater than the amount of physical memory. On the other hand, CPU access to the pagefile on your hard drive is monumentally slower than to your physical system memory, so when paging activity is high, performance plummets. The default VMM settings applied when you install Windows XP Professional are based on your hard disk space and partition designations. Windows 9x and Me allowed only a single pagefile, although its size could vary. On Windows XP, however, a pagefile is created in the root of the partition containing the operating system, each additional partition can also have a pagefile.sys, and the size of the each file is dynamic. So, if you have several disks or partitions, Windows XP Professional can decrease the size of a pagefile on one partition and shift paging onto another one as available hard disk space decreases. TIP The automatic adjustment of paging file locations is a huge advantage for Windows XP over older Windows versions, and provides yet another reason for adding one of today's bigger, faster hard drives to your system. For best performance, you might want to tell Windows to put pagefiles on only newer, faster drives with fast interfaces and the most free space, as described in the following paragraphs. Because Windows XP Professional is such a huge operating system and today's office suites, games, movies, and graphics editors are bigger than ever before, it's imperative that paging be intelligent and plentiful. This is especially important if your system barely exceeds the minimum RAM recommendation, as you learned in Chapter 2, "Getting Your Hardware and Software Ready for Windows XP." If you want to ensure that your hard disk doesn't thrash itself to death and that the system runs efficiently, not making you wait every time you switch between windows or move something around on the screen, you should install at least 256MB of RAM, let Windows manage the pagefile size, and keep lots of free space on your drive. The default pagefile size is equal to the amount of RAM in your computer plus 12MB. As disk space dwindles, the file can shrink. The minimum can be no less than about 2MB. Usually, you should leave the pagefile at its recommended size, although you might increase its minimum size if you routinely use programs that require a lot of memorythis lets Windows allocate the pagefile space immediately, when there is less chance of having a fragmented pagefile. You can check with the software maker for information about how demanding applications might benefit from increasing the allocation. You can optimize virtual memory use by dividing the space between multiple drives and especially by removing it from slower or heavily accessed drives. To best optimize your virtual memory space, you should divide it across as many physical hard drives as possible. When you're selecting drives, keep the following guidelines in mind:
TIP If you have multiple drive letters, it can be difficult to tell whether drive letters above C: are located on a second physical drive or are partitions of your first hard drive. Use the Microsoft Computer Management program (which you can access from the Administrative Tools folder in the Control Panel) and run the Disk Management tool to view local drives and their drive letters. The following are some other points to consider when you're adjusting the pagefile:
TIP For additional speed improvements, consider defragmenting your hard disk and upgrading your hard disk, hard disk controller, or motherboard for faster disk performance. Before installing a new IDE hard drive, find out which transfer protocol it uses. If the new drive uses Ultra DMA/66 or Ultra DMA/100, and your present IDE controller doesn't, you could have booting problems. See whether the drive manufacturer has provided a method of reverting to an Ultra DMA level supported by your system. If not, you might have to turn off DMA support completely in your system BIOS and suffer a large performance hit. Sometimes when you're upgrading a hard drive, upgrading the motherboard at the same time will serve you well, for just this reason. "Serial ATA" drives currently offer even faster performance. To change the initial and maximum size of the workstation's pagefile, the file locations, and the number of pagefiles, follow these steps:
TIP Short on disk space? If you're seriously short on space, you can turn off the VMM and then delete the pagefile. You can't delete it while it's in use, though. So, first, you have to turn it off using the Control Panel's System applet. Then, reboot, and delete the inactive file using Windows Explorer. You can use the Performance Monitor discussed earlier in this chapter to get a sense of how much virtual memory is being used. To get started, open the Performance Monitor and click the + (plus) button on the toolbar. Choose Paging File from the Performance Object drop-down list. Then add Usage and Usage peak. View the statistics in whatever way you like. Figure 25.7 shows an example. In this figure, you can see that even with 15 programs running, I'm still only at 3.354 percent usage, with a peak of 6.212%. Figure 25.7. You can check virtual memory usage via the Performance Monitor by adding paging file monitoring for display in the chart. Setting Multitasking PrioritiesAs you know, Windows XP Professional is a multithreaded, preemptive multitasking operating system. Left to its own devices, it does an extremely good job of balancing user requests with the need for internal system operations and control. The result from the user's point of view is performance that appears to be highly responsive, even though some internal sleight of hand and task juggling might be going on under the hood. You'll really appreciate Windows XP's excellent multitasking capabilities when your system is sharing files and a printer, running a Web server, and at the same time juggling multiple browser windows, an email client, two or three word-processing documents, a spreadsheet, and a photo editor. Sound like your office? As well as it works by default, one setting can slightly improve overall smoothness of Windows XP Professional's multitasking, depending on what you use your computer for. To set it, do the following:
Normally, Programs is selected, ensuring that the foreground application (the window you're currently working with) gets more CPU time slices than programs running in the background. Time slices are also shorter and variably sized, which results in more responsive action from an application as you work in it. Unless you have CPU-intensive applications running in the background, though, you won't notice a difference in foreground performance. If you're running something important in the background that bogs down too much when you're doing other foreground work on the computer, choose the Background Services option. Examples might be data acquisition programs, communications programs, Internet Connection sharing, a Web server, or a backup utility. The time slices are doled out in longer portions with this setting. Setting Memory UsageBy default, Windows XP devotes more memory to running programs than to the system cache (the memory used for disk caching and handing background operations). If your computer is used entirely as a workstation and doesn't share folders, drives, or its Internet connection with other computers on a network, this setting should be left alone. However, if your computer is used as a server, and particularly if you have 256MB of RAM or more, change the default for Memory Usage (see Figure 25.5) from Programs to System Cache to improve performance for shared resources. When you're finished customizing Performance settings, click OK to close the Performance Options dialog box and return to the Advanced tab of the System Properties window. Enabling Data Execution PreventionSince the early days of computing, most computer designs have allowed program instruction codes and data to be mi XEd together in memory. This has many advantages, but it's also made possible a whole category of security disasters, wherein hackers exploit program bugs to write new instructions into the program's data areas, and then fool the program into EXEcuting these new instructions. These program bugs take a lot of time to identify and eliminate, and there are untold numbers of them still lurking about, so programs and operating systems remain vulnerable. To answer the security threat, some recent microprocessors now have as part of their memory-management hardware a feature that lets the operating system mark the data storage sections of memory as non-EXEcutable, so that the operating system can be notified if a program attempts to execute instructions in them. Starting with Service Pack 2, Windows XP can take advantage of this hardware feature, and calls it the Data Execution Prevention (DEP) option. At the time this section was written, only Intel's and AMD's 64-bit processors provided Execution Protection support, so DEP was available on the 64-bit version of Windows XP, and on the 32-bit versions of XP only while running on the Opteron and Athlon-64 processors in 32-bit mode. However, it may also be provided by newer 32-bit processors, so you should check to see if Data Execution Prevention is available on your computer. To manage DEP, log on as a Computer Administrator, open the Control Panel, open the Security Center, and at the bottom of the screen double-click the System icon, to view the dialog shown in Figure 25.8. (You can also get to the Data Execution Prevention tab from the System Options/Performance dialog we've been discussing in the previous sections.) Figure 25.8. If Data Execution Prevention is available on your computer, you can control it from the System Performance Options dialog.
If Windows indicates that your processor does not have the necessary hardware support, the dialog's options will all be grayed out, and you can simply close it and forget about it. If the options are not grayed out, you should check Turn on DEP for All Programs to enable the feature. Thenceforth, if an application program attempts to execute instructions from protected memory regions, Windows will display a dialog box informing you of the program failure, and will terminate the application. In almost all cases, EXEcuting instructions in writeable data memory occurs only as a consequence of a serious bug, or during a hacking attempt. There are some rare instances of application programs that legitimately write and execute instructions on the fly"just-in-time" compilers like Java are an example. Also, some graphics processing applications use self-modifying code to squeeze out every last bit of performance. These programs should be updated by their manufacturer to work correctly under DEP. Until they're updated, however, DEP will not let them run. If you know you can trust a given application, you can disable DEP just for the one application by making an entry in the DEP configuration dialog. Click Add, and then locate the application's EXEcutable filename. If a device driver fails with DEP enabled, you will get the dreaded "Blue Screen of Death" with the message ATTEMPTED_EXECUTE_OF_NOEXECUTE_MEMORY, and you will have to restart Windows. If this happens, I suggest that you restart Windows in Safe Mode, and attempt to identify, then disable or update the device driver that failed.
|

 To learn more about starting in Safe Mode,
 EAN: 2147483647
Pages: 450