Working from the Home Page
|
|
Server Like the home page on any website, the Microsoft Project Web Access Home page is the entry point to all the other pages on the Web Access site. Interestingly, the Home page is dynamic, meaning that the content is specific to each user. The information presented on your Home page will be different from the information on other users’ Home pages.
As you can see in Figure 22.3, the Home page consists of two navigational elements as well as a large content area. The content area is divided into three (or sometimes four) separate sections.

Figure 22.3: The elements of the Web Access Home page
Navigation Bar The Navigation bar runs across the top of every Web Access pane and contains “tabs” to other pages on the Web Access site. Click a tab to go to the specified page.
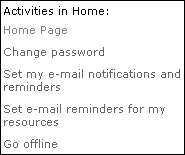
Activities Pane The Activities pane is displayed at the left of every Web Access page, and its content varies depending on the page currently displayed. This pane contains links to other pages and activities related to the open page. Click a link to go directly to the selected subpage.
| Tip | You can hide the Activities pane by clicking the left-arrow button at the top right of the pane. When the Activities pane is hidden, a right-arrow button appears. Click this button to redisplay the pane. |
Updates Area This area of the Home page displays updates that other users have made to projects that you’re assigned to or manage. You’ll typically be informed if tasks have been updated or delegated, or if changes have been made in a calendar.
Tasks Area This area of the Home page lists all the tasks that have been assigned to you.
Issues Area This area of the Home page lists any issues that are pending your review. A red indicator shows that immediate action is needed, green shows that an issue has been resolved, and yellow shows that an issue is currently in process.
In addition, there is a fourth content area on the Home page—Status Reports—that is displayed only when necessary. It shows a list of status reports that need your attention, and is visible only when these status reports are pending.
| Note | Depending on which user group you’re assigned to, you may not see (or have access to) all of these content areas on the Home page. |
Working with the Navigation Tabs
The Navigation bar at the top is the same no matter which Web Access page you visit. This provides a consistency of navigation. Click a tab to go directly to the related page.
![]()
Home Clicking the Home tab always takes you back to the Web Access Home page. There are four activity subpages under the Home page: Change Password, Set My E-Mail Notifications and Reminders, Set E-Mail Reminders for My Resources, and Go Offline.
Tasks Clicking the Tasks tab displays the View My Tasks page. From here, you can view all your assigned tasks (or just your current tasks) in either Timesheet or Gannt Chart views. There are four activity subpages under the View My Tasks page: Create a New Task, Delegate Tasks, Transfer Nonworking Time from Your Outlook Calendar, and Notify Your Manager of a Change in Your Working Days.
Projects Clicking the Projects tab displays the Project Center page. From here, you can view all the projects and to-do lists stored on Project Server, edit project details, and open selected projects in Project Professional. There are five activity subpages under the Project Center page: Analyze Projects in Portfolio Analyzer, Model Projects with Portfolio Modeler, Create a New Personal or Shared To-Do List, Manage My To-Do Lists, and To-Do List Options.
Resources Clicking the Resources tab displays the Resource Center page. From here, you can view a complete list of enterprise resources, and edit resource details as necessary. There are two activity subpages under the Resource Center page: Analyze Resources in Portfolio Analyzer, and View Resource Assignments.
Status Reports Clicking the Status Reports tab displays the Status Report Overview page. You use this page to manage all activities related to the request, submittal, and management of project status reports. There are a number of activity subpages under the Status Report Overview page, depending on what reports need to be read or submitted. Depending on your circumstances, you may see the following options: Submit a Status Report, Status Reports Archive, Miscellaneous Reports, View Status Report Responses from Your Team Members, and Request a Status Report.
Updates Clicking the Updates tab displays the View Task Changes Submitted by Resources page. This page displays all changes to tasks that have been submitted to Project Server; as a project manager you can then accept or reject any task change. There are three activity subpages under this page: View Changes to Resource Calendars, Set Rules for Automatically Accepting Changes, and View History of Past Task Changes.
Documents Clicking the Documents tab displays the View and Upload Documents for All Projects page. This page lists all the projects you have access to; click a project name to view all the documents associated with that project.
Issues Clicking the Issues tab displays the View and Submit Issues In All Projects page. This page, similar to the corresponding Documents page, lists all the projects to which you have access; click a project name to view all pending issues for that project, or to create a new issue.
Admin This takes you to the Administration Overview page. The options for this page were discussed in depth in Chapter 20.
Log Off Clicking this tab logs you out of Project Server. After you’re logged out, you can close your browser manually, or click any other tab to display the login page and log back in to the server.
Help Clicking the Help tab displays a list of Help topics related to the currently open page.
Using the Home Page
The Home page provides the starting point for your work in Web Access. Often, users blow by the Home page with a single click, and go directly to features held on other pages. But certain options are more easily accessible from the Home page—especially basic account management features, such as setting e-mail notifications and password settings.
More important, the Home page is like the Headline News channel for all of your Microsoft Project projects. This is where you’re notified of what’s new—what tasks have changed, what projects you’ve been assigned to, what status reports you need to complete, and so on. This makes the Home page vital for keeping up-to-date about the projects with which you’re working.
Viewing Updates to Your Projects
If any of your active projects have been changed in any way, these changes will appear in the Updates section of the Home page. Click the Updates link to view more detail on and manage these changes. (See the “Viewing Project Updates” section later in this chapter to learn more.)
Viewing Your Tasks
Any new tasks assigned to you are listed in the Tasks section of the Home page. Click the Tasks link to view more detail on these and other tasks. (See the “Managing Tasks and Assignments” section later in this chapter to learn more.)
Viewing and Reporting Issues
Any new issues arising from your currently assigned projects are listed in the Issues section of the Home page. Click the Issues link to access more detail about these issues, and report any other issues that have arisen. (See the “Tracking Issues” section later in this chapter to learn more.)
Sending and Receiving Status Reports
If you need to complete and send a status report—if any status reports have been submitted to you from other team members—you’ll see these reports listed in the Status Report section of the Home page. Click the Status Report link to manage these pending status reports. (See the “Updating Project Status” section later in this chapter to learn more.)
Changing Your Password
After you’ve logged on to Web Access, you may want to change your password. It’s a good way to ensure secure operation, and a must if you don’t like or can’t remember the password that the Project administrator created for you.
To change your password, follow these steps:
-
From the Home page, click the Change Password link in the Activities pane.
-
Web Access now displays the Change Password page, shown in Figure 22.4. Type your current password in the Old Password field; then enter a new password in the New Password field. (Press Tab to move from field to field on the page.) Your new password must contain at least eight characters, and you’ll have to re-enter the password in the Confirm Password field.
-
Click Change Password to make the change final. A red confirmation message will appear on the Change Password page if you’ve been successful.
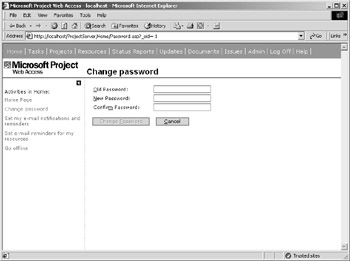
Figure 22.4: To improve security, change your pass- word on the Change Password page.Warning Don’t make the mistake of taking passwords lightly. If you’re using family members’ names or birth dates, any computer-literate person who knows you can hack your password in about two minutes. Use a minimum of eight characters, and include at least one number or one special character. It’s also helpful to mix upper and lowercase letters. Bad: Chelsea. Better: #chapter. Best: trAck*7q.
Setting E-Mail Notifications and Reminders
The Home page is also where you go when you need to configure the e-mail messages generated by Project Server to other Web Access users. You can configure the e-mail notification settings for yourself, and for all your resources.
Configuring Your Own E-Mail
To change the e-mail settings for your own Project account, follow these steps:
-
From the Web Access Home page, click the Set My E-mail Notifications and Reminders link in the Activities bar.
-
When the Set My E-mail Notifications and Reminders page appears, as shown in Figure 22.5, check those options you want to enable. The options are grouped into the following categories:E-mail Me When, Or My Project Issues Change, Or My Project Documents Change, and Or One of My Resources.
-
Scroll down the page and then check those items about which you want to be reminded as well as how many days (or weeks or months) in advance you want to be reminded.
-
Click the Save Changes button at the very bottom of the page when done.
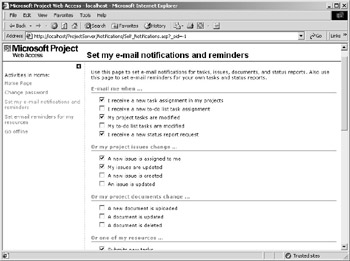
Figure 22.5: Configuring e-mail notification settings for your Project account
Configuring E-Mail for Your Resources
A project manager can also configure the e-mail reminder (but not notification) settings for all resources that have assignments in the manager’s projects. This way, all members of the team can expect to receive messages on a consistent schedule. Follow these steps:
-
From the Web Access Home page, click the Set E-mail Reminders for My Resources link in the Activities bar.
-
When the Set E-mail Reminders for My Resources page appears, as shown in Figure 22.6, check those reminders you want to enable; then enter how many days (or weeks or months) in advance you want reminder messages sent.
-
Click Save Changes when done.
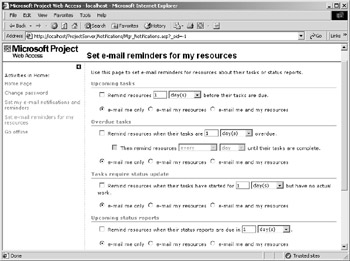
Figure 22.6: Configuring e-mail reminders for your projects’ resources
Working Offline
Business travel and telecommuting are facts of life these days, and you can work with your Web Access data even when you can’t dial in to your office server. Web Access enables you to work in offline mode, where the basic Web Access website is downloaded to your PC for your personal use. You can then work with Web Access data without being connected to Project Server; when you reconnect to Server, any offline changes you made are automatically uploaded and synchronized with the current Server data.
You can do just about everything offline that you can do online, except tasks that involve viewing, sending, and receiving messages. Table 22.1 outlines the restrictions that apply to offline Web Access work.
| View/Item | Restriction |
|---|---|
| Timesheet | Data for only the specified time period is available; cannot send timesheet updates. |
| Status Reports | Cannot send status reports (you can create and edit); cannot view previously submitted, previously edited, or late status reports. Managers cannot view resource report responses, or create and send new status report requests. |
| Home Page | Cannot view messages. Managers cannot create or run rules to process messages. |
When you want to go offline, do the following:
-
Navigate to the Web Access Home page.
-
Click Go Offline in the Activities pane.
-
When the Go Offline page appears, as shown in Figure 22.7, enter the time period for which you want project data.
-
Click Go Offline.
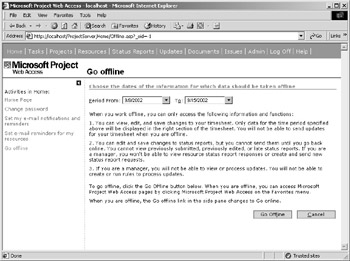
Figure 22.7: Configure Web Access for your personal offline use.
You can access Web Access offline from your web browser’s Favorites list. If you’re using Internet Explorer, select Favorites Ø Microsoft Project Web Access and then select the offline page. This takes you to the Web Access offline Home page, which looks and operates similar to the normal Web Access Home page—the restrictions in Table 22.1 aside, of course.
| Note | This entry in your Favorites list is created automatically when you click the Go Offline link and complete the associated procedure. |
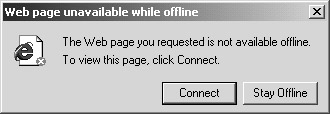
When you’re ready to return to online status, open the Web Access offline Home page, and click Go Online in the Activities pane. When Windows displays the dialog box that tells you that the page you requested is not available offline, click the Connect button. You’ll now be logged onto the Project Server site for normal online use.
|
|
EAN: 2147483647
Pages: 241