Remote Web Site ViewPublishing Web Sites
Remote Web Site View Publishing Web SitesAfter you have configured a remote Web site and set all of your publish options, you are ready to begin copying files and folders. Several options are available so that you can accomplish that:
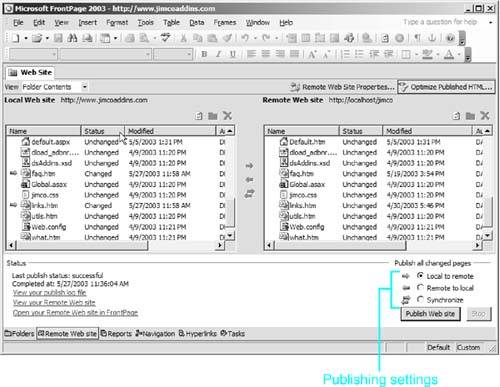
Publishing the SiteWhen you publish a Web site, FrontPage uses the options you have configured in the Remote Web Site Properties dialog to determine which files and folders are transferred. You can choose whether you want to publish from the remote Web site to the local Web site or the other way around, as seen in Figure 16.9. Figure 16.9. The Remote Web Site view allows you to choose between transferring from the local site to the remote site or the other way around.
If you have selected the Changed Pages Only option in the Remote Web Site Properties dialog, you also have the option to synchronize the files between the two Web servers. When the Web site is synchronized, FrontPage will ensure that both Web servers contain an identical copy of the Web site. If a file is not matched up between the two Web servers, FrontPage will copy the file from the server containing a more recent version to the server containing the out-of-date version. This is the preferred method of publishing if you have multiple authors working on the Web site. After selecting your preferred publish method, FrontPage will display icons next to any files that will be copied to indicate what it intends to do with that file during publishing. These icons consist of a blue arrow that points in the direction that FrontPage will copy the file. For example, if FrontPage intends to copy a file from the local Web site to the remote Web site, a blue arrow will appear next to the file in the local Web site listing that points toward the remote Web site. A blue arrow pointing in both directions indicates that the file is unmatched between the local and remote sites and FrontPage intends to synchronize the file. In Figure 16.9, the icons indicate that FrontPage will copy the files faq.htm and links.htm to the remote Web site when the Web site is published. If you have a large Web site, it might be difficult to determine which files will be published or which files are not matched on the two Web sites. By selecting an item in the View dropdown, you can filter the view in Remote Web site view, as seen in Figure 16.10. Figure 16.10. The Remote Web site view allows you to easily filter which files are displayed.
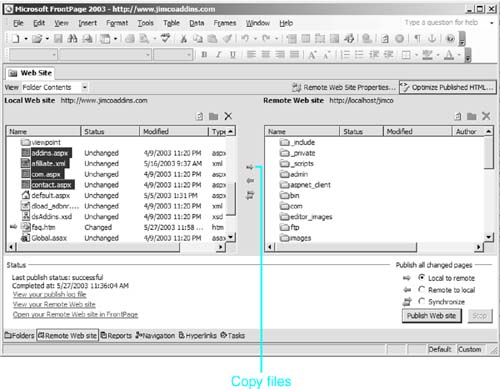
To start the publish process, select whether you want to publish local to remote, remote to local, or synchronize files, and then click the Publish Web Site button. After FrontPage successfully publishes the Web site, it will display the publish status in the lower left of the Remote Web site view (as shown in Figure 16.10). From here, you can view the publish log (if it was enabled), view the remote Web site in your Web browser, or open the remote Web site in FrontPage.
Figure 16.11. FrontPage will warn you if you have unsaved changes when you are publishing your Web site.
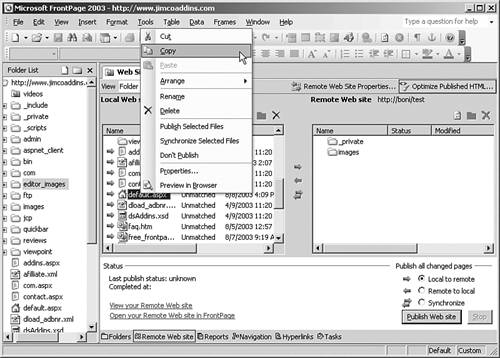
Copying FilesIf you'd prefer not to publish the entire Web site, you can easily copy only those files that you choose using the Remote Web Site view. When copying files using this method, you are not actually publishing the Web site, and the publish log and other publish statistics are not modified. To copy files between the two Web servers without publishing, perform these steps:
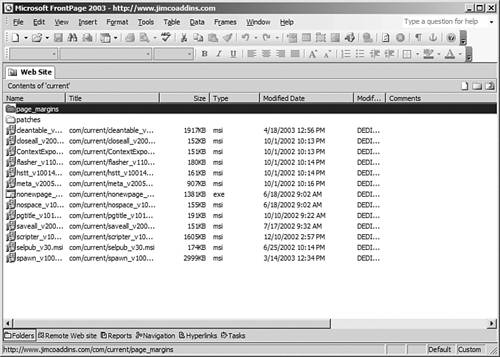
Setting Publish StatusFiles might exist in your Web site that you simply don't want to publish whether they've changed or not. For example, in my Web site, I don't like to publish all my add-ins every time I publish the site because they don't change often. When they do change, I just manually copy the new files. The publish status feature allows me to prevent those large files from publishing with the rest of the Web site. The easiest method of setting publish status on a file is to simply right-click the file and select Don't Publish from the menu. The Don't Publish option is a toggle item, so selecting it will place a check next to it. Selecting it again will remove the check and reset the publish status for that file. You can also select multiple files and set the publish status on all those files in one step. When a file's status has been set to Don't Publish, a red circle with a white x through it is displayed in FrontPage, as seen in Figure 16.14. The icon indicating publish status is not just visible in Remote Web Site view. As seen in Figure 16.15, FrontPage will indicate the publish status in all views using an appropriate icon. Figure 16.14. All the files in this folder have a publish status of Don't Publish.
Figure 16.15. Icons that represent publish status are visible in all views.
TIP To set publish status for all files in a particular folder, switch to Folder view in FrontPage and select all the files by clicking the first file and then holding the Shift key while clicking the last file. You can then right-click on any file and set the publish status for all of them. To accomplish the same task in one step, use Jimco Selective Publish, available from http://www.jimcoaddins.com/addins.aspx. |


EAN: 2147483647
Pages: 443
- Chapter VII Objective and Perceived Complexity and Their Impacts on Internet Communication
- Chapter IX Extrinsic Plus Intrinsic Human Factors Influencing the Web Usage
- Chapter X Converting Browsers to Buyers: Key Considerations in Designing Business-to-Consumer Web Sites
- Chapter XIII Shopping Agent Web Sites: A Comparative Shopping Environment
- Chapter XVII Internet Markets and E-Loyalty