Photoshop: Keeping Type As Vector
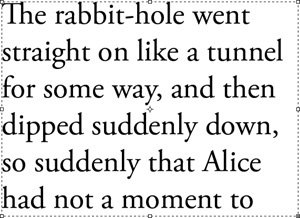
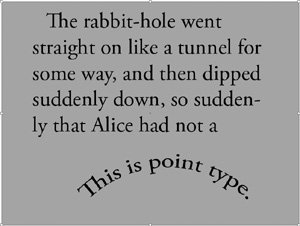
| Photoshop didn't enter the world with many type features. For many versions, its type controls were decidedly rudimentary, and we avoided using its Type tool whenever possible. But things change, and gradually it began to improve. With version CS2, Photoshop now shares a text engine with Illustrator, Adobe After Effects, and Adobe Premiere, and it has many sophisticated type controls. For example, in addition to some of the type features we discussed above, you can now spell-check and find and replace text in Photoshop. Point or Text Frame TypeOriginally, Photoshop only supported point type. You create point type as you do in Illustrator, by choosing the Type tool, clicking an insertion point, and typing. Type created in this way is designed for one line at a time, and you have to manually hit Return/Enter to start a new line. This can be a painful procedure if you need to edit the text again and want the lines to reflow. Many users of previous Photoshop versions may not realize that you can now also create text frames, just as you can in InDesign and Illustrator. Use the Type tool, but click and drag out a frame. You'll see a dotted line indicating the frame's bounding box (Figure 6-23). You can also Option/Alt-click with the Type tool to specify a text frame's dimensions. Once created, the frame can be resized by dragging the corner or side handles, or rotated by dragging a rotation handle (move to the corner to get a rotation icon). If not all the type fits in the frame, a subtle + sign appears in the lower right corner handle to indicate overflow. Figure 6-23. In Photoshop, drag with the Type tool to create a text frame. Creating type of any kind point, text frame, or path type always creates a new type layer in Photoshop CS2. After editing the type, you have to commit it to come out of editing mode. You can do this by clicking the check box in the Options bar, by pressing the Return/Enter key, or by choosing another tool, like the Move tool. How do you edit the type again? Just double-click the type layer's thumbnail (the "T" icon) which selects all the type, or click an insertion point with the Type tool when you're over type. Vector vs. Bitmapped TypeThe trick for succeeding with type in Photoshop is maintaining it as vector for as long as possible. Photoshop is a program for working with bitmaps, and there are innumerable ways of having the crispness of your type rasterized turned into a bitmap at the resolution of the file in which the type resides. You want to keep type vector because that keeps it editable, and maintains it at the highest possible quality. Staying VectorType can stay vector while you do any of the following effects:
Getting PixelatedYou must rasterize (convert to pixels) a type layer when you want to apply any kind of filter to it, or if you need to use any kind of painting tool with that layer. If you select a filter with a type layer selected, you'll get the message, "This type layer must be rasterized before proceeding," with an option to rasterize the type. (You can also choose Layer > Rasterize > Type before applying the filter.) If you select a painting tool, you'll see the international "No" symbol over the layer. Clicking the layer displays a similar warning. Type will also be rasterized whenever you merge a type layer with another layer. When rasterized or printed, the type will be converted into pixels at the current resolution of the file. Once rasterized, the type can no longer be edited. When to Do Type in PhotoshopYou should use the Type tool selectively in Photoshop. Type especially multiple paragraphs of text frames is processed slowly in Photoshop. You also have to be very careful about the format in which to save your type if you want to use it in another application (see the next section). Here are some situations in which you might want to create type in Photoshop:
Tip: Making Type Transparent If you need to apply an effect to type like opacity, a blending mode, a drop shadow, or feathering, it's usually better to do this in InDesign or Illustrator. The type can be edited at the last minute, and the flattening can take place just as the file is being printed or exported to PDF or EPS (for more information, see Chapter 11, "Transparency"). How to Successfully Save Your VectorsIf you want to integrate your Photoshop vector type into InDesign or Illustrator, you must save your file carefully. Most of the formats in which Photoshop saves will not retain vector type for placement in another application. Even formats like Photoshop PSD and TIFF, which retain vector type so that it can be reopened in Photoshop, will turn type into a bitmap when placed in InDesign or Illustrator. There are only two formats that save the Photoshop type as vectors: Photoshop EPS and Photoshop PDF. Each format has issues that you should be aware of:
We discuss file formats for saving out of Photoshop more in the "Saving Pixels" section of Chapter 4, "Pixels and Raster File Formats." |
EAN: 2147483647
Pages: 192