Project 2. Polaroids You've gotta love Polaroids. They were kind of like the first digital cameras in that you could see the photos almost immediately. Of course, we couldn't share them on the Web and over email the same way, but they were (and still are) fun. Try the following project with a few of your own snapshots, print them, and stick them to the fridge with a couple of magnets. You'll see how much fun it can be to share your photos with others this way. 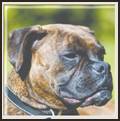 1. | Create a new image at about 5" wide by 6" high at the resolution you need for printing (200300 dpi), the Web (7296 dpi), and so on. Under Image Characteristics, select Raster Background and set the Color to white. For Color Depth, select the setting that matches the image you intend to import later in the project. If, for example, your camera shoots RAW files (or NEF files for Nikon, for instance) and you shoot that format, set the Color depth to RGB 16 bits/channel. If you shoot fine-quality JPEGs, set the Color depth to RGB 8 bits/channel. If you're not sure, use the RGB 8 bits/channel.
| 2. | Set the Foreground and Stroke Properties to Black in the Materials palette. Click the Background and Fill Properties; then, in the Material Properties dialog box that pops up, set the Color's RGB to 239, 237, 230 and the Texture to Paper Fine with an Angle of 45 and a Scale of 100%. You also need to turn on the Texture setting at the top of the dialog box.
|
Drawing the Polaroid Shape Before adding a photo to the Polaroid, we need to create the shape of the Polaroid itself. Fortunately, Paint Shop Pro X has tools that make the job quick and easy. 3. | Draw a rectangle using the Rectangle tool, leaving some room around the edges of the image (see Figure 11.10).
Figure 11.10. Draw a rectangle to act as the Polaroid background. 
| 4. | Click the Pick tool to activate the rectangle shape and then select the Pen tool. Click and drag one of the corners of the rectangle slightlyjust enough to add a little roundness to the rectangle (see Figure 11.11).
Figure 11.11. Drag the corner a little to round it off. 
| 5. | Click the arrow of the icon in the upper-left corner of the Layers palette and select New Layer Group. Name the group Polaroid Background.
|
Adding a Drop Shadow 6. | Duplicate the vector 1 layer by right-clicking the layer in the Layers palette and choosing Duplicate. Click the plus sign next to the vector 1 layer in the Layers palette and click the New Rectangle layer to activate the layer you just duplicated (it'll be below the new copy you just created). Select the Pick tool and then set the Background and Fill Properties to Black with no texture. You might not see it, but the first shape has been filled with black. Tap the down arrow key on your keyboard and then the right arrow key to see what I mean. I used five downs and three rights to get the shadow effect I wanted (see Figure 11.12). I know I could've used the built-in drop shadow effect, but I like this method and find it quite flexible.
Figure 11.12. Adding a drop shadow layer. 
| 7. | Activate the Polaroid Background layer group, create a new raster layer, name it Photo, and then create a new group. Repeat the process so that you have three groups, but this time create a vector layer instead of a raster layer. Name the topmost layer group Type and the middle one Photo and Mask. The lowest group should already be called Polaroid Background. Your layers should resemble Figure 11.13.
Figure 11.13. Adding new groups and layers. 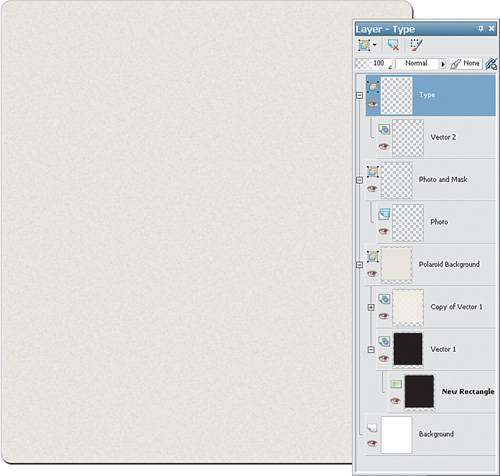
|
Adding a Layer Mask At this point we'll add a layer mask. The layer mask will make the template reusable in that you'll be able to reopen it and have any image put in place without disturbing any of the hard work you've done. 8. | Right-click the raster layer in the Photo and Mask group and select New Mask Layer, Hide All.
| 9. | Click the new mask layer to make it active, choose the Selection tool, set it to Rectangle, and draw a rectangular-squarish shape to hold the photo you'll insert. If you'd like, you can set the Selection tool's Selection Type to Square.
Note It won't look like anything has happened, but you've masked out an area that you'll punch a hole through. When you place an image in the Photo layer, it shows though the Polaroid template. Of course, this means you can change the photo at any time and print or email it as a digital Polaroid. Pretty cool stuff. | 10. | Select the Flood Fill Tool and fill the selection with white. What you've just done is punched that hole in the mask behind which you can now place any photo to have it appear as a Polaroid. You still won't see anything, but you can verify the black and white mask in the Layers palette (see Figure 11.14). You can now have some fun by copying and pasting any photo into the raster layer in the Photo and Mask group.
Figure 11.14. Creating a masked area for the digital photo to show through. 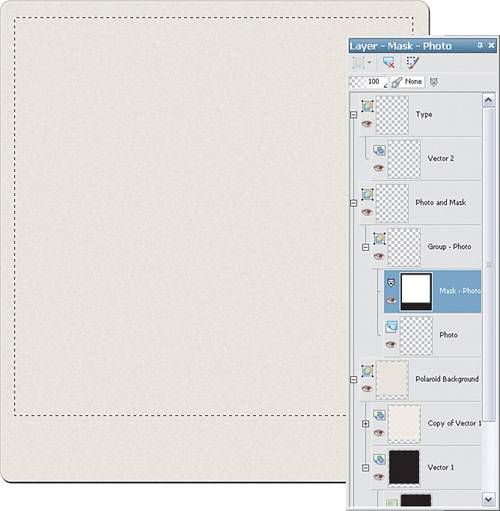
| 11. | Choose Selections, Select None.
|
Adding a Photo It's time to place a photo into the template. Choose any image you like that will fit into your Polaroid. My image is 5" x 6" at 200dpi, so I'll grab something from my digital camera. It'll be a little big, but that won't matter because of the mask we created. If you don't have an image that works well with this project, you can download the image I used from the book's website. You might have to play around with the Pick tool to resize and/or move your image into place behind the mask. If your image is large, you might not see the corner control handles. In this case, use the Pick tool to move the image in one direction or another, bit by bit, until one of the corners appears. You can then resize the image as needed.
12. | With the chosen image open, choose Selections, Select All.
| 13. | Select Edit, Copy to place the image on the clipboard. You can now close the image you opened.
| 14. | Make the Photo layer active so the image will paste in as a selection (select Edit, Paste As New Selection).
|
Adding a Final 3D Effect We're almost done, but one last thing will add the final touch. We'll use a couple of lines to add some 3D effects to the photo. 15. | Make the Copy of Vector Layer active by clicking it in the Layers palette. (It's the layer that has the Polaroid shape.)
| 16. | Select the Pen tool and set the Width to 4.00. Set the Foreground and Stroke properties to white and draw a line down the right side of the photo and another along the bottom.
| 17. | Set the Foreground and Stroke properties to black and draw a line down the left side of the photo and another along the top.
The four lines you've just drawn will give the image a more realistic 3D appearance. Take a look at Figure 11.15 to see what I mean.
Figure 11.15. Add some lines for a more three-dimensional appearance. 
|
Oops, Don't Forget the Type! Finally, don't forget to add some type to the vector layer in the upper group you created a couple of steps ago. 18. | Select the Text tool and then set the Foreground and Stroke properties to black and the Background and Fill properties to blue.
| 19. | Set the font to something that resembles handwritingI chose Brush455BT.
| 20. | Set the font to a fairly large size. I set the size to 36 points.
| 21. | Click in the image, after activating the Type layer you created earlier, and add the text in the Text Entry dialog box. When you're done, click Apply to apply the text. Then, move it into place.
My final digital Polaroid is shown in Figure 11.16. It's a quick snap of my boxer pup, Sugrrr. What a cutie.
Figure 11.16. The final "Polaroid." 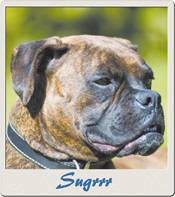
| 22. | Make sure you save this project as a .pspimage file so you can come back at any time and change the picture. Trust me, everyone needs a little Sugrrr-free time every once in a while. She can be a bit in-your-face, and she has more energy than the average two-year-old.
If you'd like to do a little extra work on this image and add more depth to help with the illusion, you can add highlight to the image within the Polaroid frame. Here's how: 1. | Duplicate the layer that has the photo you're using. In my case, for example, I'll duplicate the layer with the pup.
| 2. | Select the Selection tool and use it to select an area of the photo. Start near the upper-left corner of the photo as seen through the opening in the Polaroid shape. Don't start along the edge, but give yourself a little space.
| 3. | End the selection so you've gone past the opening in the shape in both directions. That is, drag past the lower-right corner of the opening as shown in the following figure.
| 4. | With the selection made, choose Effects, 3D Effects, Inner Bevel.
The selection is made. 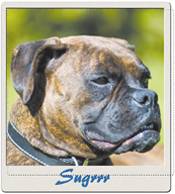 | 5. | In the Inner Bevel dialog box, enter the following values (or play around with these as a starting point). Set the Width to 25, the Smoothness to 100, the Depth to 25, the Ambience to 40, the Shininess to 80, the Angle to 315, the Intensity to 50, and the Elevation to 10.
You can see the results in the following figure.
The inner bevel values are set. 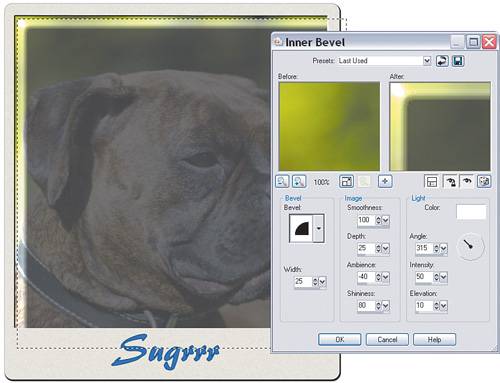 | 6. | Note the darkness of the image, now. There's a highlight, but the rest of the image is no longer usable. To have only the highlight show, set the blending mode of the layer with the Inner Bevel effect to Lighten. Doing so corrects the darkened image and leaves the new highlight intact.
| 7. | As a final touch, turn off the selection by choosing Selections, Select None. Then select Adjust, Blur, Gaussian Blur and set the Radius to 6 or 7. This smooths out the highlight a little, as you can see in the final figure.
The finished product. 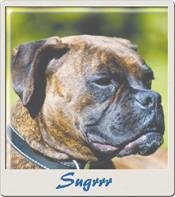 |
|
|