ber-mastery
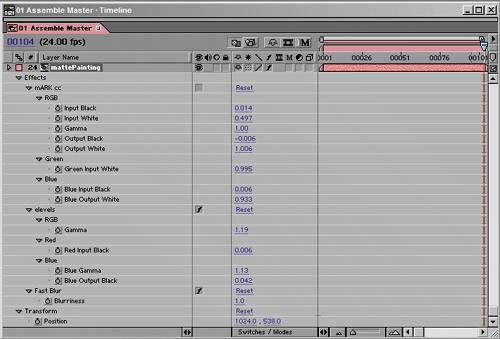
Über-masteryWith a wink at Friedrich Nietzsche, who theorized the übermensch (the overman or superman) and no doubt would be proud, I'll now focus in on the shortcuts that will make you a rapid-fire animator in the Timeline window. This section is not only about the überkey, possibly the most useful timeline shortcut of all, but about taking control of keyframe data in general with useful shortcuts and tips. The überkey comes in two delicious flavors: U and UU. Highlight a layer that contains keyframe data but has no keyframes revealed, and press U on your keyboard. All of the properties with keyframes are revealed. Press U again, and they are all concealed. But wait, there's more. Now highlight a layer with no keyframes whatsoever and press UU on your keyboard (two Us in quick succession). All of the properties that are set at any value other than their default, including those with keyframes, are revealed (Figure 2.22). Figure 2.22. Sometimes a layer will have a lot of values adjusted to transforms and effects but no keyframes whatsoever. Pressing UU with the layer highlighted reveals everything that is not set at the default value for a given layer. It's very handy. The utility of the U shortcut is obvious: It's a quick way to get at keyframes to edit them or to find an animation that you suspect is hiding somewhere. But UUnow that is a full-on problem solving tool. It allows you to quickly investigate what has been edited on a given layer, helpful when troubleshooting your own layer settings, and priceless when investigating someone else's. Highlight all of the layers in your comp, press UU, and you have before you all of the edits that have been made to all of the layer properties. Fabulous.
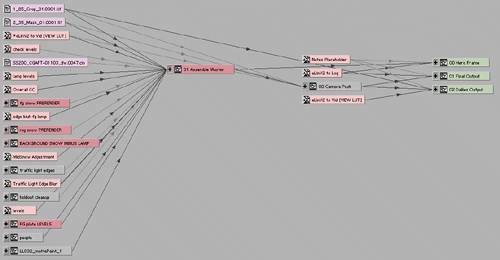
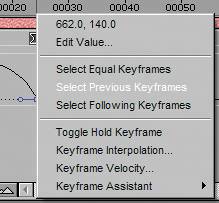
Dissecting a ProjectSuppose you've been handed someone else's project and have to make sense of it; two tools will help you more than any others. For a broad overview of the project setup, you can enable the Project Flowchart view; look under the Window menu or use the shortcut Ctrl+F11/Cmd+F11. This is itthe node interface option in After Effects (Figure 2.23), similar but far less interactive than the process trees at the heart of competing applications such as Apple's Shake, Eyeon's Digital Fusion, and Digital Domain's Nuke. Figure 2.23. What node-based compositing application is this? Why, the decidedly non-nodal After Effects. You cannot interact with this view much, but along with being an occasionally handy way to dissect an unfamiliar project, this view shows that all compositing applications are nodal, when you get right down to it. This view allows you to see how the objects in your project have been used and how they interrelate. The toggles at the lower left of the window show layers and effects, but these muddy the waters somewhat on a project of any complexity; for a project overview, toggle them off. The most intuitive view that fits well on a monitor seems to be Left to Right, which you can choose via the pull-down menu at the lower left of the menu. Whether you choose straight or angled lines is up to you, but you can clean up the view by choosing one of them with the Alt/Option key pressed. Click on the plus signs at the left of each comp, and you can see the component source files. This is step one in dissecting the project: Understand what is used where. Step two is to open the individual comp; you can double-click to open it directly from the flowchart. Turn off the Shy toggle at the top if it's on, highlight all of the layers, and press UU to reveal all properties that have been altered on all layers. Now preview the composition, stopping at any frame where you have questions and investigating which settings and animations apply to that point in time. If there is a nested composition, you can open it and investigate that in the same manner. The most effective way to do this is to start with the top-level compositions, the ones that are not contained in other compositions, and work your way backward. While I wouldn't call this process speedy, if you approach it in this logical manner, it will diminish the sense of "Where am I?" that can come over users who come to After Effects used to a more node-based approach. It also opens new comps on tabs that array to the right of the currently open comp, helping keep the tabs in visual order. Keyframe Navigation and SelectionAlthough every other shortcut pales in comparison with the überkey, there are several other highly useful shortcuts for dealing with keyframe:
Keep these tips in mind, and your keyframe edits should be rapid and painless. Keyframe OffsetsTo offset the values of multiple keyframes by the same amount, use rub text. If instead you edit one of the values, all of the keyframes will be set to that valuenot what you want. Here are a few more tips for working with multiple keyframes:
There is no easy way to scale an animation spatially, but I can offer a method if you ever really need to do it:
The new animation automatically will be two seconds long with roving keyframes, making the cases in which this is useful even rarer. But what the heck, maybe you can impress someone at a party with this trickthat is, if you invite other After Effects nerds to your parties. |
EAN: 2147483647
Pages: 156
