2.11 Web Applications: A Preview
| Up to this point, we've been using the server's default Web application for our servlets. Most servers come preinstalled with a default Web application, and most servers let you invoke servlets in that application with URLs of the form http:// host /servlet/ ServletName or http:// host /servlet/ packageName.ServletName . Use of the default Web application and URL is very convenient when you are learning how to use servlets; you probably want to stick with these defaults when you first practice the techniques described throughout the book. So, if you are new to servlet and JSP development, skip this section for now. However, once you have learned the basics of both servlets and JSP and are ready to start on real applications, you'll want to use your own Web application instead of the default one. Web applications are discussed in great detail in Volume 2 of this book, but a quick preview of the basics is presented in this section. Core Approach
Most servers (including the three used as examples in this book) have server-specific administration consoles that let you create and register Web applications from within a Web browser. These consoles are discussed in Volume 2; for now, we restrict ourselves to the basic manual approach that is nearly identical on all servers. The following list summarizes the steps; the subsections that follow the steps give details.
Making a Web Application DirectoryTo make a Web application, create a directory in your development folder. That new directory should have the same general layout as the default Web application:
The easiest way to make such a directory is to copy an existing Web application. For instance, with Tomcat, you could copy the ROOT directory to your development folder and rename it to testApp , resulting in something like C:\Servlets+JSP\testApp . As with the default Web application, we strongly advise against developing directly in the server's Web application directory. Keep a separate directory, and deploy it whenever you are ready to test. The easiest deployment option is to simply copy the directory to the server's standard location, but Section 2.9 (Establish a Simplified Deployment Method) gives several other alternatives. Updating Your CLASSPATHRecall from Section 2.7 (Set Up Your Development Environment) that your CLASSPATH needs to contain the top-level directory of .class files. This is true whether or not you are using custom Web applications, so add webAppDir/classes to the CLASSPATH . Registering the Web Application with the ServerIn this step, you tell the server where the Web application directory (or JAR file created from it) is located and what prefix in the URL (see the next subsection) should be used to invoke the application. There are various server-specific mechanisms for doing this registration, many of which involve the use of an interactive administration console. But, on most servers, you can also register a Web application simply by dropping the Web application directory in a standard location and then restarting the server. In such a case, the name of the Web application directory is used as the URL prefix. Here are the standard locations for Web application directories with the three servers used throughout the book.
For example, we created a directory called testApp with the following structure:
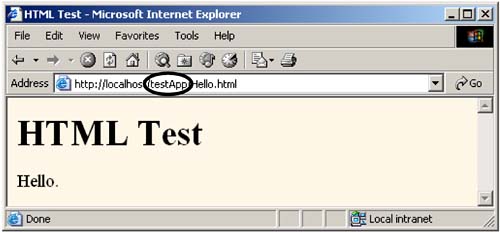
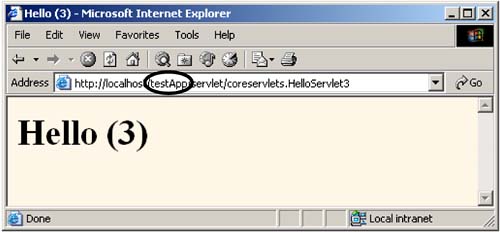
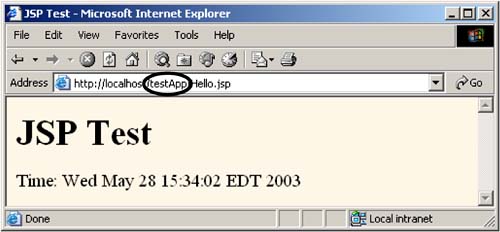
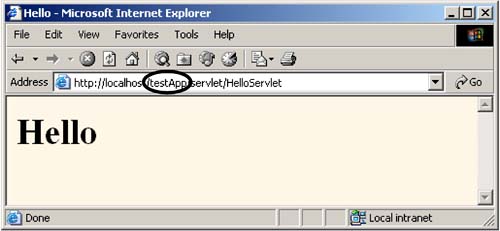
WAR FilesWeb ARchive (WAR) files provide a convenient way of bundling Web applications in a single file. Having a single large file instead of many small files makes it easier to transfer the Web application from server to server. A WAR file is really just a JAR file with a .war extension, and you use the normal jar command to create it. For example, to bundle the entire testApp Web app into a WAR file named testApp2.war , you would just change directory to the testApp directory and execute the following command. jar cvf testApp2.war * There are a few options you can use in advanced applications (we discuss these in Volume 2 of the book), but for simple WAR files, that's it! Again, the exact details of deployment are server dependent, but most servers let you simply drop a WAR file in the autodeploy directory, and the base name of the WAR file becomes the Web application prefix. For example, you would drop testApp2.war into the same directory you dropped testApp , restart the server, then invoke the test resources shown in Figures 2-16 through 2-20 by merely changing testApp to testApp2 in the URLs. Figure 2-16. Hello.html invoked within a Web application. Figure 2-20. HelloServlet3.class invoked with the default URL within a Web application. Figure 2-17. Hello.jsp invoked within a Web application. Figure 2-18. HelloServlet.class invoked with the default URL within a Web application. Figure 2-19. HelloServlet2.class invoked with the default URL within a Web application. Using the URL PrefixWhen you use Web applications, a special prefix is part of all URLs. For example:
Most servers let you choose arbitrary prefixes, but, by default, the name of the directory (or the base name of the WAR file) becomes the Web application prefix. For example, we copied the testApp directory to the appropriate Web application directory ( install_dir /webapps for Tomcat and Resin, install_dir /servers/default for JRun) and restarted the server. Then, we invoked the resources by using URLs identical to those of Section 2.8 except for the addition of testApp after the hostname. See Figures 2-16 through 2-20. Assigning Custom URLs to Your ServletsDuring initial development, it is very convenient to drop a servlet in WEB-INF/classes and immediately invoke it with http:// host/webAppPrefix /servlet/ ServletName . For deploying serious applications, however, you always want to define custom URLs. You assign the URLs by using the servlet and servlet-mapping elements of web.xml (the deployment descriptor). The web.xml file is discussed in great detail in Volume 2 of the book, but for the purpose of registering custom URLs, you simply need to know five things:
Locating the Deployment DescriptorThe web.xml file always goes in the WEB-INF directory of your Web application. That is the only portable location; other locations (e.g., install_dir /conf for Tomcat) are nonstandard server extensions that you should steer clear of. Defining the Base FormatA web.xml file that is compatible with both servlets 2.3 (JSP 1.2) and servlets 2.4 (JSP 2.0) has the following basic form: <?xml version="1.0" encoding="ISO-8859-1"?> <!DOCTYPE web-app PUBLIC "-//Sun Microsystems, Inc.//DTD Web Application 2.3//EN" "http://java.sun.com/dtd/web-app_2_3.dtd"> <web-app> </web-app> Deployment descriptors that are specific to servlets 2.4 (JSP 2.0) are discussed in Volume 2 of the book. Naming ServletsTo name a servlet, you use the servlet element within web-app , with servlet-name (any name) and servlet-class (the fully qualified class name) subelements. For example, to give the name Servlet2 to HelloServlet2 , you would use the following. <servlet> <servlet-name>Servlet2</servlet-name> <servlet-class>coreservlets.HelloServlet2</servlet-class> </servlet> Giving URLsTo give a URL to a named servlet, you use the servlet-mapping element, with servlet-name (the previously assigned name) and url-pattern (the URL suffix, starting with a slash) subelements. For example, to give the URL http:// host/webAppPrefix /servlet2 to the servlet named Servlet2 , you would use the following. <servlet-mapping> <servlet-name>Servlet2</servlet-name> <url-pattern>/servlet2</url-pattern> </servlet-mapping> Note that all the servlet elements must come before any of the servlet-mapping elements: you cannot intermingle them. Reading the Deployment DescriptorMany servers have "hot deploy" capabilities or methods to interactively restart Web applications. For example, JRun automatically restarts Web applications whose web.xml files have changed. By default, however, the web.xml file is read only when the server starts. So, unless you make use of a server-specific feature, you have to restart the server every time you modify the web.xml file. ExampleListing 2.7 gives the full web.xml file for the testApp Web application. The file was placed in the WEB-INF directory of testApp , the testApp directory was copied to the server's Web application directory (e.g., install_dir /webapps for Tomcat and Resin, install_dir /servers/default for JRun), and the server was restarted. Figures 2-21 through 2-23 show the three sample servlets invoked with the registered URLs. Listing 2.7 WEB-INF/web.xml<?xml version="1.0" encoding="ISO-8859-1"?> <!DOCTYPE web-app PUBLIC "-//Sun Microsystems, Inc.//DTD Web Application 2.3//EN" "http://java.sun.com/dtd/web-app_2_3.dtd"> <web-app> <servlet> <servlet-name>Servlet1</servlet-name> <servlet-class>HelloServlet</servlet-class> </servlet> <servlet> <servlet-name>Servlet2</servlet-name> <servlet-class>coreservlets.HelloServlet2</servlet-class> </servlet> <servlet> <servlet-name>Servlet3</servlet-name> <servlet-class>coreservlets.HelloServlet3</servlet-class> </servlet> <servlet-mapping> <servlet-name>Servlet1</servlet-name> <url-pattern>/servlet1</url-pattern> </servlet-mapping> <servlet-mapping> <servlet-name>Servlet2</servlet-name> <url-pattern>/servlet2</url-pattern> </servlet-mapping> <servlet-mapping> <servlet-name>Servlet3</servlet-name> <url-pattern>/servlet3</url-pattern> </servlet-mapping> </web-app> Figure 2-21. HelloServlet invoked with a custom URL. Figure 2-23. HelloServlet3 invoked with a custom URL. Figure 2-22. HelloServlet2 invoked with a custom URL. |

EAN: 2147483647
Pages: 194