| A list box or a combo box can come in handy if you find yourself repeatedly typing certain values into a field. For example, if you have to enter the name of one of your 12 branch offices each time you use a form, you might find it easier to create a list box containing the branch office names , and then you can click to select a particular name from the list. With a list box, the person doing the data entry is limited to the choices that display on the list. A combo box is useful when a list box is appropriate, but it's possible that a different entry might occasionally be needed. For example, if most of your customers come from one of six states, but occasionally you get a new customer from another state, you might use a combo box. During data entry, you could choose the state from the list when appropriate and type a new state when it's not. The combo box only allows data to be entered that is not on the list if you select the I Will Type In the Values That I Want option when you are creating the combo box (this is discussed in the set of steps that follow). Follow these steps to create a list box or combo box from Form Design view: -
Make sure that the Control Wizards button on the Toolbox is selected. -
  Click the List Box or Combo Box button in the Toolbox. The mouse pointer changes to show the type of box you selected. Click the List Box or Combo Box button in the Toolbox. The mouse pointer changes to show the type of box you selected. -
Drag your mouse to draw a box on the grid where you want the new element to be placed. When you release the mouse button, the list or combo box wizard starts. -
On the wizard's first screen (see Figure 12.3), click the option button I Will Type In the Values That I Want . Then click Next . Figure 12.3. The wizard walks you through the steps of creating a list box or a combo box. 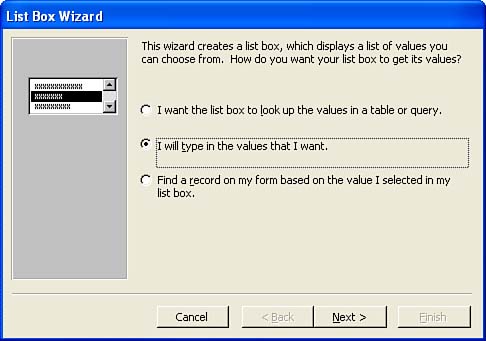  | Another Way to Enter Values List boxes and combo boxes can also be set up so that they pull their list of values from an existing table in the database (or a query that you've created). Select I Want the List Box to Look Up the Values in a Table or Query on the first wizard screen, and then specify the table or query that should supply the values for the list. A third option for setting up your list box or combo box is to allow the box to pull its list of values from a control field in the form. For example, product names could be pulled from a Product Name field in the form. Use the Find a Record on My Form Based on the Value I Selected in My List Box option on the Wizard screen to have the list pulled from a form field. |
-
On the next screen, a column of boxes (only one box shows before you enter your values) is provided that you use to enter the values that you want to appear in the list. Type them in (as shown in Figure 12.4), pressing the Tab key after each one. Then click Next . Figure 12.4. Type the values for the list or combo box. 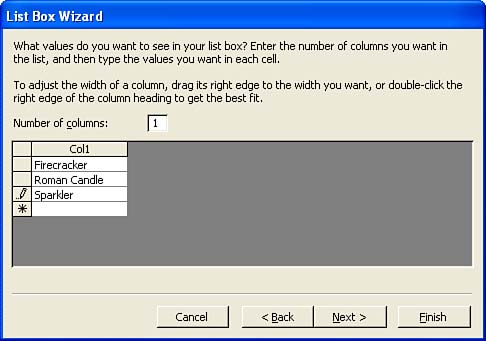 | | Adding Columns to the List or Combo Box You can add additional columns to the list box that allow you to include additional data or information related to the names or data that is included in the first column of the list or combo box. For example the first column might include product names; a second column could include the price of each of the products. In most cases, however, you will find that you only work with a List or Combo box that contains one column. |
-
On the next screen, you choose the option of Access either remembering the values in the list for later use (such as in a calculation) or entering a value selected from the list in a particular field. Because you are using this box for data entry, select Store That Value in This Field , and then choose a field from the drop-down list that is supplied. For example, if you want this list to provide data from your Product Description field, select it in the drop-down list. Click Next to continue. | | Tying a List or Combo Box to a Field The best way to approach list and combo boxes is to create a form that includes all the fields from a particular table. Then, you can delete the controls for fields in the Form Design view that you want to "re-create" as list or combo boxes. You then store the values from the list or combo box in one of the fields that you removed from the form. |
-
On the next screen, type the label text for the new list or combo box control. -
Click Finish . Your new list or combo box appears on your form. This box will show a list, so expand the control box as shown in Figure 12.5. Figure 12.5. Your list or combo box appears on the form grid. 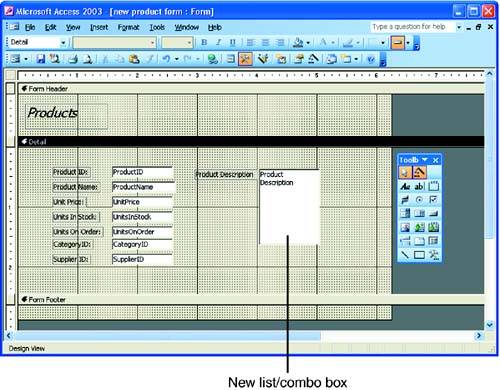  | Where Are My Values? Don't be alarmed that the values you entered for the control don't appear in the box in the Design view. The values will be available when you switch to the Form view and do data entry on the form. |
| | I Picked the Wrong Box Type! You can easily switch between a list box and a combo box, even after you create it. In Form Design view, right-click the control, click Change To from the shortcut menu that appears, and select a new control type. |
 |