| When you create a table in the Design view, you are creating the structure for the table; you create a list of the fields that will be in the table. You also select the data type for each field. (Fields can hold text, numbers , even graphicsyou learn the types of fields that can be created later in this lesson.) You also have the option of entering a description for each field. Field descriptions are useful in that they provide a quick summary of the type of data that goes into the field. Another issue that relates to creating a table in the Design view (or editing a table's structure in the Design view) is that any changes you make must be saved before closing the table. If you have worked in other applications, such as Word or Excel, you might think that saving your work is just common sense. However, when you actually start working on entering data into a table or a form, Access automatically saves your records as you enter them. Therefore, in Access, you need to remember to save only the changes that you make to the structure of a table, form, query, or report. You learn more about this in Lesson 5, "Editing a Table's Structure."  | Field Naming Rules Field names in Access can be up to 64 characters long and can contain spaces and both alphanumeric and numeric characters. You can't use periods or exclamation points in your field names. Also, avoid special characters (such as $, %, or #) in field names because some of these characters have special meanings in Access code. Access lets you know if you've used an invalid character and allows you to make the necessary corrections. |
To create a table in Table Design view, follow these steps: -
In the database window (of any database) click the Tables icon if necessary, and then double-click Create Table in Design View . The Table Design view opens (see Figure 4.1). Figure 4.1. The Table Design view allows you to create the structure for your table. 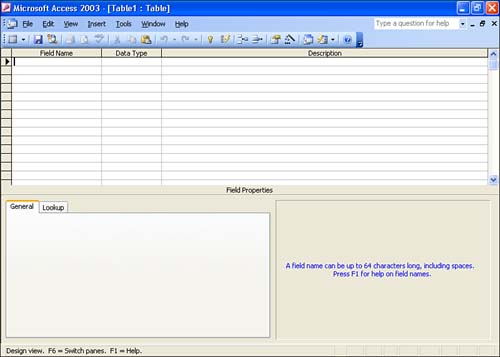 -
Be sure that the insertion point is in the first row of the Field Name column. Type the field name for the first field in your table. Then, press Tab or Enter to move to the Data Type column. -
When you move to the Data Type column, an arrow appears for a drop-down list. The default data type setting is Text; several other data types are available, such as AutoNumber, which automatically numbers each of your records (incrementally). This field type is excellent for customer number fields or employee ID fields. Click the Data Type drop-down list and select a field type that suits your needs. The different data types are discussed later in this lesson, in the section "Understanding Data Types and Formats." -
After selecting the data type, press Enter to move to the Description column; type a description for the field. (This is optionalthe table will work fine without ithowever, describing the fields reminds any user of the database what type of information should go into that particular field.) | | Deleting a Field If you enter a field and decide that you don't want it in the table's structure, select the field (its entire row) and press the Delete key. |
-
Enter other fields and their field types (descriptions are optional) as needed. Figure 4.2 shows the structure for a table that will be used to enter product information. Figure 4.2. A table's structure consists of several fields; fields may differ by field type. 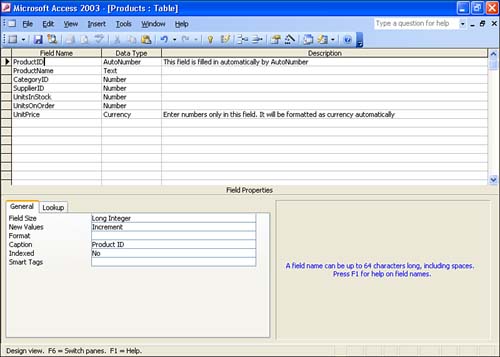 Setting the Primary Key An important aspect of table structure design is that each table must have a field that is used to uniquely identify the records in the table. This field is called the primary key . Setting an appropriate key is trickier than it seems because no two records can have the same key value. In a table of customers, for example, you might think the Last Name field would be a good key, but this theory falls flat as soon as you have more than one customer with the same last name. A more appropriate primary key for your customers is a Social Security number (although people don't like to give these out) because it uniquely identifies each customer. A good general rule is to create an identification field, such as a customer number, that allows you to assign a sequential number to each customer as you add them to your database table. Access can even help you out with the assigning of numbers to the customers because you can make the field type for the Customer Number field AutoNumber. An AutoNumber field type assigns a number to each record starting with the number 1. | | Creating the Primary Key Typically, the first field in the table serves as the primary key. |
To set a primary key, follow these steps: -
In Table Design view, select the field that you want for the primary key. -
 Select Edit , Primary Key , or click the Primary Key button on the toolbar. A key symbol appears to the left of the field name, as shown in Figure 4.3. Select Edit , Primary Key , or click the Primary Key button on the toolbar. A key symbol appears to the left of the field name, as shown in Figure 4.3. Figure 4.3. The primary key field is marked by a key symbol. 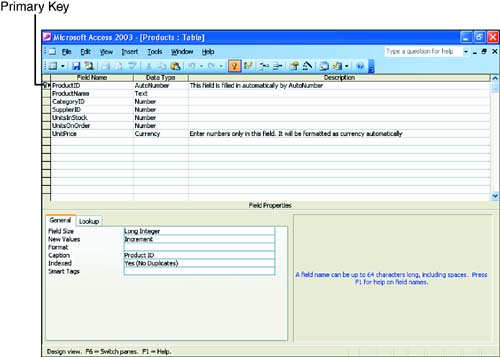 -
 After you select the primary key and have finished entering your table fields, you should save the table. Click the Save button on the Table Design toolbar to open the Save As dialog box. After you select the primary key and have finished entering your table fields, you should save the table. Click the Save button on the Table Design toolbar to open the Save As dialog box. -
Enter a name for the table, and then click OK . -
 After saving the table, you can either switch to the Datasheet view (to enter data) by clicking the View button on the toolbar, or you can choose to close the table by clicking the table's Close ( X ) button. After saving the table, you can either switch to the Datasheet view (to enter data) by clicking the View button on the toolbar, or you can choose to close the table by clicking the table's Close ( X ) button. | | No Primary Key! If you attempt to close your new table in the Design view without specifying a primary key (even if you have saved the table), a message appears, letting you know that no primary key has been assigned. Click Yes on the message box to have Access assign a primary key to the table. If you have set up your table to contain an AutoNumber field, Access will make this field the primary key. Otherwise, Access creates a new AutoNumber field in the table and specifies it as the primary key. You can change the name of this new field as needed. |
Understanding Data Types and Formats To assign appropriate data types to the fields you create in a table, it is necessary for you to know what differentiates the different data types available for use with your table fields. When you create a field, you want to assign it a data type so that Access knows how to handle its contents. The following are the different data types you can choose: -
Text Text and numbers up to 255 characters (numbers that are not going to be used in calculations). -
Memo Lengthy text. -
Number Numbers used in mathematical calculations. -
Date/Time Date and time values. -
Currency Numbers formatted for currency. -
AutoNumber Sequentially numbers each new record. Only one AutoNumber field can be placed in a table. This field type is typically used for the primary key field. -
Yes/No Lets you set up fields with a true/false data type. -
OLE (Object Linking and Embedding) A picture, spreadsheet, or other item from another software program. -
Hyperlink A link to another file or a location on a Web page. This field type lets you jump from the current field to information in another file. -
Lookup Wizard This field type chooses its values from another table. In addition to a field type, each field has other formatting options you can set. They appear in the bottom half of the dialog box, in the Field Properties area. The formatting options change depending on the field type; there are too many to list here, but Table 4.1 shows some of the most important ones you'll encounter. Table 4.1. Formatting Options for Data Types | Formatting Option | Description | | Field Size | The maximum number of characters a user can input in that field (applies only to text fields). | | Format | A drop-down list of the available formats for that field type. You can also create custom formats. | | Decimal Places | For number fields, you can set the default number of decimal places that a number shows. | | Default Value | If a field is usually going to contain a certain value (for example, a certain ZIP code for almost everyone), you can set that as the Default Value option. It always appears in a new record, but you can type over it in the rare instances when it doesn't apply. | | Required | Choose Yes if a particular field is required to be filled in each record. | The best general rule for setting the data type for the field is to take a moment to consider what kind of data will go into that field. For example, if you are working with the monetary value of a product, you will probably want to use currency. The different formatting options provided for a field in the Field Properties box are often used to help make sure that data is entered correctly. For example, the Field Size option can be used to limit a Number data type field to only a single or double digit. In the case of the default value, you can actually save data entry time because you use this option when a particular field almost always has a certain value or text entry. |