Inserting Rows and Columns

Inserting Rows and Columns

As you edit and enhance your worksheets, you might need to add rows or columns within the worksheet. Inserting entire rows and columns into your worksheet is very straightforward. Follow these steps:

  1. To insert a single row or column, select a cell to the right of where you want to insert a column or below where you want to insert a row.

    To insert multiple columns or rows, select the number of columns or rows you want to insert. To insert columns, drag over the column letters at the top of the worksheet. To insert rows, drag over the row numbers. For example, select three column letters or row numbers to insert three rows or columns.

  2. Select the Insert menu, and then select Rows or Columns . Excel inserts rows above your selection and columns to the left of your selection. The inserted rows or columns contain the same formatting as the cells (or rows and columns) you selected in step 1. Figure 12.1 shows a worksheet to which additional columns have been added.

    Figure 12.1. Columns can easily be inserted into an Excel worksheet.

    graphics/69fig01.jpg

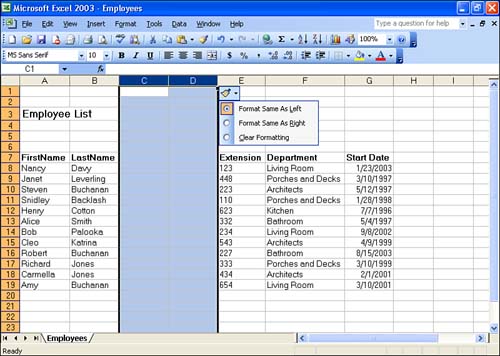
As you can see, when you insert rows or columns, the Insert Options shortcut icon appears to the right of the inserted columns or below inserted rows. Use the Insert Options menu to specify the column or row from which the new column or row should copy its formatting. For example, in the case of inserted columns, you can choose to copy the formatting from the column to the right or left of the inserted column or columns, or you can choose to clear the formatting in the inserted columns.

graphics/tip_icon.gif

Fast Insert To quickly insert rows or columns, select one or more rows or columns, right-click one of them, and choose Insert from the shortcut menu.


Microsoft Office 2003 All-in-One
ISBN: B005HKSHB2
EAN: N/A
Year: 2002
Pages: 660
Authors: Joe Habraken

flylib.com © 2008-2017.
If you may any questions please contact us: flylib@qtcs.net