| The procedure for using the merge feature discussed in this lesson assumes that you are using a form letter as your main document and creating copies of the letter for each person listed in the data source. You can also use the merge feature to create other document types, such as envelopes and labels. The procedure for creating envelopes, mailing labels, or letters is almost the same. In each case, you use the Mail Merge Wizard to specify the type of document that you are creating, and then the wizard walks you through the entire merge process. The steps that follow discuss how to create envelopes using the Mail Merge Wizard, but you can just as easily create mailing labels using this process. To create envelopes using the Mail Merge Wizard, follow these steps: -
 Open a new blank document (click the New Blank Document icon on the Standard toolbar). Select Tools , point at Letters and Mailing , and then select Mail Merge Wizard . The Mail Merge task pane opens. Open a new blank document (click the New Blank Document icon on the Standard toolbar). Select Tools , point at Letters and Mailing , and then select Mail Merge Wizard . The Mail Merge task pane opens. -
Under Select Document Type , select Envelopes . -
Click Next : Starting Document at the bottom of the task pane. -
On the next task pane screen, select the Change Document Layout option button (if necessary). To select the envelope type to use for the merge, click the Envelope Options icon. The Envelope Options dialog box will appear (see Figure 19.9). Figure 19.9. Choose the type of envelope you need in the Envelope Options dialog box. 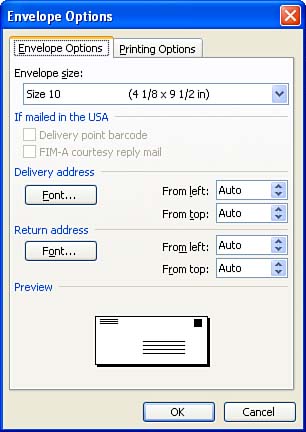 -
Select the envelope type you want to use for the merge using the Envelope Size drop-down list. If you want to edit any of the fonts for the envelope, use the appropriate Font button on the dialog box. When you have finished setting your envelope options, click OK . -
To proceed to the next step in the merge, click Next: Select Recipients at the bottom of the task pane. -
You will need to open or create a data source document. After you open or create a new data source (as discussed earlier in this lesson), the Mail Merge Recipients dialog box appears. Click OK to close this dialog box. -
To proceed to the next step in the merge process and place the merge fields on the envelope, click Next: Arrange Your Envelope . -
Insert the merge fields on the envelope using the Address Block or More Items icons provided in the Mail Merge task pane. To center the recipient address on the envelope, press Enter as required and then click the Center icon on the Formatting toolbar. -
After placing the merge fields on the envelope, click Next: Preview Your Envelopes . Use the Next ( >> ) or Previous ( << ) buttons as needed to view all the envelopes. Remove any envelopes that you do not want to create by clicking the Exclude This Recipient button on the task pane. -
To complete the merge, click Next: Complete the Merge at the bottom of the task pane. At this point, you can click the Print icon on the task pane to send the envelopes to your printer. You also can save the envelope document created (each recipient's envelope is placed on a separate page in the merged document) and then print individual pages as needed (click the Save button on the Standard toolbar). |