| You have already learned how to create folders and move e-mail messages to folders to help keep your Outlook information organized (look back at Lesson 7, "Attaching Files and Items to a Message," for more info ). Outlook also provides an easy-to-use tool, called the Organize tool, that can help you move, delete, or color -code received and sent mail. Suppose that you decide to move a message or messages to a new location in Outlook. You can use the Move Message command and place the items into a different folder. To use the Organize tool to manage messages, follow these steps: -
In your Inbox, select a message or messages that you want to work with. -
Click the Tools menu and then click Organize . The Organize window appears (see Figure 8.4). Figure 8.4. The Organize tool helps you manage messages using folders, colors, and views. 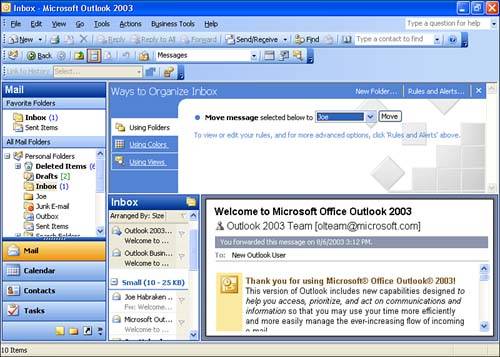 The Organize tool helps you manage and organize your messages using these methods : -
Using Folders This method is used to move or delete selected messages; they can be moved to a folder that you create or moved to the Deleted Items folder. -
Using Colors This option enables you to color-code messages according to the sender or receiver of the message. -
Using Views This option allows you to categorize messages by their view (Last Seven Days, Unread Messages, and so on). To manually move the currently selected message or messages to another folder, follow these steps: -
Click Using Folders . -
In the Move Message Selected Below To box, click the drop-down arrow and select the Outlook folder to which you would like to move the message. -
Click the Move button and the message (or messages) is moved to the new location. -
If you want to move other messages, select the message (or several messages) in the Message list and repeat steps 2 and 3. As already mentioned you can also color-code messages. This Organizer feature allows you to color-code messages from specific senders, making it easy to locate these messages in the message list. When you specify that messages from a particular sender should be color-coded in your Inbox, you are actually creating a rule that color-codes the messages based on the sender's name . We talk more about creating rules in the next section. Follow these steps to color-code messages: -
In your Inbox, select a message from the sender. All messages in the Inbox from this sender will be color-coded. -
Click the Tools menu and then click Organize. -
Select the Using Colors tab in the Organize pane (see Figure 8.5). Figure 8.5. Color-code messages from specific senders. 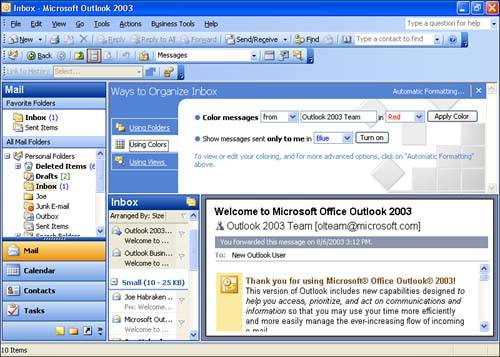 -
The sender's name will appear on the Color messages from line. Click the color drop-down box (the default is red) and select the color that will be assigned to messages from this sender. -
When you are ready to apply the color, click Apply Color. The color will be assigned to all messages from the sender. You can also use color-coding in your Sent Items folder to color code messages that you have sent to a particular recipient.  | Turning Colors Off To turn off the color-coding on a particular group of messages (from a particular sender for example) click the Automatic Formatting link at the top of the Organizer pane. In the Automatic Formatting dialog box, clear the check box next to the rule that color-coded the messages; it will appear as "Mail received from" and then the name of the sender. After clearing the checkbox, click OK to close the dialog box. |
|