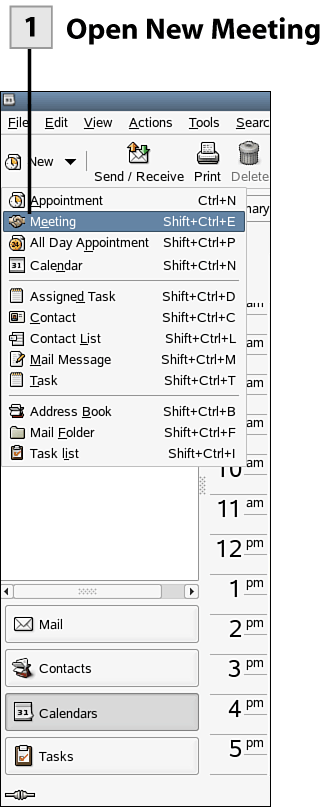
| Evolution makes it easy for you to schedule a meeting and notify the participants. Invitations can quickly be sent to your contacts and others via email. When you create a new meeting you are also creating a new appointment on your calendar.  Open New Meeting Open New Meeting
To start a new meeting select the New drop-down arrow on the toolbar and then select Meeting. A new Appointment dialog opens with Scheduling and Invitations tabs included.
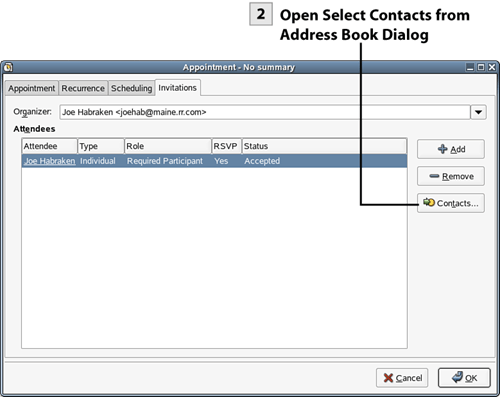
Note Because you are the organizer of the meeting, Evolution automatically includes you as a participant.
 Open Select Contacts from Address Book Dialog Open Select Contacts from Address Book Dialog
To type a new participant into the meeting list, select Add and then type the name or email address of the participant. You can also quickly add participants for the meeting from your address book. Select Contacts on the Invitations tab.
  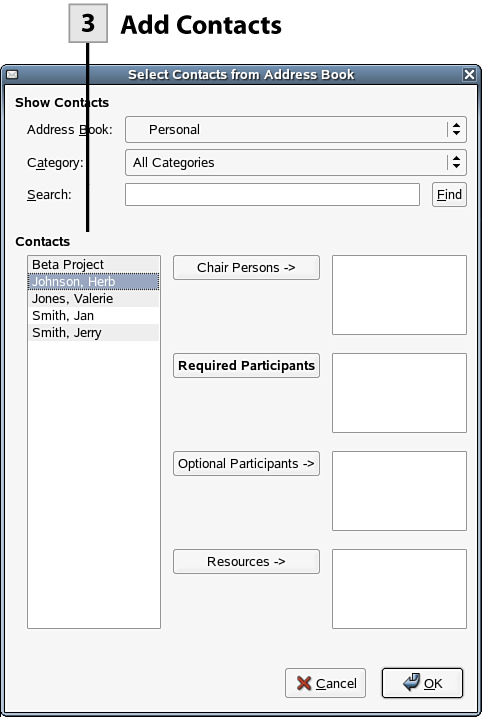   
 Add Contacts Add Contacts
In the Select Contacts from Address Book dialog box, select a contact from the list and then add them to the meeting by clicking the appropriate button: Chair Persons, Required Participants, and so on. After you have finished adding contacts, click OK to return to the Appointment dialog box.
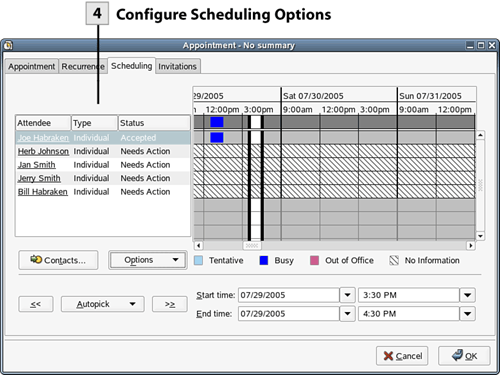
 Configure Scheduling Options Configure Scheduling Options
Select the Scheduling tab. Use the drop-down lists to set the date and the start and end times for the meeting. Or you can drag the bracketed time block on the Time/Date pane to set the time and date. You can also quickly add additional contacts by selecting the Contacts button.
Tip You can add an attendee to the Attendee list by typing in the person's email address. This allows you to add participants who you do not have in your address book.
Tip On a corporate network that allows users to share calendar data, you can quickly select a time for a meeting that will avoid all conflicts. After entering all the participants for the meeting, select (on the Scheduling tab) the AutoPick button's drop-down arrow and then select an option such as All People and Resources or Required People.
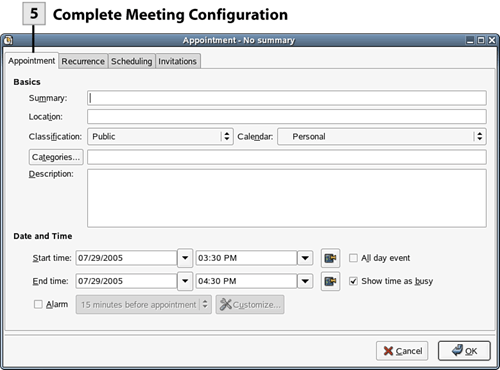
 Complete Meeting Configuration Complete Meeting Configuration
Select the Appointment tab of the new meeting. Enter a summary, location, and a description (as needed). You can also set an alarm (for you) for the meeting; select the Alarm check box and then set the time for the reminder. After you have entered the information (and checked the date and time for the meeting), click OK. An Evolution Query box opens.
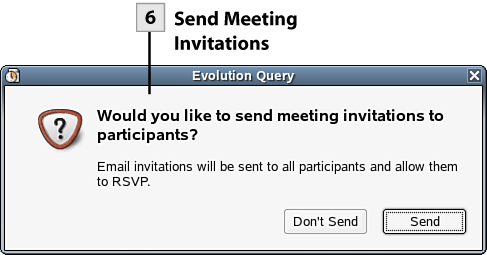
 Send Meeting Invitations Send Meeting Invitations
Evolution asks whether you want to send the meeting invitations to the participants. Click OK to close the query box and send the invitations. The invitations require a response from all invitees.
Note The invitation email that is received by your invitees makes it easy for a potential attendee to respond. The email provides a series of buttons at the top of the message such as Accept, Decline, and Propose New Time. Responses to your invitation appear in your Evolution Inbox. The response email that you receive has a "slick" Update Respondent Status button that allows you to quickly change the status of that respondent on the actual meeting dialog box (on the Scheduling tab); all you do is click the Update Respondent Status button in the email message.
|