Introducing BizTalk Server 2004 Beta 1
Although BizTalk Server 2002 is currently available as a supported product, the writing of this chapter coincides with the release of the first public beta of BizTalk Server 2004. Because this beta release has additional support for the functionality that this chapter will demonstrate , the sample code will use this newer version.
Note that the instructions for installing and configuring the product as well as the sample code in this chapter are based on this beta version of the product. Because things will likely change between this beta release and the final version, you should always consult and use the latest documentation and installation instructions.
Prerequisites for BizTalk Server 2004 Beta 1
Beta 1 of BizTalk Server 2004 has some dependencies that must be present before installing the product. These include the following:
-
An accessible installation of Microsoft SQL Server 2000 Enterprise, Standard, or Developer Edition (installed with Service Pack 3 or higher)
-
SQL Server Analysis Services (also installed with Service Pack 3)
-
Microsoft Visual Studio .NET 2003 for both the development and deployment environment
Tip It's always a good idea to refer to the full installation documentation that comes with the product for a complete list of prerequisites.
Microsoft SQL Server is used as the primary database for storing all of the Services configuration and deployment information for BizTalk Server. Visual Studio .NET 2003 houses the BizTalk Server design tools, including the Schema Editor, Mapper, Orchestration Designer, and BizTalk Explorer.
Before installing BizTalk Server 2004 Beta 1, you need to install the applications mentioned in the previous list. For the purpose of the sample in this chapter, it's assumed that these installations are on the same machine and that this machine is running Microsoft Windows Server 2003.
Installing BizTalk Server 2004 Beta 1
With the prerequisites fulfilled, to start the installation, launch the BizTalk Server 2004 Beta 1 Setup Wizard, and click the Install option on the welcome screen. After entering the product serial number and completing the license agreement page, select a complete installation of the product. By default, this will install the product to the C:\Program Files\Microsoft BizTalk Server 2004 directory. If you don't have Microsoft Windows SharePoint Services 2.0 installed on your machine, you might receive a warning indicating that Business Activity Services will not be installed. You can ignore this warning because this isn't a feature that we'll use when working with the sample code.
After installation has completed, the BizTalk Server 2004 Configuration Wizard will be launched. This allows you to configure how the product will run and to specify where databases required by the product will reside.
When the wizard starts, you'll be prompted to specify whether you want to create a new BizTalk Server group or join an existing one, and whether this server will hold the master secret key for the Enterprise Single Sign-On (SSO) features. For the purpose of running the sample code in this chapter, create a new BizTalk Server group and hold the key on the local machine, as shown in Figure 11.1.
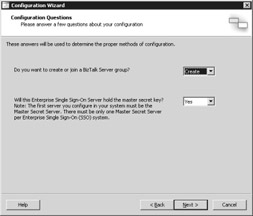
Figure 11.1: Starting the BizTalk Server 2004 Configuration Wizard.
In the next stage of the wizard, review the credentials configuration, as shown in Figure 11.2. This configuration should be prepopulated and shouldn't need changing. Ensure that an administrative account is designated for the SSO Administrator(s). If a prepopulated value needs to be changed, click the Edit button and enter a valid account.
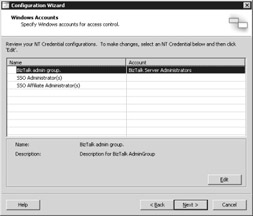
Figure 11.2: Setting the Windows accounts for access control.
Accept the defaults for the next two screens within the wizard. These set the BAM Query Web service URL and the machine name for the BizTalk SSO Server ” neither of which will be used in our sample code.
The next screen shows the SQL Server setup and configuration that will be used for the BizTalk Server databases, as shown in Figure 11.3.
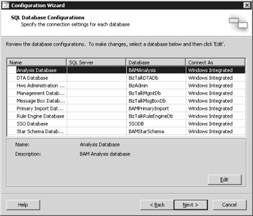
Figure 11.3: Specifying the database locations for BizTalk Server.
By default, the configuration wizard will detect the installation and connection type for SQL Server on the local machine. If this isn't automatically completed, or if the database will reside in a different location, you should click the Edit button to make changes as appropriate.
The next screen in the wizard requires credentials for the BizTalk Server services, as shown in Figure 11.4.
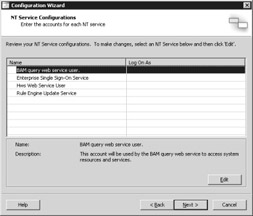
Figure 11.4: Defining the Microsoft Windows NT Service configurations.
Click the Edit button for one of these services and enter valid credentials as appropriate for your machine. Entering the credentials for one of the services will populate the remaining three.
Click the Next button within the BizTalk Messaging screen (again, we won't use this component in this chapter) and confirm the summary of items to configure. The configuration wizard will now set up BizTalk Server 2004 according to your settings.
After the configuration wizard has completed, the Host Creation Wizard will be launched. This wizard is used to set up the host-specific settings for the machine that will run BizTalk Server 2004. Within this wizard, choose not to configure the Analysis Server by clearing the check box, as shown in Figure 11.5.
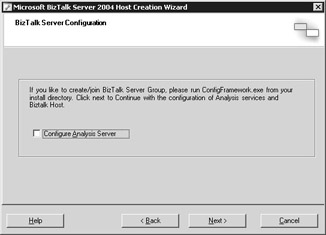
Figure 11.5: Launching the Host Creation Wizard.
In the next screen of the Host Creation Wizard, use a host name of BizTalkServerApplication for the host. The name of the BizTalk Host Users Group will reference one created on the server, as shown in Figure 11.6.
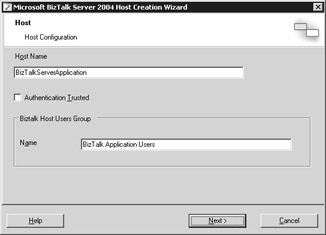
Figure 11.6: Setting the host name and user group settings.
Enter a valid username and password for the host in the next wizard screen. This is the username and password that will be used to run the Windows service for the instance of BizTalk Server. If you enter an account with administrative privileges, you'll receive a security warning indicating that a less- privileged account is recommended. As with the other security recommendations made throughout this book, the samples will work with an administrative account, but you should think carefully about such security implications if you're deploying BizTalk Server 2004 in a production environment.
Continuing through the wizard, enter a name and group for the BizTalk Isolated Host. The isolated host is used for applications that need access to the BizTalk Server databases in a controlled way. For the samples in this chapter, you can accept the default host name and group, as shown in Figure 11.7.
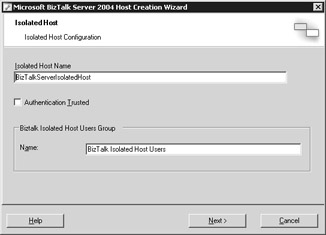
Figure 11.7: Setting the isolated host name and user group settings.
On the wizard's next page, it isn't necessary to configure the HTTP/SOAP settings for the isolated host. Click Next again, and then click Finish to complete the Host Configuration Wizard.
After the wizard has completed, the setup of BizTalk Server 2004 is complete. Now let's build and test the sample code.
EAN: 2147483647
Pages: 132