MIDI Windows
| [ LiB ] |
MIDI Windows
Cubase offers different editing environments for MIDI events, depending on the type of MIDI events you want to edit. For example, if a track contains melodic or harmonic content, you can use the MIDI editor known as the Key Editor . On the other hand, if the events you want to edit are percussion or drum based, you can use the Drum Editor, which makes it easier for you to associate pitch values to actual instrument names , such as kick, snare , timbales, conga, and so on.
MIDI Device Manager
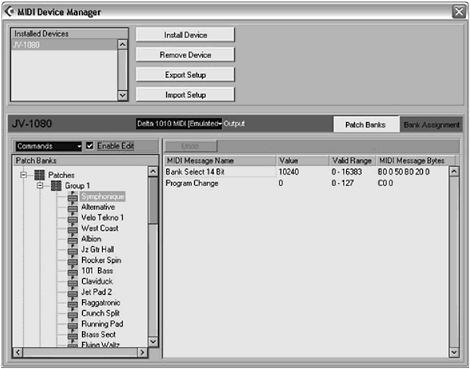
The MIDI Device Manager (see Figure 2.20) installs or removes an external MIDI device in your setup and attaches it to a specific MIDI port so that it becomes available in a MIDI track when selecting MIDI ports. You can configure all your external MIDI devices using this device manager. It also configures the patch names for these devices so that you can change the programs on this device directly from Cubase's inspector or track list area.
Figure 2.20. The MIDI Device Manager window.
How To
To view the MIDI Device Manager window:
-
Click the MIDI Device Manager button in the Devices panel.
-
Select Devices > MIDI Device Manager from the menu bar.
Key Editor
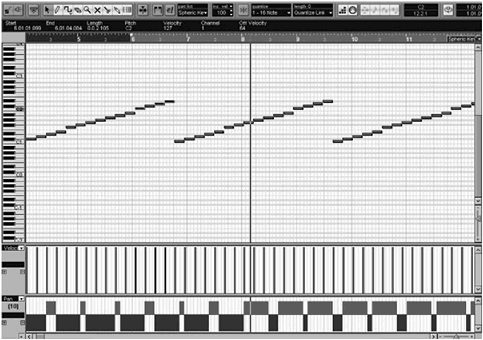
The Key Editor (see Figure 2.21) is probably the best-known editing environment for MIDI events, allowing you to modify not only note events, but also MIDI channel messages, such as velocity, aftertouch, pitch bend, or control change messages. To use the Key Editor, you need to select one or several MIDI parts , or a MIDI track in the project window; otherwise , the Key Editor is not available.
Figure 2.21. The Key Editor window.
How To
To view the Key Editor window:
-
Select a MIDI part in the project window and press Ctrl(PC)/
 (Mac)+E.
 -
Or double-click on a MIDI part in the project window.
-
Or select a part in the project window and then select MIDI > Open Key Editor from the menu bar.
Quantize Setup Panel
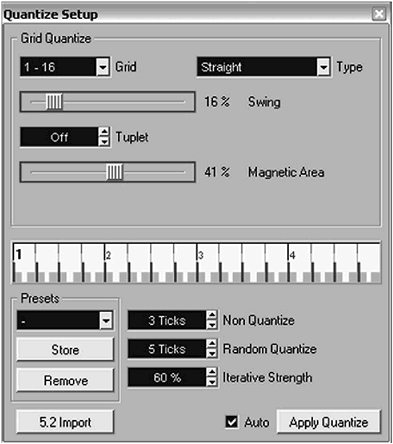
Quantizing enables you to match recorded MIDI events to a predefined grid in order to add rhythmic precision to these events. You can also use quantizing creatively, adding a swing feeling to straight MIDI note events, for example. The Quantize Setup panel (see Figure 2.22) configures how quantizing will be applied to the selected MIDI events or parts. You can later save quantization settings to use them in other projects or even use groove templates that have been extracted from an audio drum loop's rhythmic information.
Figure 2.22. The Quantize Setup panel.
How To
To view the Quantize Setup panel:
-
Select MIDI > Quantize Setup from the menu bar.
-
Or, from within any MIDI editing window, including the project window, select the Setup option at the bottom of the Quantize drop-down menu.
Drum Editor
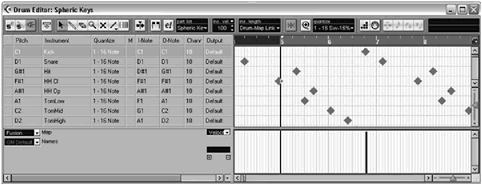
The Drum Editor, as with the Key Editor, edits MIDI events; in this case, the editor is designed to handle percussion and drum maps. Most drum sounds are short by nature and usually drum patches are laid across a keyboard range, each key playing a different instrument. Drum maps are used to identify each note value (see Figure 2.23). In the Drum Editor, lengths of events are not displayed as they are not relevant to editing; instrument names, on the other hand, are associated with each pitch value to make editing a specific instrument easier.
Figure 2.23. The Drum Editor window.
How To
To view the Drum Editor window:
-
Select a part associated with a drum map in the project window and press Ctrl(PC)/
 (Mac)+E.
 -
Or double-click on a MIDI part associated with a drum map in the project window.
-
Or select a part in the project window and then select MIDI > Open Drum Editor from the menu bar.
Drum Map Setup Dialog Box
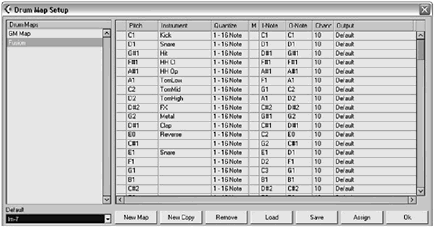
A drum map is a list of percussive instruments associated with pitch values in a MIDI-based rhythmic part or track. You can choose from a list of ready-made drum maps or create your own custom drum maps. The Drum Map Setup dialog box (see Figure 2.24) allows you to manage these maps.
Figure 2.24. The Drum Map Setup dialog box.
How To
To view the Drum Map Setup dialog box:
-
From the Inspector panel of a MIDI track, select Drum Map Setup from the Drum Map field's drop-down menu.
-
Or, inside the drum editor, select Drum Map Setup from the Drum Map field's drop-down menu found in the lower-left portion of the window.
-
Or select MIDI > Open Drum Map Setup from the menu bar.
List Editor
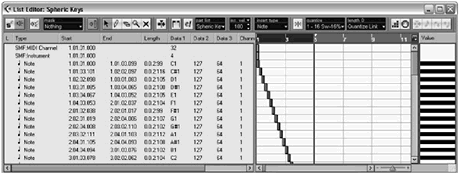
The List Editor (see Figure 2.25) is another MIDI environment that displays MIDI events in a table (list) format for numerical editing. Contrary to the Browser panel which also displays a table listing of events, the List Editor is limited to editing only MIDI events.
Figure 2.25. The List Editor window.
How To
To view the List Editor window:
-
Select a MIDI part in the project window and press Ctrl(PC)/
 (Mac)+G.
 -
Or select a part in the project window and then select MIDI > Open List Editor from the menu bar.
Score Editor
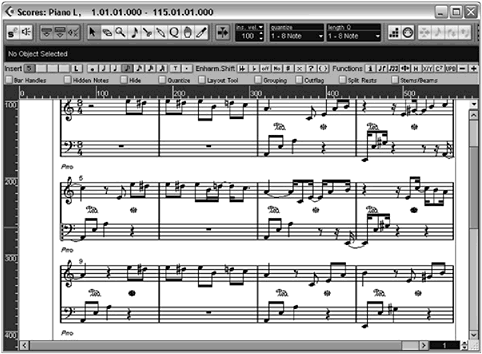
The Score Editor (see Figure 2.26) is for musicians who want to convert MIDI events into musical notation and then print the final result on paper for safekeeping or to use in a studio session with live musicians. With the scoring functions, you can create complete scores and individual music sheets for individual musicians . Note that score editing only works with MIDI events, not audio events.
Figure 2.26. The Score Editor window.
How To
To view the Score Editor window:
-
Select a MIDI part (or parts) in the project window and press Ctrl(PC)/
 (Mac)+R.
 -
Or select a part (or parts) in the project window and then select MIDI > Open Score Editor from the menu bar.
Audio Editing Windows
Because audio and MIDI are two very different types of events, it is normal that they get their own editing tools and windows to manipulate, transform, and process these events. The Media Pool is where you will find all the audio events associated with your project. The Sample Editor is where you will edit them, and the Audio Part Editor is where you will organize when they play inside an audio part.
Media Pool Window
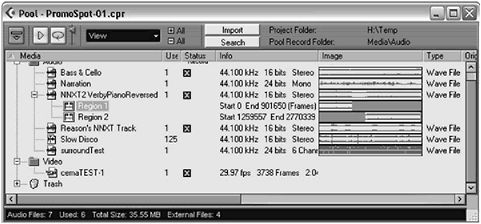
The Media Pool (see Figure 2.27) allows you to see the audio and video files and their associated regions used in your current project. This window enables you to manage your files, import or export media files, monitor file use, and display file and region information, as well as a graphic representation of these files and regions .
Figure 2.27. The Media Pool window.
How To
To view the Media Pool window:
-
Press Ctrl(PC)/
 (Mac)+P.
 -
Or select Project > Pool from the menu bar.
Audio Part Editor
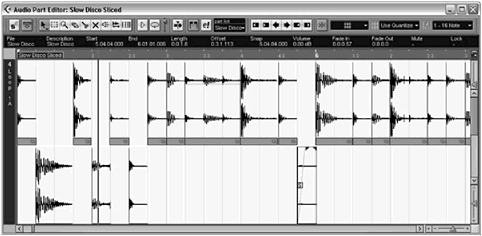
On an audio track, you can have audio parts and audio events. An audio event is a single instance or reference to a file that is self-contained on this track. However, an audio part is a container that can hold several audio events or regions. By default, editing these audio parts is done in the Audio Part Editor window (see Figure 2.28). Here, you can move the audio events in time inside the part itself, create fades or crossfades between events, adjust event- related volume envelopes, and quantize audio events to a quantize grid setting. You can also modify audio events and create new regions in the Audio Part Editor.
Figure 2.28. The Audio Part Editor window.
How To
To view the Audio Part Editor window:
-
Select an audio part (or parts) in the project window and press Ctrl(PC)/
 (Mac)+E.
 -
Or double-click on an audio part in the project window.
Fade Editor
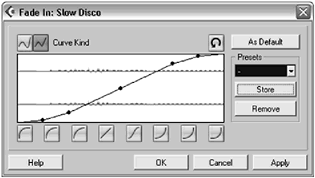
When working on audio events in the project window or in the Audio Part Editor, you can use fade envelopes at the beginning or at the end of this event to create a fade-in or a fade-out. You can also create fade-ins and fade-outs using offline processes. In the former method, fades are rendered in real time through processing, while in the latter, audio segments containing the actual fade portion of the audio are created on your hard disk, making it less processing intensive for your computer. By creating an additional audio segment, it allows you to safely create volume changes to the audio file without modifying the original content. The Fade Editor (see Figure 2.29) chooses the type of curve you want to apply to the fade itself.
Figure 2.29. The Fade In dialog box.
Crossfade Editor
The Crossfade Editor (see Figure 2.30) is similar to the Fade Editor, with the exception that it controls the fade curves for two overlapping audio events, thus creating a crossfade between these two events. As with the Fade Editor, you can't create crossfades in the Sample Editor, nor can you create crossfades between two audio parts that contain several audio events embedded in them.
Figure 2.30. The Crossfade dialog box.
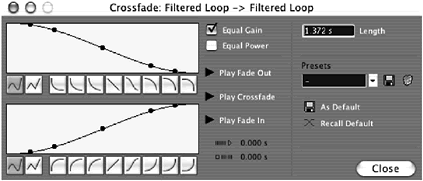
You need to access the events from within the Audio Part Editor or the project Window and open the Crossfade Editor from there. Using the Crossfade Editor is explained in Chapter 9.
Auto Fades
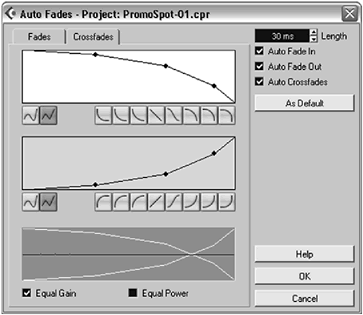
Sometimes, the beginning of an audio event doesn't start with its waveform at the zero crossing (silence on the amplitude axis). This may cause a little clip or glitch at the start of the audio event. To prevent this from occurring, you can use the Auto Fades dialog box (see Figure 2.31). When this function is enabled, it will create a short (up to 500 milliseconds ) fade at the beginning and end of the audio event to smooth out any amplitude jumps that could be audible and unwanted. The Auto Fades dialog box adjusts the parameters associated with this function. Note that this can be applied globallyaffecting all audio tracks in the same wayor individually for each track. You'll learn more about this in Chapter 9.
Figure 2.31. The Crossfade tab in the Auto Fade's dialog box.
Sample Editor
The Sample Editor (see Figure 2.32) enables you to edit audio clips (the representation inside the pool of an audio file on your hard disk) or an audio event (when an audio clip is used in a project, an audio event is created), process it, and create regions or hitpoints. Hitpoint is a term invented by Steinberg to represent a special audio markera marker that divides your audio clip or event into slices corresponding to specific audio elements, such as a kick, a snare, or a crash in a drum loop. You can later quantize these audio slices without affecting the pitch or quality of the audio file.
Figure 2.32. The Sample Editor window.
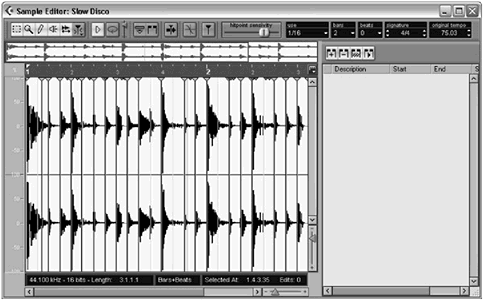
You can also use the Sample Editor to apply offline processing to your file. Offline processing implies that the processing is not calculated every time you play the audio file, but rather processed once using the parameters inside an effect. Cubase will then create an additional audio segment in a special "Edit" folder (under your project's folder) where it will read the processed portion of the file (more on this in Chapter 10).
How To
To view the Sample Editor window:
-
Select an audio clip (file) or audio event in the Audio Part Editor and press Ctrl(PC)/
 (Mac)+E.
 -
Or double-click on an audio clip (file) or audio event in the Audio Part Editor.
-
Select an audio clip (file) or audio region in the Media Pool and press Ctrl(PC)/
 (Mac)+E.
 -
Or double-click on an audio clip (file) or audio region in the Media Pool.
Spectrum Analyzer
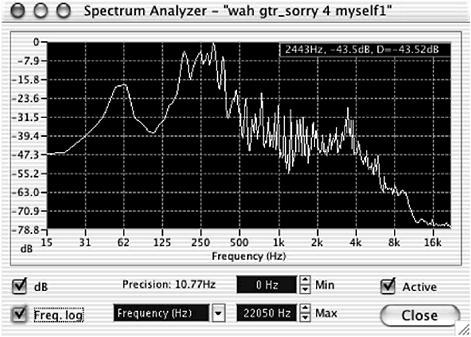
The Spectrum Analyzer (SX version only) provides information about a selected audio event's average amplitude level over a frequency range. This can be useful for pinpointing frequencies that need to be equalized, for example. The Spectrum Analyzer (see Figure 2.33) displays this information in an X/Y, two-dimensional graphic, where the X axis represents frequencies and the Y axis represents amplitude values.
Figure 2.33. Cubase SX's Spectrum Analyzer dialog box.
How To
To view the Spectrum Analyzer dialog box:
-
Select an audio clip (file) or audio event in the Audio Part Editor or in the Media Pool.
-
Select Audio > Spectrum Analyzer from the menu bar.
-
Adjust the settings or leave as is and click Process.
| [ LiB ] |