Computer Graphics Primer
| |
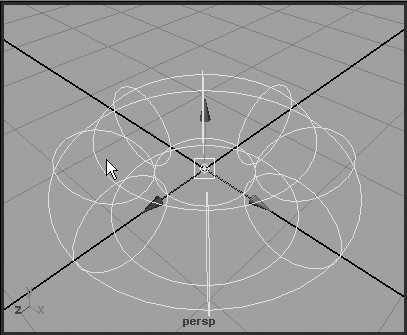
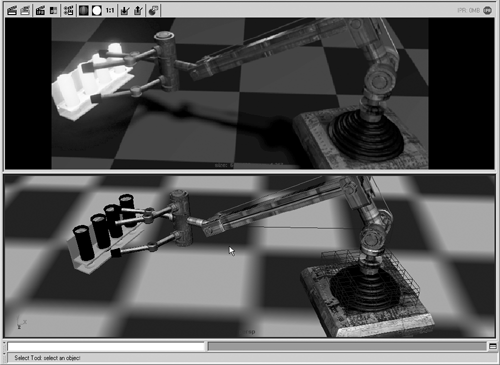
| If you've used a product such as Photoshop, you probably already know the terms and general methods of computer graphics and can skim forward, but these terms are so fundamental to progressing with computer graphics that we've supplied a recap of them in the following sections. Vectors and PixelsYou approach computer graphics in two primary ways: vectors and pixels. Vectors are a connect-the-dots approach; a fixed point on a picture has a connecting line to the next point. After several lines are made, you can close the line and then fill in the resulting shape with color . This approach is sometimes called line art . Because the endpoints and lines are at absolute points in space, you can create line art at any scale without loss of quality. This approach is excellent for hard-edged graphics, such as signs and logos, and programs such as CorelDraw and Illustrator use this method. All TrueType fonts are vector-based. The pixel (for pict ure el ement) approach uses an array of rectangular dots called pixels to make up a bitmap image. The dots can be any of a multitude of colors, and viewed together from a distance, the array of pixels can produce any sort of image or photograph. The more pixels, the more detailed the resulting image, if the image's absolute printed or projected size stays the same. The image's absolute pixel array size is called its resolution , and densely pixeled images are described as high-resolution or sometimes "high-res" (for example, 35mm motion picture film is usually at 2048 pixels across by 1536 pixels high). Bitmaps are not scalable like vector art. If you enlarge a bitmap enough, or zoom in far enough, it pixelates ; in other words, you can see the squares of solid color that make up the image. Bitmaps are ideal for photographic imagery, and programs such as Adobe Photoshop and Corel Photo-Paint are popular software for creating and editing bitmaps. For the most part, vector art is not used in 3D applications, but most vector art programs allow you to rasterize the image ” turn it into a bitmap at some chosen resolution. The files for bitmaps are usually much larger than line art files. For example, a typical small 640x480 pixel color image contains 307,200 pixels, and each pixel has a data byte for each of its red, green, and blue colors. The raw file size is, therefore, 921,600 bytes! This size issue was a real problem in the early computer graphics, but data compression techniques (described in "Image File Formats," later in this chapter) and the ever-larger-capacity computer have solved that problem. Both types of graphics files come into play in Maya. You might need to create a logo from line art, create text from a font, or import a 2D floor plan from a drafting program like AutoCAD. All have vector files as sources, which is a good thing; you can easily take these 2D shapes and use them as modeling curves. You might need tools such as Okino Polytrans to make these translations because Maya's capability to import vector files is minimal. You'll use bitmaps far more often in your 3D work, mostly to apply to surfaces in a manner similar to decals or wallpaper. Also, Maya's actual output (its renderings ) is bitmaps, the 2D pictures taken in its 3D world. 2D and 3DIt's possible to confuse 2D and 3D computer graphics because artists often strive for a 3D "look" but use 2D tools exclusively. When we speak of 3D, we're referring to a fully three-dimensional virtual space where objects, lights, and cameras can be placed anywhere . You'll see the three dimensions referred to as x, y, and z, taken from the mathematical subject of geometry. Helpers appear in Maya to indicate these axes, as shown in Figure 1.12. Which direction is represented by which letter? It usually depends on the user's discipline. For animators, the 2D screen had an x-axis going from left to right and a y-axis for up and down. The screen faces the animator, so y was always the up and down vector. When 3D arrived, the z-axis added the factor of depth ”into or out of the screen. CAD users saw it differently, however. They were always looking down on their floor plans from above ”the plan view ”so x and y were indicators of north/south and east/west. The z axis for these users indicated height. Maya allows the user to switch the up axis between y and z, and you'll find this feature necessary to change to the z-axis when you work on CAD- related scenes. Other 3D programs mix these axes up, too (again, usually based on the program's pedigree ”drafting versus art), so you might need to change the y/z up setting when importing from other packages. Figure 1.12. Maya's axes are displayed in the corner of any 3D view, and selected objects can display their own axes. Input and OutputMuch of the time, you work in Maya from a completely blank scene and build up your world from this black empty void. When the scene is finished, a still image or a series of stills is rendered ”that is, the computer calculates a 2D bitmap of the scene from the camera view, taking into account all lights, objects, and material properties assigned to objects. A series of stills is used to create animation by playing them back quickly in sequence. Movies can be viewed from sequences by using the computer to play them back or by output to videotape or movie film. Don't confuse the fast shaded views of Maya's interactive 3D panels with rendering. Although a reasonably high-quality image can be produced in real time from a modern 3D accelerated video card (like those Maya requires), the image quality is no match for what the slower software rendering looks like (see Figure 1.13). Each new generation of video cards increases the capacity and quality of the shaded view (also known as hardware or real-time rendering), but the quality of software rendering cannot be achieved in anything close to real time for a typical scene file. Animators are always wanting more, and soft shadows, volumetric lights, depth of field, and other effects are render killers. The software renderer can handle them, but it can take several minutes more per frame to compute. Figure 1.13. The interactive shaded view at the bottom looks nice, but it's no match for the quality of actual final renderings. Often you need to bring data, particularly images, into or out of Maya. Every time you apply an image to a surface as part of a material, you need to load the image, and every time you render an image that you plan to keep, you need to save it as a file. Also, you can create scenes from real-world objects (known as scanning) or create real physical objects from 3D modeled objects in Maya. 3D ScannersWouldn't it be nice if you could scan in a plastic model of a car rather than painstakingly hand-draft each part? Actually, there are several technologies for doing this, but there are also drawbacks. The laser scanner is the fastest and most expensive method, ranging from a few thousand to a few hundred thousand dollars. An array of data called a point cloud is collected from the laser's scan of a region. Multiple scans must be stitched together to create an object's outer surface. The point clouds are necessarily dense, so the usual result is a huge mesh data file that requires a lot of editing to make it usable in a 3D program. Often the point cloud functions as a reference, and the model is created over it. A stylus device uses a pointer to take data from an object. These devices are usually cheaper than laser scanners, but thousands of points must be carefully captured before an object of any real detail emerges. The stylus can be connected by an armature that calculates position, or it might use a kind of radio field so that you can use a portable wand to capture points. Less editing is required than with laser scanning, but it's a slow process to touch a probe to 10,000 points on a plastic model! Inaccuracy can also be a problem, making the 3D-sampled version of a perfectly smooth car body appear warped and dented. 3D PrintersAn even more amazing technology can generate a solid physical object from any object made in a 3D program. The leader of these technologies is called laser sintering and involves the use of a laser to harden specified areas of a photosensitive viscous amber fluid. A small platform in the fluid slowly submerges after each laser pass, pulling the partially completed object down so that the laser can create a new layer on the top. The result is a kind of amber plastic solid model of your object! These devices remain expensive and are mostly owned by service bureaus that charge by the object's size and complexity. Sintering is also time consuming; it might take days to create large objects. Manufacturers, in particular, appreciate the ability to create a physical version of an object modeled in a 3D program, such as Maya, for the purposes of prototyping or design evaluation. Image File FormatsThe usual output of your efforts in Maya is in the form of 2D bitmaps. Many different file formats are offered in Maya, and you need to know the basics of how they store data. Some formats discard parts of the image, so you might be disappointed when you see the saved version of the image that seemed so perfect in its raw state from the Maya renderer. These are the file formats available in Maya:
Images can be compressed in several ways, but you need to be aware of whether the compression is lossy , which means some image degradation is allowed to achieve a smaller file size. Non-lossy compression schemes can reduce file size by minimizing redundant data, but files are always retained at the original quality. Samples of the image formats listed previously and of lossy image compression artifacts are available on this book's CD-ROM (in the folder below the CD file icon). Maya images that are added to other images later might have an alpha channel , an optional attribute for each pixel that defines the transparency. For example, if you want to render a character in Maya and then have him cavort around in the real-world video footage, it would be a pain to cut the character out from each frame by hand. The alpha channel lets you instantly cut the mask for the character. Make sure you save the image sequence using an image file format that supports the inclusion of an alpha channel, or it will be lost when you render the character. Let's review the image file formats offered by Maya:
Using a movie file format for later output to video is usually a bad idea because most movie formats often have lossy compression schemes. For output of animations to video or film, the usual route is sequential TIFF or TGA. Dozens or even thousands of individual numbered files are rendered and saved on the hard disk. Later, these images are loaded by specialized hardware that can then play back video at full speed or burn the images to movie film.
|
EAN: 2147483647
Pages: 201