Understanding Authorization Logic
Now that you've learned about authentication, you are ready to deal with authorization. Again, authorization is to measure or establish the power or permission that has been given or granted by an authority. In ASP.NET applications, the owner of the application or administrator of the application makes determinations about authorization.
Two types of authorization are available:
-
Users. Authorization that allows or denies access on a user-by-user basis.
-
Roles. Authorization that allows or denies access based on roles that are used to group users with common permissions or power levels, such as Administrators, Managers, Users, and so on.
These are the two types of authorization schemes that you can deal with. There are also two ways to enforce authorization:
-
Configuratively. Setting up user and role permissions within Web.Config files in directories on which you want to enforce protection.
-
Programmatically. Using available methods to check whether a user is authenticated and has the proper permissions to view a page or parts of a page.
The place to start is by addressing user-level authorization.
User Authorization
When I talk about user-level authorization, I am talking about the name attribute placed into the Authentication cookie. This value is used to allow people into a directory or page, and to allow only specific users to view certain data.
For the purpose of all the examples in the user section, I will be using the Web.Config file to authenticate users. I will be using the following users, with their appropriate user names and passwords, to demonstrate this.
<credentials passwordFormat="Clear"> <user name="Peter" password="NewRiders"/> <user name="Tom" password="qwerty"/> </credentials>
Configurative
Earlier in the chapter you saw the Web.Config file used to restrict anonymous users from accessing a directory. A Web.Config file was placed in that directory and a tag called <deny> was used to restrict all unauthenticated users. The <deny> tag has a counterpart called the <allow> tag.
<configuration> <system.web> <authorization> <allow users="Bob"/> <deny users="?"/> </authorization> </system.web> </configuration>
Two different symbols must be explained: the question mark (?) and the asterisk (*). The question mark is a wild card for all anonymous (unauthenticated) users, and the asterisk is a wild card for all users. Using a combination of these symbols, the users, and the <allow> and <deny> tags, you can enforce simple to very strict rules concerning who is allowed to access the items contained within the directory in which the Web.Config file resides.
Note |
| A Web.Config file controls all the contents of its directory, including other subdirectories, but subdirectories can have their own Web.Config files to either override or add to the security for contents within the directory it controls. |
If I set <deny users="?" />, then all unauthenticated users are denied from that directory. If I set a combination, <allow users="Peter" /> and <deny users="*" />, then all users are denied access with the exception of "Peter". (No one can stop me! HAH HAH HAH!!) The following are a few examples of the Web.Config with explanations.
Deny all anonymous users:
<configuration> <system.web> <authorization> <deny users="?"/> </authorization> </system.web> </configuration>
Deny all users, both anonymous and authenticated, with the exception of Peter, Betty, Gene, Frank, and Suzy:
<configuration> <system.web> <authorization> <allow users="Peter,Betty,Gene,Frank,Suzy"/> <deny users="*"/> </authorization> </system.web> </configuration>
Deny all anonymous users, as well as Tom, Frank, and Suzy:
<configuration> <system.web> <authorization> <deny users="?,Tom,Frank,Suzy"/> </authorization> </system.web> </configuration>
WARNING!!! The Web.Config file is a mysterious being if you don't understand it, you will pull your hair out of your head trying to decipher its behavior. In essence, the file reads from the bottom up, and the last rule read takes precedence. The following strange example reinforces the point:
<configuration> <system.web> <authorization> <allow users="Peter" /> <deny users="Peter"/> </authorization> </system.web> </configuration>
This Web.Config file lets "Peter" access the file in its directory. Why? Because the file is read from bottom to top, the <allow> tag takes precedence over the <deny> tag. Now look at what happens when you swap the <allow> and <deny> tags:
<configuration> <system.web> <authorization> <deny users="Peter" /> <allow users="Peter"/> </authorization> </system.web> </configuration>
If you place the <allow> tag below the <deny> tag, the <deny> tag takes precedence and "Peter" won't be allowed access to that directory. I mention this so that you understand the flow of rules and you can understand how this affects the way the rules apply.
Later, during the discussion of roles, you'll investigate how to use combinations of users and roles in the Web.Config file to enforce even greater control over the security of your web applications.
Programmatic
You can use programmatic code to enforce permissions on a user. You can also control what a particular user can or cannot see programmatically. If you want to boot anyone who isn't logged in out of a particular page, you can use the User.Identity.IsAuthenticated property to determine whether the user has been authenticated. If they are, this property returns true; otherwise, if the user is still anonymous, this property returns false.
Visual Basic .NET author_rejectnonauthenticated_vb.aspx
<%@ page language="vb" runat="server"%> <script runat=server> Sub Page_Load() If User.Identity.IsAuthenticated = False Then Response.Redirect("login.aspx") End If End Sub </script> <html> <head> <title>Login</title> </head> <body bgcolor="#FFFFFF" text="#000000"> You're Authentic!! </body> </html>
C# author_rejectnonauthenticated_cs.aspx
<%@ page language="cs" runat="server"%> <script runat=server> void Page_Load(){ if (User.Identity.IsAuthenticated == false){ Response.Redirect("login.aspx"); } } </script> <html> <head> <title>Login</title> </head> <body bgcolor="#FFFFFF" text="#000000"> You're Authentic!! </body> </html>
You can also control what users see depending on who they are. For instance, the following example show what to do if you want to display one message for unauthenticated users, another message just for the "Peter" user, and a third message for all other authenticated users.
Visual Basic .NET author_controlusers_vb.aspx
<%@ page language="vb" runat="server"%> <script runat=server> Sub Page_Load() If User.Identity.IsAuthenticated = False Then OurLabel.Text = "Welcome anonymous user!" ElseIf User.Identity.Name = "Peter" Then OurLabel.Text = "Welcome Peter" Else OurLabel.Text = "Welcome " + User.Identity.Name OurLabel.Text += "<br>Isn't Peter funny looking?" End If End Sub </script> <html> <head> <title>Authorize</title> </head> <body bgcolor="#FFFFFF" text="#000000"> <h3><asp:Label runat="server" /> </body> </html>
C# author_controlusers_cs.aspx
<%@ page language="c#" runat="server"%> <script runat=server> void Page_Load(){ if (User.Identity.IsAuthenticated == false){ OurLabel.Text = "Welcome anonymous user!"; }else if(User.Identity.Name == "Peter"){ OurLabel.Text = "Welcome Peter"; }else{ OurLabel.Text = "Welcome " + User.Identity.Name; OurLabel.Text += "<br>Isn't Peter funny looking?"; } } </script> <html> <head> <title>Login</title> </head> <body bgcolor="#FFFFFF" text="#000000"> <h3><asp:Label runat="server" /> </body> </html>
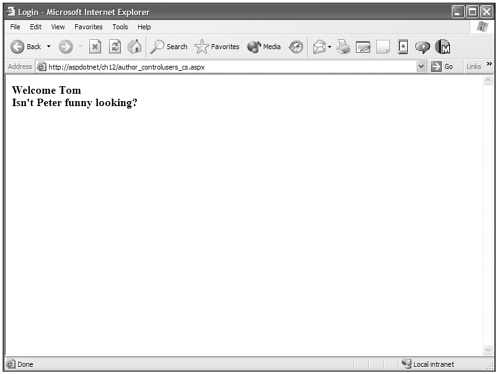
In Figure 12.9 you can see the results. The code has checked to see whether a user is authenticated or the User.Identity.Name of the user that is logged in is equal to "Peter".
Figure 12.9. You can programmatically control what is delivered to the browser based on user information.

Being able to control information based on users is pretty powerful but can quickly become cumbersome if you are supporting a lot of users. This is where roles authorization comes in.
Roles
Roles authorization is a system of grouping together users with common levels of permission and controlling all the users by affecting authorization and permission control on the role rather than on the individual users.
The .NET Framework has provided a way to handle roles, but from my perspective it is often misunderstood. The object that is used to handle roles security is called the Principal object. There are few or no good references out on the web regarding role-based security or the Principal object, and strangely the .NET Framework SDK is kind of sparse in these areas as well. Never fear, Pierre is here.
There is going to be a bit of information here that may seem like overkill, but it puts all the power of ASP.NET forms-based authentication into your hands. If you want to truly use roles security in your ASP.NET applications, you need to backtrack into the authentication process.
To utilize roles, you need to store those roles somewhere. For security purposes these roles need to be somewhere that an unscrupulous user can't alter them, which is something a persistent cookie usually isn't good for. These are basically text files that someone slick enough can open and edit, and in which he can perhaps assign himself to a role with permissions to areas that he normally isn't allowed to access. You need a secure place to store this information.
As I explained earlier, the authentication cookie is encrypted. You might think that only the name value of the authentication cookie is encrypted, but there is much more in there. There is even a place where you can hide and encrypt roles. It can actually hold anything you want, but this is a great place to hold your roles data because it is encrypted and validated when it is sent to the server.
Let me not get ahead of myself. The first thing I must do is give you a bit of understanding about how the Authentication cookie actually works. I'm not going to get too deep, but if you're going to manipulate this monster manually, you gotta know what's under the hood.
The content of the authentication cookie is actually another object called a FormsAuthenticationTicket. It's a structured group of data that makes up all the important stuff that ASP.NET needs to handle authentication. It contains the following:
-
Version. Ignore this, you should always set this to 1.
-
Name. Authentication cookie Name.
-
IssueDate. Time at which the cookie was issued.
-
Expiration. Expiration date for the cookie.
-
Expired. Boolean value to see whether the cookie has expired.
-
isPersistent. Boolean value to determine whether the cookie persists across sessions.
-
UserData. User-defined data (this is the magic place).
-
CookiePath. The path for the cookie.
The only ones you need to concern yourself with are Name, IssueDate, Expiration, IsPersistent, and UserData. As you saw in the previous example, when the FormsAuthentication.RedirectFromLoginPage() method is called, ASP.NET does a few things behind the scenes. It creates the FormsAuthenticationTicket object, fills it with the listed information, encrypts the ticket, and creates a cookie with the name attribute in the <forms> tag in the Web.Config file. Then it places the encrypted ticket into the cookie and adds it to the HttpResponse object so that when the server responds back to the client, the client cookie is created. Then it retrieves the value of ReturnUrl from the QueryString and redirects the user back to that page. WHEW!!!
To access the UserData property of the FormsAuthenticationTicket object, you need to replicate that process when authentication takes place.
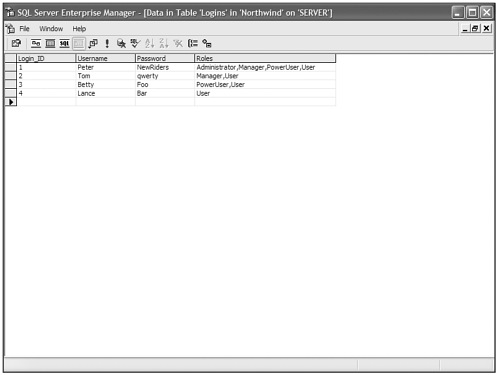
Now you have to get assigned roles from somewhere, and for this example I'm going to modify the Login table from the SQL Server example in the "Authenticating Against a Database" section to contain a column for users' roles. You can see the altered table in Figure 12.10.
Figure 12.10. The Login table with a Roles column added.

I'm also going to need to alter the stored procedure from that example to return the roles for the authenticated user.
spLogin
CREATE PROCEDURE [spLogin] @Username varchar(50), @Password varchar(50), @Login_ID int output, @Roles varchar(255) output AS if exists (Select * from Logins where username = @username and password = @Password) Begin Set @Login_ID = (Select Login_ID from Logins where username = @username andpassword = @Password) Set @Roles = (Select Roles from Logins where username = @username and
password = @Password) End else Begin Set @Login_ID = 0 Set @Roles = '' End GO
Now you need to authenticate against the SQL Server and retrieve the roles from the database so you can do the magic of building the FormsAuthenticationTicket, placing roles in the UserData property of the ticket, encrypting the ticket and placing it in the Authentication cookie. Then you add the cookie to the Response back to the client, get the RedirectUrl, and redirect the user back to that page.
Visual Basic .NET author_roles_vb.aspx
<%@ page language="vb" runat="server"%> <%@ Import Namespace="System.Data"%> <%@ Import Namespace="System.Data.SqlClient" %> <script runat=server> Sub Authorize(Sender As [Object], e As EventArgs) Dim vUsername As String = Username.Text Dim vPassword As String = Password.Text Dim OurConnection As SqlConnection Dim OurCommand As SqlCommand Dim OurDataReader As SqlDataReader OurConnection = New SqlConnection("Server=server;uid=newriders;pwd=password;  database=Northwind") OurCommand = New SqlCommand("spLogin", OurConnection) OurCommand.CommandType = CommandType.StoredProcedure OurCommand.Parameters.Add("@Username", SqlDbType.VarChar, 50).Value = vUsername OurCommand.Parameters.Add("@Password", SqlDbType.VarChar, 50).Value = vPassword OurCommand.Parameters.Add("@Login_ID", SqlDbType.Int).Direction = ParameterDirection.
  Output OurCommand.Parameters.Add("@Roles", SqlDbType.VarChar, 255).Direction =
  ParameterDirection.Output OurConnection.Open() OurCommand.ExecuteNonQuery() Dim Login_ID As Integer = CInt(OurCommand.Parameters("@Login_ID").Value) Dim Roles As String = CStr(OurCommand.Parameters("@Roles").Value) OurConnection.Close() If Login_ID > 0 Then Dim OurTicket As FormsAuthenticationTicket Dim IssueDate As DateTime = DateTime.Now Dim ExpireDate As DateTime = DateTime.Now.AddDays(14) OurTicket = New FormsAuthenticationTicket(1, vUsername, IssueDate, ExpireDate,
  True, Roles) Dim cookie As New HttpCookie(FormsAuthentication.FormsCookieName) cookie.Value = FormsAuthentication.Encrypt(OurTicket) Response.Cookies.Add(cookie) Response.Redirect(FormsAuthentication.GetRedirectUrl(vUsername, True)) Else OurLabel.Text = "This login doesn't exist" End If End Sub 'Authorize </script> <html> <head> <title>Login</title> </head> <body bgcolor="#FFFFFF" text="#000000"> <form runat="server"> <h3>Login Page</h3> <asp:textbox runat="server" /> Username<br> <asp:textbox runat="server" /> Password <br><br> <asp:button text="Login" onClick="Authorize" runat="server" /><br><br> <asp:Label EnableViewState="False" runat="server" /> </form> </body> </html>
 C# author_roles_cs.aspx
<%@ page language="c#" runat="server"%> <%@ Import Namespace="System.Data"%> <%@ Import Namespace="System.Data.SqlClient" %> <script runat=server> void Authorize(Object Sender, EventArgs e){ string vUsername = Username.Text; string vPassword = Password.Text; SqlConnection OurConnection; SqlCommand OurCommand; SqlDataReader OurDataReader; OurConnection = new SqlConnection("Server=server;uid=newriders;pwd=password;  database=Northwind"); OurCommand = new SqlCommand("spLogin" ,OurConnection); OurCommand.CommandType = CommandType.StoredProcedure; OurCommand.Parameters.Add("@Username", SqlDbType.VarChar, 50).Value = vUsername; OurCommand.Parameters.Add("@Password", SqlDbType.VarChar, 50).Value = vPassword; OurCommand.Parameters.Add("@Login_ID", SqlDbType.Int).Direction = ParameterDirection.
  Output; OurCommand.Parameters.Add("@Roles", SqlDbType.VarChar, 255).Direction =
  ParameterDirection.Output; OurConnection.Open(); OurCommand.ExecuteNonQuery(); int Login_ID = (int)OurCommand.Parameters["@Login_ID"].Value; string Roles = (string)OurCommand.Parameters["@Roles"].Value; OurConnection.Close(); if (Login_ID > 0){ FormsAuthenticationTicket OurTicket; DateTime IssueDate = DateTime.Now; DateTime ExpireDate = DateTime.Now.AddDays(14); OurTicket = new FormsAuthenticationTicket (1,vUsername,IssueDate,ExpireDate,true,
  Roles); HttpCookie cookie = new HttpCookie(FormsAuthentication.FormsCookieName); cookie.Value = FormsAuthentication.Encrypt(OurTicket); Response.Cookies.Add (cookie); Response.Redirect(FormsAuthentication.GetRedirectUrl (vUsername, true)); }else{ OurLabel.Text = "This login doesn't exist"; } } </script> <html> <head> <title>Login</title> </head> <body bgcolor="#FFFFFF" text="#000000"> <form runat="server"> <h3>Login Page</h3> <asp:textbox runat="server" /> Username<br> <asp:textbox runat="server" /> Password <br><br> <asp:button text="Login" onClick="Authorize" runat="server" /><br><br> <asp:Label EnableViewState="False" runat="server" /> </form> </body> </html>
 I know reading this block of code may be a bit like trying to swallow an unchewed piece of steak, and right now it's caught in your throat. Stand back; I'm ready to do the ASP.NET Heimlich Maneuver and pop that big bite outta your windpipe.
The large block of code highlighted in bold does the following:
-
Creates a variable of the FormsAuthenticationTicket type.
-
Creates a variable of DateTime type and sets it to Now for the ticket's IssueDate property.
-
Creates a variable of DateTime type and sets it to Now + 14 days for the ticket's Expiration property. I chose +14 days just for demonstration purposes. You can set the expiration to whatever you want.
-
Populates the FormsAuthenticationTicket with a new FormsAuthenticationTicket object through one of its overloaded constructors, which takes six input parameters in the following order: Version, Name, IssueDate, Expiration, IsPersitent, and UserData. As you can see, the UserData is populated with the roles information that was returned from the database.
-
Creates a variable of HttpCookie type and populates it with a new instance of an HttpCookie object with the name value pulled from the Web.Config file. It uses the FormsAuthentication.FormsCookieName property.
-
Sets the value of the cookie to the encrypted form of the ticket using the FormsAuthentication.Encrypt() method.
-
Adds the cookie to the response back to the client browser so the cookie is created on the user's machine.
-
Redirects, the Response.Redirect, to the proper page, which is retrieved with the FormsAuthetication.GetRedirectUrl property.
Now you've successfully authenticated and stuffed the appropriate data into the authentication cookie, including the roles into the UserData property of the FormsAuthenticationTicket in the authentication cookie. But this doesn't mean it's doing anything. You will still get rejected from directories and pages that require a specific role to be present.
Now for the next trick. Here is where the Principal object comes in. In short, the Principal object is used to compare role information against the authorization system, either the Web.Config file or programmatically generated list of specific roles. The actual enforcement processes are covered later, but the first thing to do is to get roles into the Principal object.
I have read various papers on the Principal object on the web and in some other resources and have come to a conclusion. The Principal object is misunderstood. Most examples show the Principal object as some magician that persists all by itself across page loads. This may be true for Windows applications built on the .NET Framework where a user is operating in a connected environment with full operational state, but I haven't found it to be true with the disconnected request/response stateless environment of ASP.NET applications.
From my experience, the Principal object must be created and populated each time a security check must be done. Fortunately, ASP.NET provides a simple way for this to be done. Every time any type of security check is attempting to be enforced, there is an attempt to fire a function that can possibly exist in the application's global.asax file located in the application's root directory. You must create this function, but if named properly it will fire every time any type of authorization process is executed by the .NET Framework. It is called Application_AuthenticateRequest(). In this function, you create all the necessary players to create a Principal object, decrypt and pull the roles out of your FormsAuthenticationTicket, place them inside the Principal object, and associate the Principal object with the authenticated user. One important note is that you must import the System.Security.Principal namespace into your global.asax file to use the Principal object and some of the other associated objects that are necessary.
Visual Basic .NET global.asax
<%@ Import Namespace="System.Security.Principal"%> <script language="vb" runat=server> Sub Application_AuthenticateRequest(sender As Object,e As EventArgs) If Request.IsAuthenticated = True Then Dim OurTicket As FormsAuthenticationTicket OurTicket = FormsAuthentication.Decrypt(Request.Cookies(FormsAuthentication.FormsCookieName).Value) Dim authName As String = User.Identity.Name Dim arrRoles() As String = split(OurTicket.UserData,",") Dim OurIdentity As GenericIdentity = New GenericIdentity(authName) Context.User = New GenericPrincipal(OurIdentity, arrRoles) End If End Sub </script>
C# global.aspx
<%@ Import Namespace="System.Security.Principal"%> <script language="c#" runat=server> void Application_AuthenticateRequest(Object sender,EventArgs e){ if (Request.IsAuthenticated == true){ FormsAuthenticationTicket OurTicket; OurTicket = FormsAuthentication.Decrypt(Request.Cookies [ccc][FormsAuthentication.FormsCookieName].Value); String authName = User.Identity.Name; String[] arrRoles = OurTicket.UserData.Split(','); GenericIdentity OurIdentity = new GenericIdentity(authName); Context.User = new GenericPrincipal(OurIdentity, arrRoles); } } </script>
This code performs the following steps:
-
Checks to see whether the user is authenticated; if so, it proceeds.
-
Creates a variable of the type FormsAuthenticationTicket.
-
Populates that variable with the decrypted contents of the Authentication cookie. You retrieve this through a standard Request.Cookies, but you retrieve the cookie name from the Web.Config file with the FormsAuthentication.FormsCookieName property.
-
Creates a variable of the string type and populates it with the authenticated user's Name property.
-
Places the UserData property of the ticket into a one-dimensional array.
-
Creates a variable of the GenericIdentity type and populates it with a new instance of a GenericIdentity with the authenticated user's Name property.
-
Assigns a new GenericPrincipal object to the Context.User, which is the current user that the .NET Framework is dealing with in this request. Passes the GenericPrincipal constructor the proper parameters, which are the GenericIdentity and the roles. This enables the Principal object to know who it's associated with so that it can then authorize that user against those roles.
This process may seem complicated, but it really is simple. You're creating a Principal object that contains the roles you want and associating it with the proper user. This object can now be used to check against authorization restrictions that exist both configuratively in the Web.Config file and programmatically.
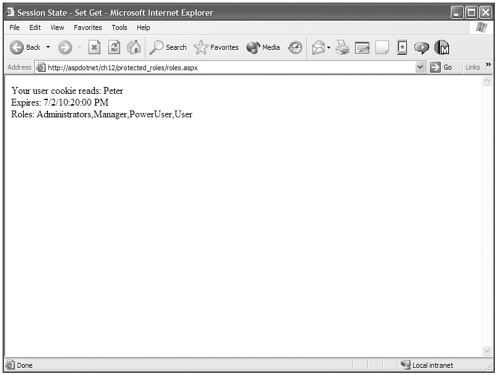
In Figure 12.11, the login is posted to a page that is protected, allowing only administrators based on the Web.Config file in the ch12/protected_roles directory. You can see the user is Peter and that Administrators is one of the roles in the Principal object.
Figure 12.11. The Principal object enables you to control authorization against roles instead of just against users.

Configurative
Configuring authorization regarding roles in the Web.Config file follows exactly the same rules as users except that you use the word roles in its place.
<configuration> <system.web> <authorization> <allow roles="Administrators"/> <deny roles="*"/> </authorization> </system.web> </configuration>
This is where the real power in configurative authorization comes in, because you can use combinations of users and roles to control security. For instance, if you wanted to allow all Administrators and also allow just Betty, who is a PowerUser, User, but you want to restrict all other PowerUsers or Users, you can simply add Betty to the <allow> tag as a user.
<configuration> <system.web> <authorization> <allow roles="Administrators" users="Betty"/> <deny roles="*"/> </authorization> </system.web> </configuration>
Experiment with configurative authorization now that you understand both roles and users. You can have fine control over your applications by using the Web.Config files in different directories, along with the <allow> and <deny> tags, with a combination of users and roles. Just remember that the order of these tags can affect the outcome significantly.
Programmatic
When we were checking users programmatically earlier, we used the User.Identity.IsAuthenticated property to check for authorization. To programmatically check role-based authorization, use the User.IsInRole() method with the role name being the parameter that you pass in.
Visual Basic .NET author_controlroles_vb.aspx
<%@ page language="vb" runat="server"%> <script runat=server> Sub Page_Load() If Not User.IsInRole("Administrators") And Not User.IsInRole("Manager") Then OurLabel.Text = "You aren't an Administrator or a Manager" Else If User.IsInRole("Administrators") Then OurLabel.Text = "You are an Administrator" Else OurLabel.Text = "You are a Manager" End If End If End Sub </script> <html> <head> <title>Login</title> </head> <body bgcolor="#FFFFFF" text="#000000"> <h3><asp:Label runat="server" /> </body> </html>
C# author_controlroles_cs.aspx
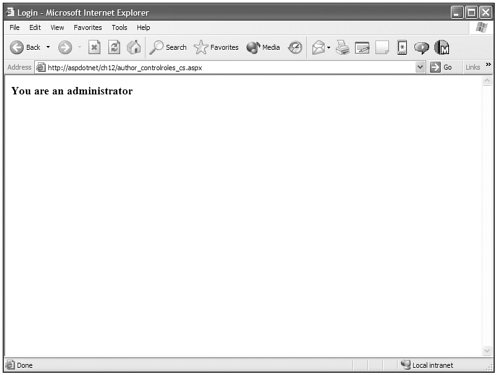
<%@ page language="c#" runat="server"%> <script runat=server> void Page_Load(){ if (!User.IsInRole("Administrators") & !User.IsInRole("Manager")){ OurLabel.Text = "You aren't an Administrator or a Manager"; }else{ if (User.IsInRole("Administrators")){ OurLabel.Text = "You are an Administrator"; }else{ OurLabel.Text = "You are a Manager"; } } } </script> <html> <head> <title>Login</title> </head> <body bgcolor="#FFFFFF" text="#000000"> <h3><asp:Label runat="server" /> </body> </html> In Figure 12.12 you can see the result this page produces when you are logged in as "Peter," who belongs to all the roles, but trips the Administrator branch of this code first.
Figure 12.12. Use the User.IsInRole() method to programmatically control what a user sees or doesn't see.

As you can see, role-based security provides a much broader and more powerful way to control who is authorized to see content on your web site, because you can control whole groups of users through a single role.
| Top |