New Security Features in ASP.NETAnd How to Use Them
| for RuBoard |
New Security Features in ASP.NETAnd How to Use Them
In the .NET platform, everything is "new." This includes the implementation of methods previously available through other means, such as IIS and DCOM, and methods introduced in .NET. In the world of authenticating users to a resource, such as a Web site, Microsoft .NET provides four options, Basic , Windows , Forms-based and Passport .
For validating user authentication and authorization when it comes to code permissions, a.k.a. code access security, there is now the simple to implement method of impersonation. While this might not be late-breaking news, what is is the fact that now a user's principals can be changed by privileged code. Impersonation, in this case, means that through the Common Language Runtime (CLR), you control the user under which code executes. Those of you familiar with Microsoft Transaction Server and Component Services for COM+ will be able to draw quick parallels. One difference that was available for the Beta releases, and not in the initial release was the use of configuration files to specify an intrinsic trust level associated with an assembly. While this feature may return in a future release, with the focus on security, it would have to implemented cautiously. For those still getting used to the new terminology, an assembly is code, usually in the form of a class or object. An assembly can (but doesn't have to) be a .dll file.
The following sections introduce these "new" features. In the cases covering Basic and Windows authentication, the goal is showing how to use .NET instead of IIS to perform these tasks . Forms, or Forms-based authentication, and Passport represent two truly new methods of authenticating users using built-in Microsoft functionality. The key point is that all of the features mentioned in these chapters are controlled through XML-based configuration files, such as Web.config. These are presented in the order of most likely to be used in a real-world scenario. At the end of this chapter, you will,
-
Know what the features of ASP.NET security are
-
How to use Forms authentication
-
How to use implementation and code access security
-
Know what the differences between protecting a Web service and a Web page are
Forms Authentication
By now, you should be familiar with the web.config file that is created by Visual Studio.NET, for each .NET Web Application you create. This is the file that controls what actions the Web site will process and what to map these events to, for example, the control of verbs for specifying if a user or group is allowed to GET or POST or has all rights. For more information on the specifics of XML-based configuration files, see Chapter 20, "Administering an IIS Machine Using ASP.NET." It is also the file that tells the Web to use Forms-based authentication. While the web.config file can be very useful, it is not required to be used by ASP.NET. If it is not used, the machine.config file will be the governing configuration of a Web site.
Forms authentication in ASP.NET is, by definition, a means by which users can be authenticated to a Web site through a Web page containing a form using cookies for state management, with regards to the authentication ticket, and storing user information in a data store. It is worth noting here that the state management used for authentication is separate from that which may be used for cookie-based session management. In the old days, this process might have been completed using an Active Server Page that made a call to ADO that queried a SQL Server database for a username and password, then if there was a positive result, let the user into the site and possibly personalize some information for that user based on database information that was written to a cookie. Forms authentication does not mean that the entire authentication is done on a Web page. It could be, if you like embedding users' plain-text passwords in your Web pages. In a real-world example, you would not write the plain-text password of your user to the cookie to avoid having to make a trip back to the Web server to make sure the user was authenticated from page to page. Nor in some cases would you want, or be able to use, the Session object to carry data. ASP.NET takes care of this by allowing you to select a " protection level ." The protection level determines if and how the information in the cookie is treated. It can be encrypted, validated , or nothing at all. Before going too much further, let us put this in motion by creating a sample Forms-based authentication site. Some of the steps listed here may not be needed by all readers. It is more of an illustration of taking what you know and applying it to something new.
Creating the Site If You Do Not Have Microsoft Visual Studio.NET Installed
Follow the instructions in this section if you only have the .NET Framework SDK installed.
To begin, you need to make a directory that will house the application; this can be easily accomplished by clicking Start, selecting Run, typing cmd and pressing Enter. In the command windows, type mkdir c:\inetpub\ wwwroot \FormAuth , and click OK. Next , open the Internet Information Services console. Then perform the following steps:
-
Right-click My Computer.
-
Select Manage.
-
Click the (+) beside Services and Applications to expand the list.
-
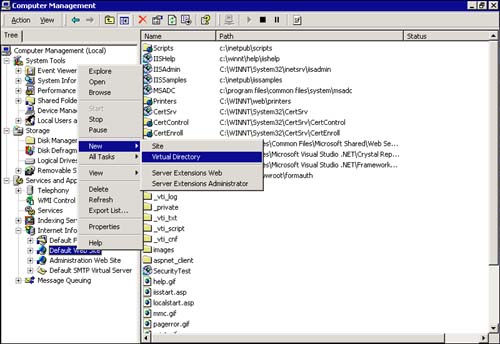
Click the (+) beside Internet Information Services to expand the services; you should see a screen similar to that shown in Figure 13.1.
Figure 13.1. Computer Management console.

-
Right-click the site you want to create a virtual directory in (in this case, Default Web Site), select New, and then select Virtual Directory. This action is shown in Figure 13.2.
Figure 13.2. Selecting to create a new virtual directory.
-
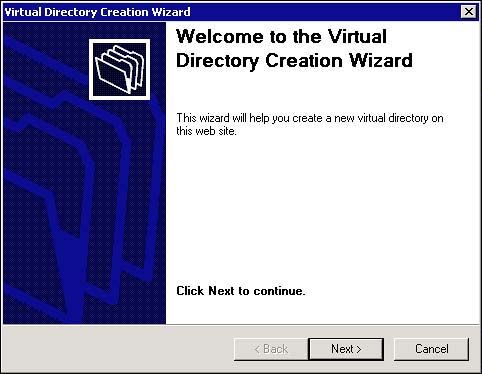
Step 5 launches the Virtual Directory Creation Wizard, as shown in Figure 13.3. Click Next to proceed.
Figure 13.3. Virtual Directory Creation Wizard.
-
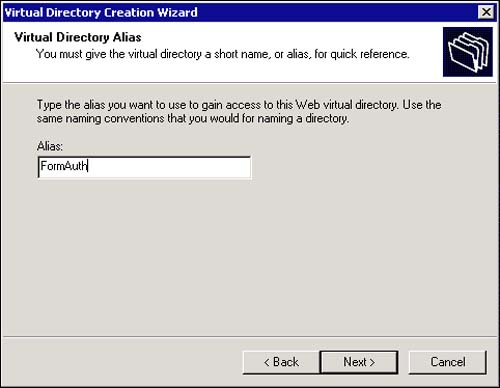
The next screen asks you for a name to give your new virtual directory. In this sample, you'll use FormAuth , as shown in Figure 13.4. Type this into the text box provided and click Next.
Figure 13.4. Virtual Directory Alias.
-
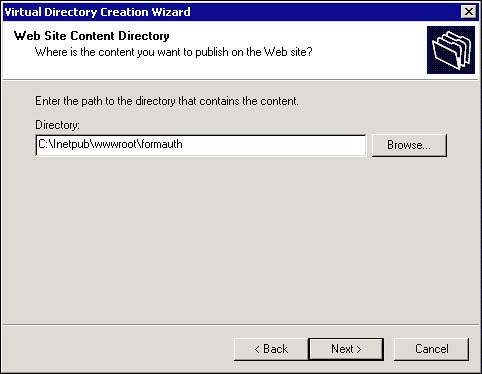
The next screen asks you for the location of the files to use. This is the physical location on a hard drive for the files. In this sample, the location is C:\Inetpub\wwwroot\FormAuth because this is the directory you created earlier. Type or browse to this location and click Next. Figure 13.5 illustrates this.
Figure 13.5. Web Site Content Directory.
-
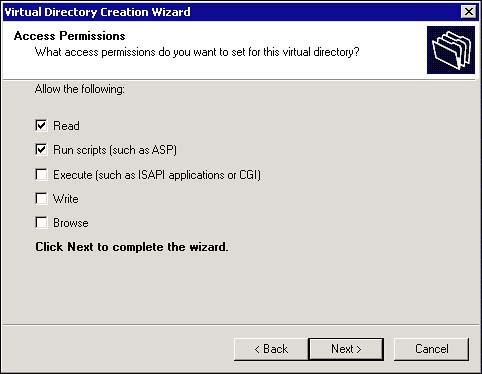
The next screen is one that many developers have never stopped to read. It regards the access permissions that are needed on the site. Because you are not using ASP to call COM/COM+ objects, and because your settings here have no effect on ASP.NET, you can leave the settings as shown in Figure 13.6 and click Next. Since you are setting up forms authentication, the anonymous user needs to have access to the site. Also, the isolation settings for the site have no effect on the ASP.NET Web site.
Figure 13.6. Access Permissions.
-
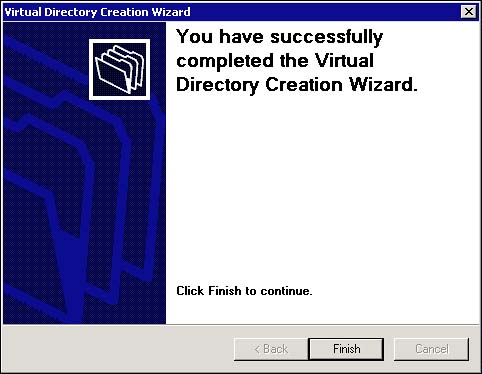
The final screen is just a confirmation that everything has been completed. Simply click Finish. This screen is illustrated in Figure 13.7.
Figure 13.7. Wizard complete.
NOTE
This could have been done as well with Visual InterDev or FrontPage. It was illustrated via the previous steps to point out specifically where the access permissions come from when establishing a site.
Making the Site with Visual Studio.NET
If you followed the steps in the previous section, and made the site without using Visual Studio.NET, note that you will have to delete that virtual directory, "FormAuth," from IIS before completing the steps in this section.
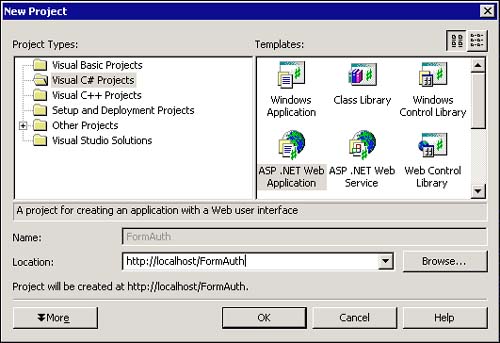
From Visual Studio.NET, create a new C# Empty Web Project. To do this, select File, New, Project from the menu. Type the project name FormAuth in the dialog provided. Click the OK button. Where this project is stored on your hard drive will vary based on your configuration. It should look like Figure 13.8.
Figure 13.8. New Project dialog.
NOTE
If you were to select a project of type "ASP.NET Web Application", the web.config file will be created automatically
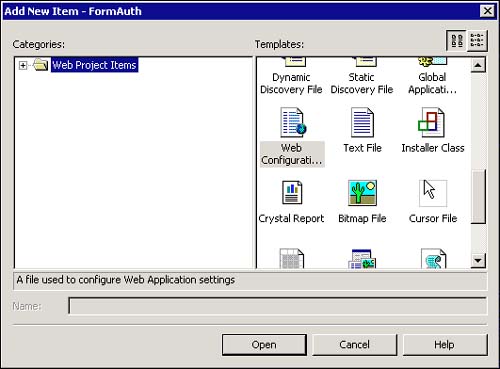
Now that the Web and project have been created, you need to create a configuration file to tell the Web that you will be using Forms-based authentication. In the IDE, add a new file to the project called web.config . To do this, right-click the FormAuth folder in the project view, select Add, Add New Item. From the Templates panel, in the Add New Item dialog, double-click Web Configuration File. This is shown from a Visual Studio.NET perspective in Figure 13.9.
Figure 13.9. Add New Item dialog.
The first element you are going to alter is the authentication mode element. Listing 13.1 is an unaltered code listing from what the VS.NET Wizardgenerated file produces when you add a new Web configuration file through the IDE.
Listing 13.1 Partial Web.config File
<!-- AUTHENTICATION This section sets the authentication policies of the application. Possiblemodes are "Windows", "Forms", "Passport" and "None" --> <authentication mode="Windows" />
You are first going to change this element's value to Forms . The next thing to do is deny access to anonymous users. To do this, you will add the authorization element under the system.Web element. Authorization is discussed in detail in Chapter 15, "Authorization: Control Who Is Accessing Your Site." Listing 13.2 shows the complete code for this sample's web.config file. In this sample, note the user element that contains a plain-text username and for a password, a SHA-1 hash. The password for this sample is password .
Listing 13.2 Complete web.config File
<?xml version="1.0" encoding="utf-8" ?> <configuration> <system.Web> <compilation defaultLanguage="c#" debug="true" /> <customErrors mode="Off" /> <authentication mode="Forms"> <forms name=".NETBOOKDEMO" loginUrl="login.aspx" protection="All" timeout="30" path="/"> <credentials passwordFormat="SHA1" > <user name="user@domain.com" password="5BAA61E4C9B93F3F0682250B6CF8331B7EE68FD8"/> </credentials> </forms> </authentication> <authorization> <deny users="?" /> </authorization> <trace enabled="false" requestLimit="10" pageOutput="false" traceMode="SortByTime" localOnly="true" /> <sessionState mode="InProc" stateConnectionString="tcpip=127.0.0.1:42424" sqlConnectionString="data source=127.0.0.1;user id=sa;password=" cookieless="false" timeout="20" /> <globalization requestEncoding="utf-8" responseEncoding="utf-8" /> </system.Web> </configuration>
Notice the introduction of the forms element. This element allows you to configure the actual aspects of the form or forms that will be used on your site for authentication. Table 13.1 shows the possible attributes to include, what their values can be, and includes a brief explanation of the attribute. Table 13.2 shows specifics about the protection attribute.
Table 13.1. Forms Element Attributes
| Attribute | Possible Values | Description |
|---|---|---|
| loginURL | Any valid URL, default is login.aspx | Where a user is redirected if login fails. |
| name | Any valid HTTP string as a name for the cookie, default is .ASPXAUTH | This is the name of the cookie that the application will use. If you intend to have more than one application running on the same server, this value should be unique. |
| timeout | Any valid integer, default is 30 | This is how long the cookie will live on the user's machine. This is a sliding value, meaning that it expires x minutes from the last time the cookie was updated, not from when the user started the session with the site. |
| path | / (default) or other string | This represents where the cookie is stored on the client. |
| protection | All (default), None , Encryption , Validation Note: these parameters are case-sensitive | This attribute sets the method used to protect the cookie data. The options are listed in detail in Table 13.2. |
Table 13.2. Possible Protection Attribute Values
| Attribute Value | Description |
|---|---|
| None | Does nothing. While this is the least secure, there are no performance hits. |
| Validation | Checks to see if the cookie has been altered since the last visit. Does not encrypt or decrypt a cookie. |
| Encryption | Encrypts the cookie using either DES or 3-DES (default, if available). Does not validate that contents have not been altered since last visit. |
| All (default) | Encrypts and validates the cookie. |
To see all of this in action, have a look at the code for what is being executed. Listing 13.3 shows the complete login.aspx file.
Listing 13.3 is a sample of the cookie contents created in this sample site, once a successful login has occurred, with the protection attribute set to All and an authentication mode of "Forms". Notice that all of the user information contained within is encrypted.
Listing 13.3 Sample Cookie Contents
.NETBOOKDEMO F55C7E54A47424392E1566A04A411394C31B32791ABCC0C200B0FB93793873F980B5DFC6915335
Now, you have a site with no pages that no one can access, the ultimate secure site. Unfortunately, reality dictates that you must provide some content. The reason for this approach is simple. Start with the most secure you can be, without regard to the application, and work backwards . The next step will be to add a page that serves as your login page. It does not have to be elaborate, and for this example it won't be. Just a couple of simple .aspx files with the necessary text boxes and Submit button.
That is all it takes to create and enable an ASP.NET application that uses Forms-based authentication.
Using Impersonation in ASP.NET
Impersonation is the process by which an application runs as a user. In ASP, this was always on by default; in ASP.NET, it is not. As with all application development, it is important to remember that no application should ever run as an administratorunless there is irrepressible proof that it must. Even though .NET introduces managed code, this code could still be making calls to objects and executables written prior to .NET. This opens a security risk when it becomes possible to open an unchecked buffer in an application configured to run as an administrator from a .NET-managed application. One suggestion, especially for COM- and COM+based applications is to create a user specifically for that application and grant him or her the explicit rights needed. For example, a COM/COM+ application that writes files using the COM-based Scripting.FileSystemObject library running as an administrator means that anybody or anything that accesses that object is now an administrator, and any code running in it will run as such. Creating a user called MyApp with read/write privileges on a directory used by your application is far safer. This is also a far more intelligent decision than granting IUSR_MACHINENAME administrative rights. For certain developers, this is what has happened . Many created in-process COM objects that did not use MTS or COM+ to help manage things, like context, and ended up with a .dll that ran in the same process space as IIS. While a nifty performance trick, it meant that your code ran with the same rights as IIS, usually SYSTEM . So now your code, albeit I'm sure you did a good job, is running on the Internet with SYSTEM privileges. However, if your code was written as an ISAPI extension, IIS would use an impersonation token. Usually, this token was that of IUSR_MACHINENAME unless otherwise configured.
Thankfully, ASP.NET does not have to suffer from this. Not only does it not suffer from this kind of security issue, it has protected itself from IIS's default settings as well. The ASP.NET worker process as well runs, by default, as the ASP.NET user, which is by default a member of the Users group.
Here's why. ASPNET_ISAPI.dll is not just a beefed up ASP.dll that we all know and love. It merely passes your request to ASP-NET_WP.exe through a named pipe. This creates an out-of-process worker. There is a file in the %WINDIR%\Microsoft.Net\Framework\%VERSION%\CONFIG directory called machine.config . In that file, you will find an element called processModel . In that element, you will find the attributes username and password . This is the account that ASP.NET applications will run as. Because you don't want to place plain-text passwords in a flat file, it is advisable that you use the machine account as shown in Listing 13.4.
Listing 13.4 Section of machine.config
userName="Machine" password="AutoGenerate"
So what does this do? It causes ASP.NET to run at a higher isolation level. ASPNET_ISAPI.dll now calls LogonUser and CreateProcessAsUser and executes with the limited permissions of IWAM_MACHINE or whatever account you set up in the processModel element. The process of modifying the remote identity of service that is set to execute as one user is referred to as impersonation.
Passport Authentication
Passport technology has been expanded to allow all developers to utilize this authentication technology on their sites. This feature adds a single source for authentication and user information without having to worry about integrating your code or data. The PassportAuthenticationModule provides a wrapper around the Passport SDK for ASP.NET applications and provides Passport authentication services and profile information from an IIdentity -derived class called PassportIdentity . As is the case with WindowsIdentity , the primary purpose of handling the PassportAuthentication_OnAuthenticate event is to attach a custom IPrincipal object to the context. A special IIdentity -derived class called PassportIdentity provides an interface to the Passport profile information and methods to encrypt and decrypt Passport authentication tickets. Much concern has arisen at the time of this writing as to just how secure using a public service to log in your private users really is and how much of that private user's information must be stored on the public server. In most cases, the Microsoft Passport servers need an email address and a country of origin. There is no foundation to claims that Microsoft is reading additional information placed in cookies from other sites that use Passport authentication.
To implement Passport authentication in an ASP.NET application, do the following:
-
Download, install, and configure the Passport SDK from http://www.passport.com/business. You must register to obtain the SDK. There is a fee involved for actually subscribing to the Microsoft Passport server. Details may be found at http://www.passport.com.
-
Set up Passport as the authentication mode in the application configuration file as follows :
<authentication mode= "Passport"> </authentication>
As with Forms authentication, Passport authentication provides you with a redirectUrl attribute that serves the same purpose as the loginUrl attribute on a forms element.
| for RuBoard |
EAN: 2147483647
Pages: 235