Creating and Assigning Materials and Effects
|
| < Day Day Up > |
|
Let's begin with the stars. In this lesson, we decided not to use the automatic generation of a starry sky in order to demonstrate the most universal method to create the Environment, be it starry sky, city panorama, or marine view.
There are two spherical starry sky textures included in 3ds max — Stars10.jpg and Stars8.tif. The format of the first one (JPEG) compresses and degrades image quality and is therefore unacceptable in our case. The second file is better, because TIFF files do not degrade image quality.
| Tip | You can find similar files on the Internet (e.g., NASA websites). Be sure to look at the licensing agreement closely, for such files are not always free for commercial use. |
This file should be touched up in a raster graphics editor. You will notice that the stars are dim and multicolored. If you saw the Stanley Kubrick film "2001: A Space Odyssey" — the most realistic science fiction movie on space exploration — you might have noticed that the stars are bright dots filling the entirety of space. Color is not important; only size and intensity matter. It is easy to achieve by adjusting contrast and color saturation in any 2D graphics editor.
We only need part of this file, because we will "pull" the texture over the area created by extrusion (Extrude) of the Arc. The vertical size will be determined by the Amount parameter of the Extrude modifier, but we need to know the width-to-height ratio of the arc to determine the horizontal size. How can we measure it?
We can use a special utility in 3ds max called Measure.
-
Select the Stars object.
-
Deactivate all modifiers, including Extrude, in the modifiers stack on the control panel by "turning off" the lamp to the left.
-
Go to Utilities on the control panel while maintaining the selection.

-
Press Measure to calculate the length of the Shapes group. (We have about 640 units.)

Activate the modifiers for the Stars object and calculate the Amount parameter of the Extrude modifier. (We have about 200 units.)
| Tip | Since we have already configured the animation, we can minimize the dimensions of the Stars object by moving it as required and changing the Amount parameter of the Extrude modifier, so that it perfectly fits within the camera view. |
Now, we know the width-to-height ratio we need for the image. Based on that, cut out an area somewhere near the center. Since our sector slightly exceeds 180°, we used a piece measuring 1500 × 480 pixels.
You can make your own file, or use ours: Lessons\Lesson05\Scenes\stars.tif on the CD-ROM.
-
Open the material editor, select any preview window, and rename the material Stars.
-
Assign the
 Stars.tif file to the Diffuse texture channel.
 -
Set Self-Illumination to 100%.
-
Make the material two-sided.
-
Drag-and-drop the material on the Stars object and display the material in the viewports using the Show Map in Viewport button.

-
To be on the safe side, deactivate shade casting and receipt from other light sources in the parameters of the Stars object:
-
Context menu à Properties à General à Rendering Control à Receive Shadows and Cast Shadows
-
Now, it is time to discuss Motion Blur, which occurs when filming moving objects — "smear," as cinematographers call it. Using blur makes the image more realistic, but necessarily leads to a loss in sharpness. There are several methods for using blur in 3ds max. They can be divided into two groups: blur applied to objects and blur applied to the whole scene. Let's discuss them and choose the most suitable one for our scene.
Object Motion Blur is the oldest, rooted in 3D Studio for DOS. When rendering, several copies of the object's image are shifted relative to each other (as a rule, the amount it would move during the course of a frame) and merged together. The drawbacks of this method are that the rendering time is considerably increased, and that the blur is applied to the object, not to its shadows or reflections. The advantage is that the object clearly intended will be blurred. To apply this method, adjust the parameters of the target object and check the appropriate flags in the rendering parameters (Fig. 5.8):
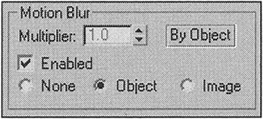

Figure 5.8: Object Motion Blur and Image Motion Blur settings
-
Main menu à Rendering à Render à MAX Default Scanline A-Buffer à Object Motion Blur
Rendering Image Motion Blur takes much less time and gives higher quality results, when the motion of an object is more or less smooth. If the object makes sharp turns or simultaneously rotates, then you get nothing but an obscure mess. Moreover, when objects with this type of blur are overlapped, other unpleasant effects take place. In other respects, this method suffers the same drawbacks as Object Motion Blur. It is activated and employed in a similar way in the effects menu, mainly for quick adjustment.
When should we use these methods? They are primarily employed for objects that move quickly relative to a static or slowly moving camera.
| Note | We recently gave up explicitly using blur in 3ds max. The reason is that Rich Pixel Format (RPF) files can now record speed and direction data into a special Velocity channel for use in Discreet Combustion and better results in a shorter period of time. In addition, blurring the whole scene, either in Combustion or After Effects, makes the capability rather superfluous in any 3D package. Consideration of this and other techniques combining 3ds max and Combustion is beyond the scope of this book. However, if you really want to animate 3D graphics professionally, pay attention to it, especially since the price of the latest version (Combustion 2.1) is much lower than those of for previous versions and other professional video editing packages. |
Our case is somewhat different. The camera actively rotates while tracking the spaceship, so we should not blur the whole scene.
3ds max has two types of "global" blur.
The first one uses the Video Post module during rendering. It is obsolete and therefore inappropriate for us to use. The module itself is not bad for some things, such as simple video editing, but we will not consider it further.
The second method appeared in the fourth version of 3ds max and is called Multi-Pass Motion Blur. It is the most resource-consuming method, but also the most "correct." We recommend that you use it.
-
Switch to the camera view by pressing the <C> key.
-
Select the camera via the viewport's context menu.
-
Go to an intermediate frame that only contains stars (e.g., the 0:1:0 frame — 1 second).
-
Make a Quick Render of the scene:
-
Main panel à Quick Render (Production)

-
You should get a starry sky, a portion of which is shown in Fig. 5.9, a.
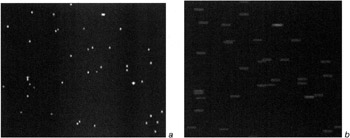
Figure 5.9: Starry sky unblurred (a) and blurred (b)
-
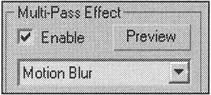
In the camera parameters, Enable the Multi-Pass Effect, select Motion Blur in the drop-down menu, and make another quick rendering.
To tell you the truth, the result leaves something to be desired (Fig. 5.9, b).
3ds max is not to blame. It did what it's supposed to: blur the image by averaging the saturation values. This would work if, for example, we were looking at a mountain landscape. As for a starry sky in outer space, however, such a procedure is not appropriate. We could have done the same thing with bright and extruded lines.
This is a topic deserving more serious discussion. Computer images with "8 bits per channel" are composed of pixels with a brightness from 0 (corresponding to black) to 255 (corresponding to white). In reality, this range is much wider, reaching into the millions. In most cases, neither film nor videotape can handle such a range, but they can still show "flashes" from bright objects, such as stars — you likely have seen it many times. There are several methods to avoid this limitation, including High Dynamic Range Imaging (HDRI), but 3ds max does not support them without additional modules from third parties.
We attempted to solve this problem with the standard tools in 3ds max, but we gave up.
First, we tried using Lens Effects. Their name suggests effects performed on light entering the lens, but they are used for many purposes — we once managed to produce a very convincing fire with them. In this case, we decided to use the Glow effect on the Stars object. Turning off brightness, we tried to adjust them so that only parts of the object were glowing. Everything went OK! Our excitement quiclky ended, though. We tried rendering the last frames, when the Moon occupies most of the picture, and got a stray glow at the edge of the Moon. We initially decided to let it stand, because we can use depth cutoff (Z-Buffer) in the effect settings. Unfortunately, we still failed to obtain the desired result. Looking at the channels employed in 3ds max to create the effects, we discovered an unpleasant fact: When the channels are created, Camera Motion Blur is not taken into account. The Render Effects Per Pass flag in the multipass effects parameters was similarly useless, rendering the effects in the same way.
We wanted to give up blurring the stars completely, but something stopped us and, after greater consideration, we managed to find a solution!
Let's take a closer look:
-
First of all, we decided to abandon blurring the whole scene in favor of blurring individual objects. To do so, deactivate the Enable flag in the Multi-Pass Effect.
-
Select the Earth, Moon, and StarShip-Base objects.
Tip You can do this quickly with the selection-by-name command: Press the <H> key, choose the objects while holding the <Ctrl> key, and press Select.
-
Open the properties window for the objects:
-
Context menu à Properties
-
-
Enable Motion Blur and use the Object type.
-
Select the Stars object and go to its property window.
-
Enable Motion Blur and use the Image type.
-
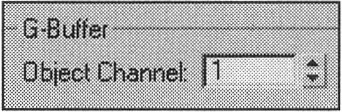
Set the Object Channel parameter to 1 in the G-Buffer group.
-
Ensure blur will be rendered in the parameters window:
-
Main menu à Rendering à Render à MAX Default Scanline A-Buffer à Object Motion Blur and Image Motion Blur à Apply
-
-
Open the effects settings window:
-
Main menu à Rendering à Effects
-
-
Press the Add button and select Lens Effects. Rename the added effect Lens Effects - Stars. We will use at least one more lens effect to simulate the Sun later.
-
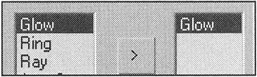
Select Glow in the Lens Effects Parameters drop-down menu and transfer it from the left to the right window usine the > button.
-
Select the effect and specify the parameters shown in Fig. 5.10.
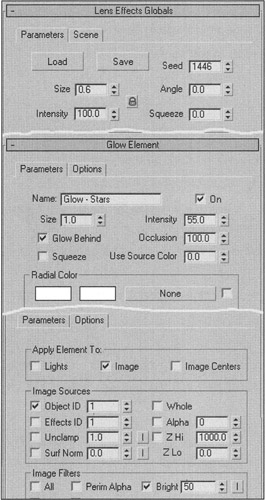
Figure 5.10: Parameters for the effect
| Explanation | To apply changes to the settings, use the Update Effect button in the Preview group of the Effects menu. If your computer is powerful enough, you might want to check the Interactive flag, which will keep you from constantly pressing this button. Move the time control slider to the frame where only stars are rendered (e.g., 0:1:0). We should change the parameters in the order below. On the Glow Element rollout, Options tab:
On the Parameters tab of the same rollout:
On the Lens Effects Globals rollout, Parameters tab:
The rest of the parameters are not used and can be left unchanged. |
Since we started to create effects, we might as well create them for the Sun, too:
-
Go to the frame starting the motion of the StarShip-Base. (Our frame is 0:5:0.) Position and resize the Sun (Dummy_Sun light source) and Earth objects so that both are fully visible in the camera view. If necessary, scale the Earth by all coordinates (Uniform Scale).
Tip Sometimes, it is worthwhile to display the so-called "safe frame" (Viewport context menu à Show Safe Frame). It will show the objects that will be included in final rendering.
-
Create a new group of lens effects in the Effects window. We named it Lens Effects-Sun.
The parameters for these effects are slightly different and contain more elements. Before we proceed, let us briefly consider all of the different lens effects (Fig. 5.11):
-
Glow is a halo around a bright object. You can see it everyday. (There is one around street lights in foggy weather.)
-
Ring is also a halo, formed under the same conditions, but it is an atmosphere more than a lens effect.
-
Ray, on the other hand, is related to optics and its imperfections. Sometimes, photographers use special filters to obtain this effect.
-
Auto Secondary and Manual Secondary reflections are parasitic effects that form when light goes through the lenses of the camera. Sometimes, they appear as a polygon, depending on the aperture.
-
Star extends streaks of light from bright spots. It is very effective on the surface of water, on snow, or to imitate fireworks.
-
Streak is self-descriptive, often seen as a flash in photographs and movies.
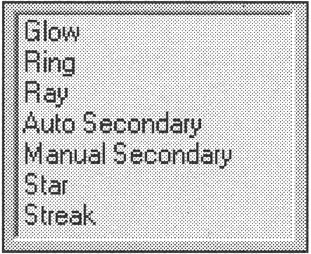
Figure 5.11: Lens effects
Which ones should we use?
We can use a halo for the Sun. Another halo can be used for the corona. To be completely honest, it is difficult to see the corona at such a distance in outer space without a filter, but we will create one for appearance. If we use blur, that implies using the camera with Rays and secondary reflections.
Setting the lens effects is a precise and interesting task, and describing all of its aspects could fill dozens of pages. If you know what you want to do, try making your own effects by combining several elements.
You can use our effect on the CD-ROM in Lessons\Lesson05\Plugcfg\ ![]() Lens Effect - Sun.lzv.
Lens Effect - Sun.lzv.
-
Add another lens effect:
-
Effects à Add à Lens Effect
-
-
Load
Lens Effect - Sun.lzv:-
Lens Effects Globals à Parameters à Load
-
-
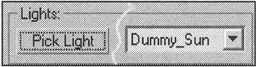
In the same menu, pick the light source for the effect (Dummy_Sun):
-
Lens Effects Globals à Parameters à Pick Light
-
-
By selecting an element of the effect on the list to the right, you can then edit its parameters.
| Tip | If you decided to make your own effect, create each element separately and add them gradually. |
The first element in the list (we named it Sun Inner Glow) should give a bright, sharp disk (Fig. 5.12, a). We did so by setting a high Intensity of up to 200 and making the Falloff Curve steeper (Fig. 5.12, b):
-
Glow Element à Parameters à Radial Color à Falloff Curve
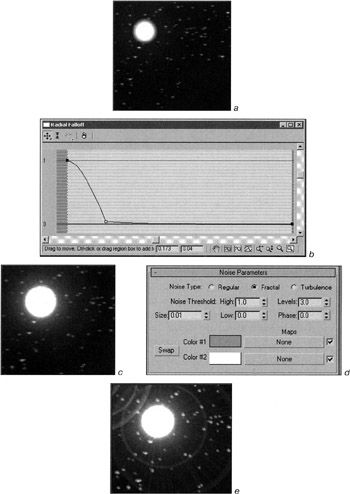
Figure 5.12: Setting the lens effects simulating the Sun
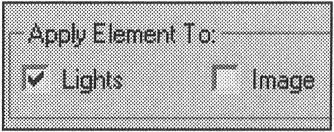
We only assigned our elements to lights (not the image):
-
Glow Elementà Options à Apply Element to
The next element — Sun Glow Crown — is set as previous elements except for a lower intensity, a slightly different falloff curve, and use of the Noise texture on the Radial Color channel, giving a blurred contour to the effect (Fig. 5.12, c). To do this, we transferred the texture from the "Map #1" button into a preview window of the material editor by inheritance (Instance), and set its parameters (Fig. 5.12, d).

The rest of the elements are just as easy to set. We finished with the effect shown in Fig. 5.12, e.
When effects (including lens effects) are used, it is important to recognize that they are applied from top to bottom, summing the individual intensity values along the way. Try to switch places of the Lens Effects-Stars and Lens Effects-Sun, and you'll get a hideous result.
-
Save your version of the effect for use in the future.
We have now reached the materials for the Earth and the Moon.
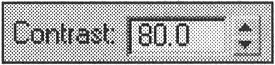
The space.mat library of 3ds max contains materials for these celestial bodies. We used the Space_Moon material for the Moon. The only thing to do is to enhance the contrast of the Moon_Sun and make its light yellowish:
-
Control panel à … à Advanced Effects à Contrast à 80
We created our own material for the Earth, which does not require a light source.
The structure of that material is shown in Fig. 5.13, a.
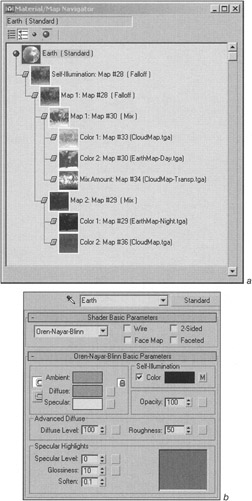
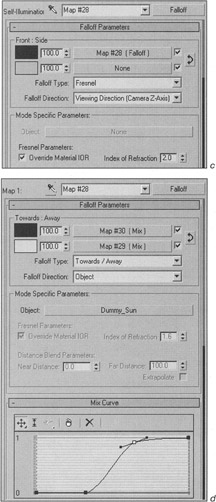
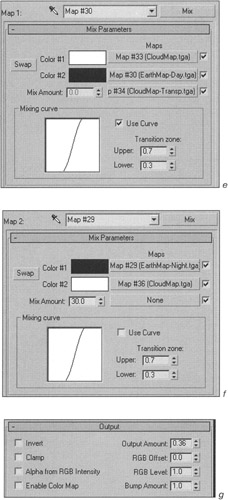
Figure 5.13, a and b: Structure of the Earth material (a) and parameters of its elements (b)
| Explanation | We started with the standard material and Oren-Nayar-Blinn shader (Fig. 5.13, b). This shader gives a "softer" feel to the object. As you can see, we only used the texture on the Self-Illumination channel, where we also used color. This is why the Diffuse color is left neutrally gray. The first texture level is of the Falloff type, with parameters that give a thin blue halo (Fig. 5.13, c). We used Fresnel as the attenuation type. This type is primarily used to simulate glass, but it also works in our case. The Side channel was assigned a blue color, because it is responsible for the halo. The Front channel uses the same type of texture, but with different settings (Fig. 5.13, d). Towards/Away is used as the attenuating type, and Object defines the direction of attenuation (surfaces facing toward and away). Sun_Dummy is selected as the controlling object, and the mix curve was given non-linear attenuation. Mix textures were assigned as sub-textures (Sub-Map) for the day and night sides of the Earth. The day side (Fig. 5.13, e) consists of two sub-textures from raster images — The night side (Fig. 5.13, f) also consists of two sub-textures — |
You can find our result in the ![]() lesson05-04.max file.
lesson05-04.max file.
|
| < Day Day Up > |
|
EAN: N/A
Pages: 136