Selecting Cells Whenever you click a cell or press Enter, Tab, or one of the arrow keys to move to a cell , you select the cell, and Excel displays a dark outline around the cell, called the selector . You typically select a single cell to type or edit an entry. Many times, however, you need to select multiple cellsa block or range of cellsperhaps to apply the same formatting to several cells or to total the values in multiple cells. The following sections show you how to select and work with cell ranges. Selecting a Cell Range A range consists of two or more cells on a sheet; the cells can be neighboring or nonneighboring. The only trick to selecting cells is making sure Excel is not in Edit mode; Excel does not allow you to select cells when you're in the middle of typing or editing an entry. If you are typing or editing an entry, click another cell to exit Edit mode. Then perform one of the following steps to select a range: -
To select neighboring cells with your mouse, click the cell in the upper-left corner of the range, and then hold down the left mouse button while dragging the mouse pointer down and to the right until it reaches the cell in the lower-right corner of the range. See Figure 4.10. Figure 4.10. You can click and drag to select a range.  -
To select neighboring cells with the keyboard, move the selector to the cell in the upper-left corner of the range, and then hold down the Shift key and use the down-arrow and/or right-arrow key to extend the selection to the cell in the lower-right corner of the range. -
To select nonneighboring cells with your mouse, select the cell or range as explained previously and then hold down the Ctrl key while selecting additional cells or ranges. -
To select an entire row, click the row's number at the far left of the row. -
To select an entire column, click the column letter at the top of the column. -
To select the same range on two or more worksheets, select the worksheets before selecting the range. See Chapter 3, "Working with Workbook Files," for instructions on selecting worksheets. Tip  | To select a range of neighboring cells with the Go To feature, press the F5 key or Ctrl+G to display the Go To dialog box. Type the address of the cell in the upper-left corner of the range, followed by a colon and the address of the cell in the lower-right corner of the range; for example, type b5:h18 . Press Enter . |
Naming Cell Ranges You can treat the individual cells as a group of cells by naming the range. After a range has a name , you can quickly select it using the Go To command. You can also perform mathematical operations on the values contained in the range. For example, if you have a range named Income that contains cells in which you type the amount of each of your paychecks , you can enter the function =SUM(Income) to determine your total pay. (You can name individual cells or ranges.) To name a cell or range, follow these steps: -
Select the cell(s) you want to name. -
Click in the Name box on the left end of the formula bar. (This box displays the selected cell's address.) -
Type a brief, descriptive name for the range, as shown in Figure 4.11. Names can include up to 255 characters (no spaces allowed), but try to use a name that's 10 characters or fewer. You don't want to type a long name whenever you use the Go To feature or use the name in a formula. Figure 4.11. You can name a single cell or a range. 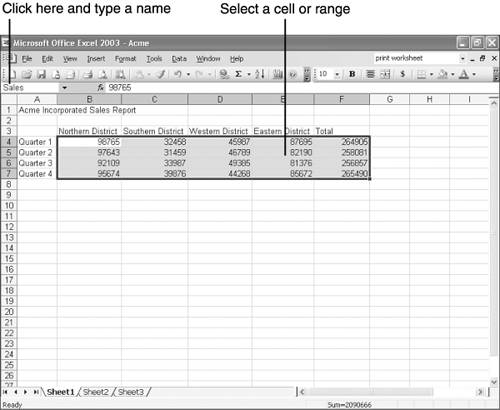 -
Press Enter . The name appears in the Name box. |