Connecting to Your Camcorder

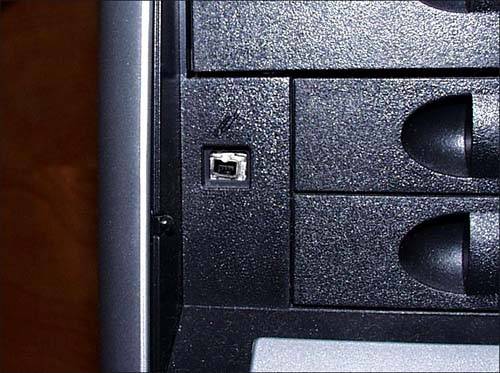
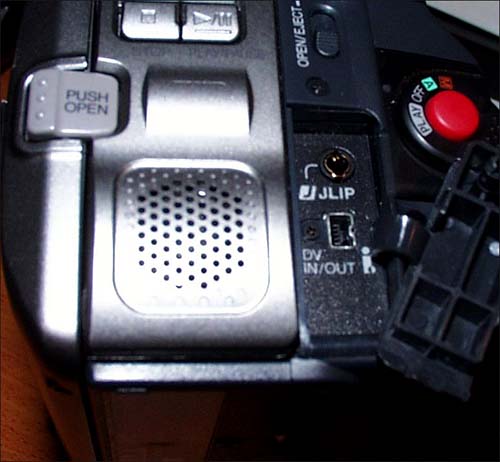
The first step in making your masterpiece is to move your "raw footage" from the camcorder to your Media Center PC. Start by taking stock of your connection situation. This means literally taking a hard look at your camcorder to determine its video output options, and then scrutinizing your Media Center PC to check out its video input capabilities. Obviously, the goal is to find a match.

Most, if not all, Media Center PCs support a FireWire (IEEE-1394) high-speed connector for just this purpose. If you have a reasonably recent model of camcorder, chances are that you will have a match in terms of a 1394 input on the PC (see Figure 10.1) and a 1394 output on the camera (see Figure 10.2). If you do, count your blessings, because you're about to find out what great engineering is all about.

Figure 10.1. This close-up of the IEEE-1394 FireWire input port on a Media Center PC is your best bet for high-quality , high-speed transfers of video from your camcorder.

graphics/10fig01.jpg

Figure 10.2. This close-up of the IEEE-1394 FireWire port on the back of a JVC Digital CyberCam ( marked "DV IN/OUT") provides a perfect match for transferring digital video data to the FireWire port on a Media Center PC.

graphics/10fig02.jpg

graphics/noteguy_icon.gif

Remember that if you connect your camcorder video to your PC using an S-Video cable, you will still need to connect an audio cable of some kindunless you have decided to capture the spirit of the Silent Movie Era. You may opt for a cable that connects the twin RCA-type audio output jacks to a 1/8-inch stereo plug (see Figure 2.4 in Chapter 2 for an example of a 1/8-inch-to-RCA Y-patch cable).


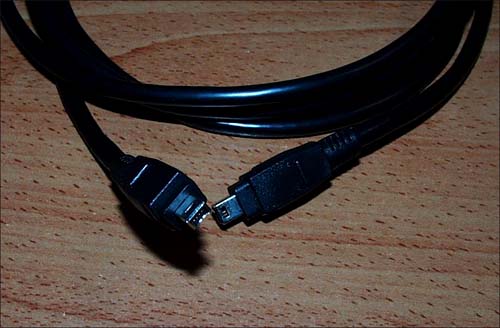
FireWire technology, first introduced on PCs made by Apple, is more than just a superfast serial bus connection. When you connect a new device using FireWire, the system automatically recognizes the device, and generally knows what to do with it. You'll see that in action a little later in this chapter.

However, if you don't have FireWire connectivity, you'll probably need to establish an analog connection to transfer video from your camcorder to your PC. Find yourself a match (camcorder output, PC input) using RCA type connectors, coaxial cables, or S-Video. (For examples of these connector types, see Figure 2.2 in Chapter 2.)

Making the Connection

The first thing you'll need is the right cable. If you are lucky enough to be able to connect directly and digitally via FireWire, you'll need a 1394 cable, such as the one shown in Figure 10.3.

Figure 10.3. A 1394 FireWire connector cable like this may or may not be included as standard equipment with your camcorder or your PC.

graphics/10fig03.jpg

Plug one end of the cable into the 1394 receptacle on your camera, and the other end into its counterpart on the PC, and you're in business.

Capturing Video

After you have the cables connected, do the following:

  1. Switch the camcorder on. In a moment, the PC will sense the new device and display a pop-up window such as the one shown in Figure 10.4.

    Figure 10.4. This What Do You Want Windows to Do? window allows you to establish a video capture connection between your camcorder and a video editing application.

    graphics/10fig04.jpg

    graphics/noteguy_icon.gif

    Although Windows Movie Maker is a free program that comes bundled with Windows XP, many other excellent video capture and editing programs are available for the Windows platform from third-party software developers such as Adobe, Ulead, and Roxio. If you do decide to stick with the least expensive option (it's hard to beat free), make sure that you've got the most up-to-date version of Windows Movie Maker by visiting www.microsoft.com/windowsxp/moviemaker and downloading the latest revision.


  2. With your mouse, select Capture Video Using Windows Movie Maker. If you're reasonably sure that you'll want to do the same thing every time you connect your camcorder, you can also check the box that says Always Perform the Selected Action.

  3. Click OK.

  4. In the following pop-up screens, select your camcorder device, and specify a name and location for your captured video. The default video storage location is the My Videos folder.

  5. The Video Capture Wizard will then ask you to pick a video capture rate (see Figure 10.5). The recommended setting is Best Quality for Playback on My Computer, which captures the video using an eye-pleasing 640-by-480-pixel resolution and 30 frames per second.

    Figure 10.5. If you are planning to edit your video on the PC, and then record your final movie back to tape on your camcorder, Windows Movie Maker recommends selecting the DV-AVI video setting.

    graphics/10fig05.jpg

  6. Choose between capturing the entire tape automatically and capturing parts of the tape manually. The simplest method is simply to capture the entire tape. You can always edit it down to size after it has been stored on your PC.

  7. Click Next, and Movie Maker will begin capturing your video.

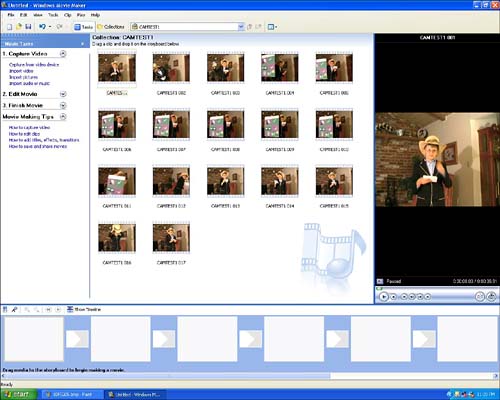
After the video capture is complete, Windows Movie Maker will open a project page displaying your video as a series of scenes (see Figure 10.6). Now you're ready to begin the editing process and create your movie.

Figure 10.6. Windows Movie Maker automatically divides your video into segments, or scenes, so you can drag and drop them onto the storyboard.

graphics/10fig06.jpg


Absolute Beginner's Guide to Microsoft Windows XP Media Center
Absolute Beginners Guide to Windows XP Media Center
ISBN: 0789730030
EAN: 2147483647
Year: 2002
Pages: 159
Authors: Steve Kovsky

flylib.com © 2008-2017.
If you may any questions please contact us: flylib@qtcs.net