5.1.1 Problem You want to create a custom control that combines two or more HTML controls. 5.1.2 Solution Use the .NET language of your choice to: -
Create a class that inherits from the Control class in the System.Web.UI namespace. -
Override the Render method to have it output the HTML controls you wish to include. -
(Optional) Use the HtmlTextWriter class to enhance your chances of writing well- formed HTML. To use the custom control in an ASP.NET page: -
Register the assembly containing the control. -
Insert the tag for the custom control anywhere in the page. Figure 5-1 shows the output of a custom control that combines a label and text box. Example 5-1 and Example 5-2 show the VB and C# class files for the custom control. Example 5-3 shows how to use the custom control in an ASP.NET page. Figure 5-1. Basic custom control output 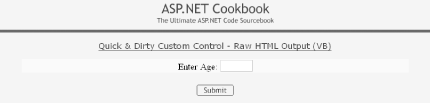
5.1.3 Discussion To create a custom control that combines the functionality of two or more HTML controls, you first create a class that inherits from the Control class in System.Web.UI . The Control class is the base class that all ASP.NET server controls inherit from. It provides all of the basic properties, methods , and events necessary to build custom controls. The only method of Control that is required to output HTML is the Render method. Render is responsible for writing the HTML that will be rendered by the browser. To enhance your ability to write well-formed HTML, you can use other methods of the HtmlTextWriter class along with the HtmlTextWriterAttribute and HtmlTextWriterTag enumerations. We'll talk more about this in a minute, but for now we'll stick with writing our own unvarnished HTML. The custom control we have implemented in our example contains a label and an input control. The label and input control are output in the Render method with the following code: writer.Write("Enter Age: ") writer.Write("<input type='text' size ='3' />") writer.Write("Enter Age: "); writer.Write("<input type='text' size='3' />");
To use the custom control, the assembly containing the control must be registered in the target .aspx file. The TagPrefix attribute defines an alias to use for the namespace in the page. The Namespace attribute must be set to the fully qualified namespace of the control, and the Assembly attribute must be set to the name of the assembly containing the custom control. Here is how you register the assembly in our example: <%@ Register TagPrefix="ASPCookbook" Namespace="ASPNetCookbook.VBExamples" Assembly="ASPNetCookbookVB" %>
The custom control can be placed anywhere on the page by inserting a tag. The control to insert is identified by naming the tag with the TagPrefix followed by the class name. The tag must include the id and runat ="server " attributes for the control to be rendered on the page. This is the tag used in our example: <ASPCookbook:CH05QuickAndDirtyCustomControlVB1 id="ccQuickAndDirty" runat="server" />
In our example, raw HTML is written to the web page using the Render method. For simple HTML, this works well. As the complexity of the HTML you write increases, however, the likelihood that you'll introduce errors increases significantly. Fortunately, HtmlTextWriter includes a variety of methods that simplify the generation of complex HTML. These methods can help you with the nuances of adding HTML attributes (and values) to an HTMLTextWriter output stream, writing beginning and ending tags, flushing buffers so that all buffered data is written to the text stream, and the like. To create the input box in our example, you could use the HtmlTextWriter like this: Protected Overrides Sub Render(ByVal writer As HtmlTextWriter) 'output label writer.Write("Enter Age: ") 'output input control writer.AddAttribute(HtmlTextWriterAttribute.Type, _ "text") writer.AddAttribute(HtmlTextWriterAttribute.Size, _ "3") writer.RenderBeginTag(HtmlTextWriterTag.Input) writer.RenderEndTag( ) End Sub 'Render protected override void Render(HtmlTextWriter writer) { //output label writer.Write("Enter Age: "); //output input control writer.AddAttribute(HtmlTextWriterAttribute.Type, "text"); writer.AddAttribute(HtmlTextWriterAttribute.Size, "3"); writer.RenderBeginTag(HtmlTextWriterTag.Input); writer.RenderEndTag( ); } // Render
One advantage of implementing the Render method in this way is that you can use the RenderBeginTag and RenderEndTag methods to output HTML and sidestep having to insert the < , / , and > characters yourself. In addition, using the HtmlTextWriterTag and HtmlTextWriterAttribute enumerations ensures all tags and attributes are correctly spelled. Another advantage is that you can avoid the hassle of making sure the single and double quotes are handled correctly. Notice in the first example that the values for the attributes of the input tag were output with single quotes, since double quotes mark the beginning and end of strings. Outputting double quotes around the values would have required more complex code with string concatenations. Using the AddAttribute method avoids this problem completely.  | You must call the AddAttribute method immediately before you call the RenderBeginTag method, which writes the opening tag of the associated HTML element. This is required because the HtmlTextWriter builds a collection of attributes to output in the opening tag of the HTML element. When the RenderBeginTag method is called, the attributes are output in the opening tag and then the collection is cleared. | |
A useful enhancement to this approach would be to add HTML-style attributes to the control to make the control more adaptable and reusable throughout your applications. See Recipe 5.2 for how to do this. 5.1.4 See Also Recipe 5.2; for additional details on Control , Render , HtmlTextWriterTag , HtmlTextWriterAttribute , and especially HtmlTextWriter , search the MSDN Library Example 5-1. Quick-and-dirty custom control (.vb) Option Explicit On Option Strict On '----------------------------------------------------------------------------- ' ' Module Name: CH05QuickAndDirtyCustomControlVB1.vb ' ' Description: This class provides the quick and dirty custom control ' example which includes a label and a textbox. The Control ' is rendered by writing raw HTML to the output stream. ' '***************************************************************************** Imports System Imports System.Web Imports System.Web.UI Namespace ASPNetCookbook.VBExamples Public Class CH05QuickAndDirtyCustomControlVB1 Inherits Control '************************************************************************* ' ' ROUTINE: Render ' ' DESCRIPTION: This routine renders the HTML output of the control '------------------------------------------------------------------------- Protected Overrides Sub Render(ByVal writer As HtmlTextWriter) 'output label writer.Write("Enter Age: ") 'output input control writer.Write("<input type='text' size='3' />") End Sub 'Render End Class 'CH05QuickAndDirtyCustomControlVB1 End Namespace
Example 5-2. Quick-and-dirty custom control (.cs) //---------------------------------------------------------------------------- // // Module Name: CustomControlQuickAndDirtyCS1 // // Description: This class provides the quick and dirty custom control // example which includes a label and a textbox. The Control // is rendered by writing raw HTML to the output stream. // //**************************************************************************** using System; using System.Web; using System.Web.UI; namespace ASPNetCookbook.CSExamples { public class CH05QuickAndDirtyCustomControlCS1 : Control { //************************************************************************ // // ROUTINE: Render // // DESCRIPTION: This routine renders the HTML output of the control //------------------------------------------------------------------------ protected override void Render(HtmlTextWriter writer) { //output label writer.Write("Enter Age: "); //output input control writer.Write("<input type='text' size='3' />"); } // Render } // CH05QuickAndDirtyCustomControlCS1 }
Example 5-3. Using the quick-and-dirty custom control (.aspx) <%@ Page Language="vb" AutoEventWireup="false" Codebehind="CH05DisplayQuickAndDirtyControlVB1.aspx.vb" Inherits="ASPNetCookbook.VBExamples.CH05DisplayQuickAndDirtyControlVB1" %> <%@ Register TagPrefix="ASPCookbook" Namespace="ASPNetCookbook.VBExamples" Assembly="ASPNetCookbookVB" %> <!DOCTYPE HTML PUBLIC "-//W3C//DTD HTML 4.0 Transitional//EN"> <html> <head> <title>Quick And Dirty Custom Control</title> <link rel="stylesheet" href="css/ASPNetCookbook.css"> </head> <body leftmargin="0" marginheight="0" marginwidth="0" topmargin="0"> <form id="frmCustomControl" method="post" runat="server"> <table width="100%" cellpadding ="0" cellspacing="0" border="0"> <tr> <td align="center"> <img src="images/ASPNETCookbookHeading_blue.gif"> </td> </tr> <tr> <td class="dividerLine"> <img src="images/spacer.gif" height="6" border="0"></td> </tr> </table> <table width="90%" align="center" border="0"> <tr> <td><img src="images/spacer.gif" height="10" border="0"></td> </tr> <tr> <td align="center" class="PageHeading"> Quick & Dirty Custom Control - Raw HTML Output (VB) </td> </tr> <tr> <td><img src="images/spacer.gif" height="10" border="0"></td> </tr> <tr bgcolor ="#ffffcc"> <td align="center"> <ASPCookbook:CH05QuickAndDirtyCustomControlVB1 id="ccQuickAndDirty" runat="server" /> </td> </tr> <tr> <td align="center"> <br> <asp:ImageButton ID="btnSubmit" Runat="server" ImageUrl="images/ buttons /button_submit.gif" /> </td> </tr> </table> </form> </body> </html>
|