Problem You want to secure your web site by writing only a minimum amount of code. Solution Use ASP.NET 2.0's Membership and Role providers. The solution involves the following steps: Modify web.config as follows: Add the <authentication>, <authorization>, and <location> elements, as described in Recipe 9.3. Add a <membership> element with a <provider> element defining the provider used to authenticate users. Add a <roleManager> element with a <provider> element defining the provider used to manage the roles for users of your application.
In the .aspx file for the login page: Add a Login control. Customize the Login control as required by your application.
In the .aspx file for pages in your application, optionally add an <asp:LoginName> control to display the logged in user's name and an <asp:LoginStatus> control to provide the ability to log out. The code we've created to illustrate this solution is shown in Examples 9-15, 9-16 through 9-17. Example 9-15 shows the modifications we make to web.config to use the Membership and Role providers. Example 9-16 shows the .aspx file for the login page, and Example 9-17 shows the .aspx file for a page that displays the user's name and provides the ability to log out of the application. Discussion ASP.NET 1.x simplified the coding required to control access to pages in your application. The infrastructure to handle authentication and authorization for pages in your application requires no code in the individual pages; however, it does require you to validate the user's credentials, store the user information in a cookie, and extract the information from the cookie for each page request. Though not much code was required in ASP.NET 1.x (see Recipe 9.3), authentication and authorization can be implemented without writing any code whatsoever in ASP.NET 2.0. Two providers are available in ASP.NET 2.0 to handle authentication and authorization. The Membership provider handles the validation of user credentials and the Role provider handles the user roles to support authorization. In addition, a configuration tool is provided to support managing users and their roles. In our example application we have modified the web.config file to include the <authentication>, <authorization>, and <location> elements, as described in Recipe 9.3. These elements are used to define the type of authentication used and the roles required to access the pages in the application. To take advantage of the membership functionality, a <membership> element is added to web.config. This configures the provider that will be used to validate the user's credentials when she logs in. <membership defaultProvider="AspNetSqlMembershipProvider" userIsOnlineTimeWindow="15"> <providers> <remove name="AspNetSqlMembershipProvider" /> <add name="AspNetSqlMembershipProvider" type="System.Web.Security.SqlMembershipProvider" connectionStringName="LocalSqlServer" enablePasswordRetrieval="false" enablePasswordReset="true" requiresQuestionAndAnswer="true" applicationName="/" requiresUniqueEmail="false" minRequiredPasswordLength="1" minRequiredNonalphanumericCharacters="0" passwordFormat="Hashed" maxInvalidPasswordAttempts="5" passwordAttemptWindow="10" passwordStrengthRegularExpression="" /> </providers> </membership>
The defaultProvider attribute of the membership element defines the provider that will be used for managing users. The userIsOnlineTimeWindow attribute specifies the number of minutes after the last access the user is still considered to be online. After the specified number of minutes elapses with no activity from the user, the user is logged out. The default is 15 minutes. <membership defaultProvider="AspNetSqlMembershipProvider" userIsOnlineTimeWindow="15"> … </membership>
 | The defaultProvider attribute should always be explicitly set. Omitting the defaultProvider attribute will implicitly define the membership provider as the first provider listed within the <membership> element. This could result in unexpected behavior of your application if the list of providers is modified. In addition, you should always define the provider(s) required for your application since a provider is defined in machine.config. If your application does not define its own provider(s), the provider defined in machine.config will be used; this may cause your application to behave unexpectedly. |
|
The <membership> element contains a <providers> element with one or more <add> elements to define the provider(s) available for managing users. The name and type attributes of the <add> element are required. All other attributes are optional and are a function of the individual providers. In our example we are using the SqlMembershipProvider, which supports multiple attributes to configure the provider. Table 9-1 defines the attributes available for the SqlMembershipProvider. Table 9-1. SqlMembershipProvider attributesAttribute | Description |
|---|
name | Defines the name for the provider. Any value can be used. | type | Specifies the class used to provide the functionality for the provider. Must be set to System.Web.Security.SqlMembershipProvider for the SqlMembershipProvider. | connectionStringName | Specifies the name of the connection string used to access the SQL database used by the provider. Must be set to one of the connection strings defined in the <connectionStrings> element of web.config. Required for the SqlMembershipProvider. | enablePasswordRetrieval | Specifies if retrieval of passwords is supported. Valid values are true and false. The default value is false. | enablePasswordReset | Specifies if resetting passwords is supported. Valid values are true and false. The default value is true. | requiresQuestionAndAnswer | Specifies if a user must provide an answer to his security question when retrieving his password. Valid values are true and false. The default value is true. | applicationName | Specifies the name of the application using the membership provider. The default value is the value of the System.Web.HttpRequest.ApplicationPath property. | requiresUniqueEmail | Specifies if the membership provider requires user email addresses to be unique. Valid values are true and false. The default value is true. | minRequiredPasswordLength | Specifies the minimum length of passwords allowed by the member ship provider. The default value is 7. | minRequiredNonalphanumericCharacters | Specifies the minimum number of nonalphanumeric characters (spaces, punctuation, etc.) that must be included in a password. The default value is 1. | passwordFormat | Specifies the format in which passwords are stored in the database used by the membership provider. Valid values are Clear, Encrypted, and Hashed. Clear specifies that passwords are to be stored in plain text. Encrypted specifies that passwords are to be encrypted. Encrypted should be used when password values must be retrievable. Hashed specifies that passwords are to be stored using a one-way hash algorithm. Passwords stored in hashed format cannot be retrieved. The default is Hashed. | maxInvalidPasswordAttempts | Specifies the maximum number of attempts that can be made before the user's account is locked out. The default value is 5. | passwordAttemptWindow | Specifies the elapsed number of minutes during which the maximum number of invalid password attempts is allowed. The default value is 10. | passwordStrengthRegularExpression | Specifies a regular expression to be used to validate the strength of user passwords. The default is an empty string. |
 | In our application, we have set the minRequiredNonalphanumericCharacters to 0 to simplify the use of the example. Evaluate the security needs of your application and set the minRequiredPasswordLength, minRequiredNonalphanumericCharacters, maxInvalidPasswordAttempts, and passwordAttemptWindow attributes accordingly. |
|
To take advantage of the role management functionality provided by the Role Manager, a <roleManager> element is added to web.config. This configures the provider used to associate users with roles and support authorization as a function of the user's role. <roleManager defaultProvider="AspNetSqlRoleProvider" enabled="true" cacheRolesInCookie="true" cookieName=".ASPNETCookbookVBSecurity951Roles" cookieTimeout="30" cookiePath="/" cookieRequireSSL="false" cookieSlidingExpiration="true" cookieProtection="All" > <providers> <remove name="AspNetSqlRoleProvider" /> <add name="AspNetSqlRoleProvider" type="System.Web.Security.SqlRoleProvider" connectionStringName="LocalSqlServer" applicationName="/" /> </providers> </roleManager>
The <roleManager> element has multiple attributes used to configure the role manager. Table 9-2 defines the available attributes for the <roleManager> element. Table 9-2. RoleManager attributesAttribute | Description |
|---|
defaultProvider | Specifies the provider that will be used for role management. Should always be explicitly set to the desired provider. The default, if not specified, is the first provider listed within the <roleManager> element. | enabled | Specifies if role management is being used. Valid values are true and false. The default value is false. | cacheRolesInCookie | Specifies if user role information is cached in a cookie. Valid values are true and false. The default value is true. | cookieName | Specifies the name of the cookie used to cache the user roles. The default value is .ASPXROLES. | cookieTimeout | Specifies the time in minutes before the cookie expires. The default value is 30 minutes. | cookiePath | Specifies the path of the cookie used for storing role information. Most browsers treat the path as case-sensitive and will not return the cookie for a request that does not match the value provided for the path attribute. The result will be having the users redirected as if they were not logged in, since the role data will not be available. Unless your application requires specifying the path, we recommend that you leave the path as "/". | cookieRequireSSL | Specifies if SSL is required. Valid values are TRue and false. The default value is false. | cookieSlidingExpiration | Specifies if sliding expiration of the role cookie is enabled. If set to true, the roles cookie time to expire will be refreshed on every page request. If set to false, the roles cookie will expire at the time set when the cookie was created. The default value is true. | cookieProtection | Specifies the protection method used for the roles cookie. Possible values are All, None, Encryption, and Validation. Validation specifies that the cookie data will be validated to ensure it was not altered in transit. Encryption specifies that the cookie is encrypted. All specifies that data validation and encryption will be used. None specifies that no protection will be provided for the cookie information. The default is All and is highly recommended because it offers the highest level of protection for this authentication cookie. |
| The cookieName specified in the <roleManager> element must be different from the value specified for the name attribute in the <forms> element. The name attribute of the <forms> element specifies the name of the authentication cookie. The cookieName attribute of the <roleManager> element specifies the name of the cookie used to store user role data. If both are set to the same value, the user will be properly redirected to the first page after he is authenticated. Attempts to access additional pages in the application will result in the user being redirected to the login page. This is because the roles data overwrites the authentication data in the cookie, thus deleting the data ASP.NET uses to determine if a user is authenticated. |
|
One or more <provider> elements can be specified to define the providers available to manage user roles. In our application we are using the SqlRoleProvider. As with most providers, attributes of the element are used to configure the provider. Table 9-3 defines the attributes available for the SqlRoleProvider. Table 9-3. SqlRoleProvider attributesAttribute | Description |
|---|
name | Defines the name for the provider. Any value can be used. | type | Specifies the class used to provide the functionality for the provider. Must be set to System. Web.Security.SqlRoleProvider for the SqlRoleProvider. | connectionStringName | Specifies the name of the connection string used to access the SQL database used by the provider. Must be set to one of the connection strings defined in the <connectionStrings> element of web.config. Required for the SqlRoleProvider. | applicationName | Specifies the name of the application using the membership provider. The default value is the value of the System.Web.HttpRequest.ApplicationPath property. |
In our application, we are using SQLExpress as the data store for the user information. ASP.NET 2.0 makes creation of the database required to support membership and roles simple. If you are using Visual Studio 2005, you can select your website in the Solution Explorer and then select the WebSite  ASP.NET Configuration toolbar item. This will launch the Web Site Administration Tool as shown in Figure 9-4. ASP.NET Configuration toolbar item. This will launch the Web Site Administration Tool as shown in Figure 9-4. To manage the users and roles, select the Security tab. The security page will be displayed, as shown in Figure 9-5, with options to configure the security aspects of your application. We have configured everything required except for the creation of the users and roles. To manage the user roles, select the Create or Manage Roles link. The roles administration page will be displayed, as shown in Figure 9-6. Add the roles required for your application. For our application, we have added a User and an Admin role. Figure 9-4. Web Site Administration Tool home page 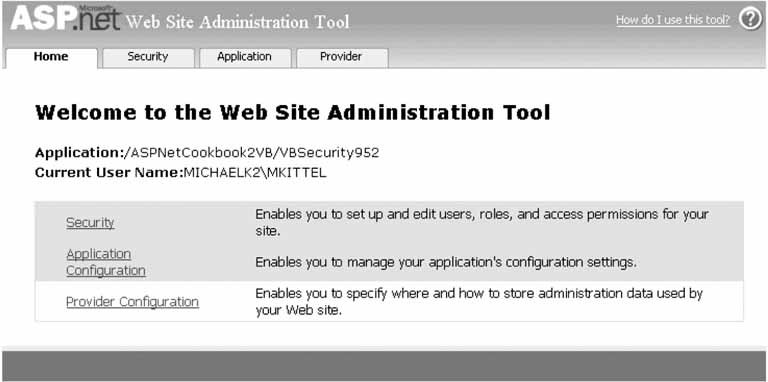
Figure 9-5. Web Site Administration Tool security page 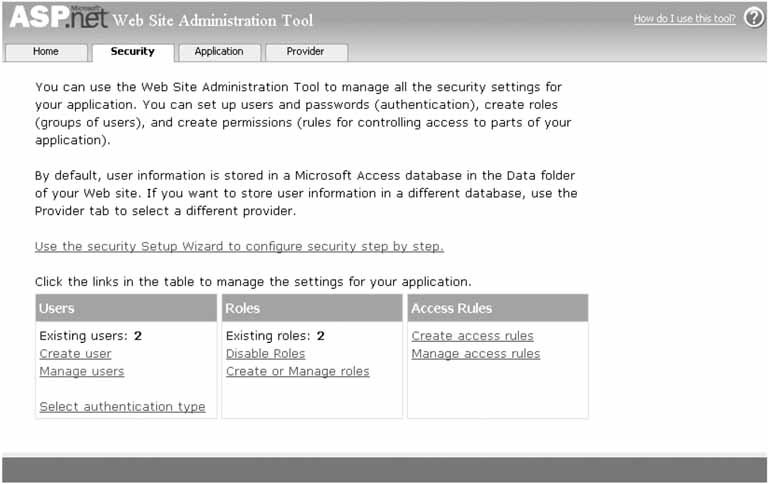
Figure 9-6. Web Site Administration Tool role management page 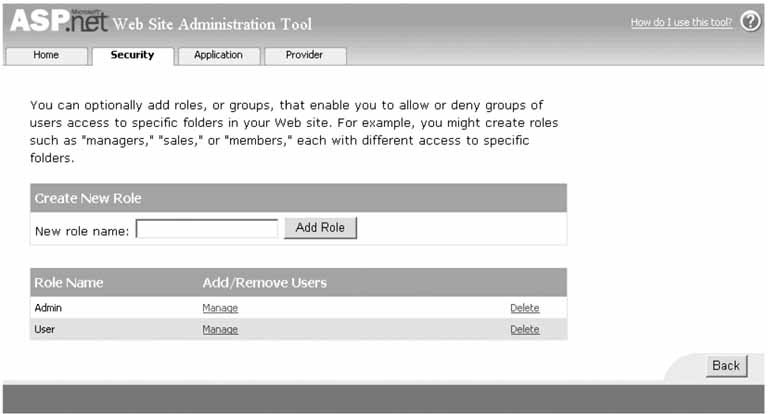
When the required roles have been added, click the back button on the Role Management page and select the Manage Users link when the security home page is displayed to manage the users in your application. The user management page will be displayed, as shown in Figure 9-7. Add the users and assign the roles for each user required for your application. For our application, we have created two users: "user" and "admin." | When you use the WebSite Administration Tool, a SQLExpress database is created in the App_Data folder of your application. The database is contained in a file named ASPNETDB.MDF. |
|
Now that the application is configured and the data store is created, you will need to create a login page that uses an asp:Login control. The only attributes of the asp:Login control that must be set are the ID and runat attributes; however, the control provides a multitude of attributes to allow you to modify the appearance of the rendered control to meet the needs of your application. <asp:Login runat="server" />
The asp:Login control will automatically make the appropriate calls to validate the users credentials, create the authentication and roles cookies, and redirect the user to the page specified in the defaultUrl attribute of the <forms> element in the web.config file. No code is required on your part. Figure 9-7. Web Site Administration Tool user management page 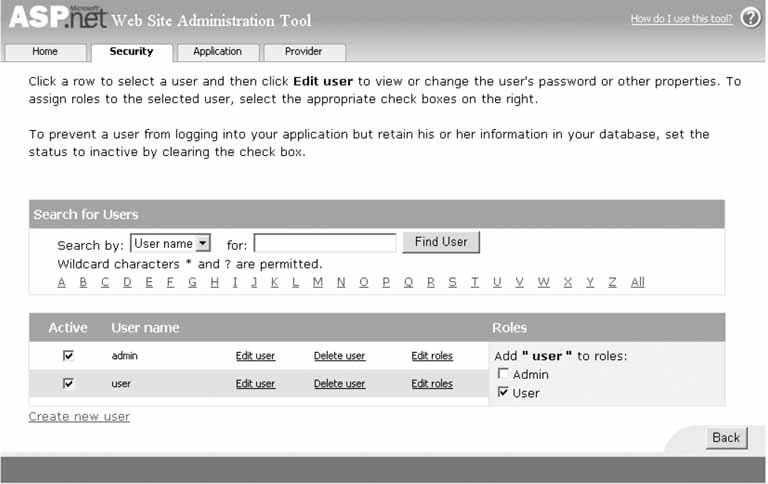
In our application, we have added an asp:LoginName and an asp:LoginStatus control on our secured pages, as shown in Example 9-17. The asp:LoginName control provides the ability to display the name of the logged-in user and the asp:LoginStatus control provides a link for the user to log out. When the user clicks the "log out" link of the asp:LoginStatus control, the control automatically makes the appropriate calls to log the user out and take the action defined by the LogoutAction attribute. In our application, we have set the action to RedirectToLoginPage, which will redirect the user to the page specified in the loginUrl attribute of the <forms> element in the web.config file. | If you want to use controls other than the asp:Login and asp:LoginStatus controls to handle the login and logout actions from the user, you can use the Membership and Role providers. The Membership class provides a full set of methods to manage the users of your application programmatically. The Validate method accepts the user's credentials and returns a Boolean value indicating whether the credentials are valid or not. Combining this with the login code described in Recipes 9.1, 9.2, and 9.3, you can use the functionality of the Membership and Role providers but keep control over the login and logout process. For more information on the available methods, see the documentation in the MSDN Library for the Membership and Roles classes. |
|
See Also Recipes 9.1, 9.2, and 9.3; MSDN Library for additional information on the Membership and Roles classes Using SQL Server Instead of SQLExpress with the Membership and Role Providers SQL Server can be used with the Membership and Role providers. The SQL Server database will not be automatically created for you, but Microsoft has provided an application to assist you. The application provides the ability to create a new database with the table structure required by the Membership and Role providers or add the tables to an existing database. The application is aspnet_regsql.exe and by default is located in the C:\WINNT\Microsoft.NET\Framework\<version> folder, where <version> is the version number of the framework installed on your machine. After creating the database, you will need to add a connection string to the web.config file that defines the name, location, and login credentials for the Membership database. The [server], [user], and [password] settings shown below should be set accordingly for your server and database: <connectionStrings> <remove name="sqlConnectionString" /> <add name="sqlConnectionString" connectionString="Data Source=[server]; Initial Catalog=aspnetdb; UID=[user]; PWD=[password]; persist security info=False; Connection Timeout=30;"/> </connectionStrings>
The final step for configuring SQL Server for the Membership and Role providers is to set the connectionStringName attribute of the providers to the name of the connection string added for SQL Server: connectionStringName="sqlConnectionString"
|
Example 9-15. Changes to web.config to use Membership and Role providers <?xml version="1.0"?> <!-- Note: As an alternative to hand editing this file you can use the web admin tool to configure settings for your application. Use the Website->Asp.Net Configuration option in Visual Studio. A full list of settings and comments can be found in machine.config.comments usually located in \Windows\Microsoft.Net\Framework\v2.x\Config --> <configuration> <appSettings/> <connectionStrings> <remove name="LocalSqlServer" /> <add name="LocalSqlServer" connectionString="data source=.\SQLEXPRESS; Integrated Security=SSPI; AttachDBFilename=|DataDirectory|aspnetdb.mdf; User Instance=true" providerName="System.Data.SqlClient" /> </connectionStrings> <system.web> … <authentication mode="Forms" > <forms name=".ASPNETCookbookVBSecurity951" loginUrl="Login.aspx" protection="All" timeout="30" path="/" defaultUrl="Home.aspx" /> </authentication> <authorization> <deny users="*" /> <!-- Deny all users --> </authorization> <membership defaultProvider="AspNetSqlMembershipProvider" userIsOnlineTimeWindow="15"> <providers> <remove name="AspNetSqlMembershipProvider" /> <add name="AspNetSqlMembershipProvider" type="System.Web.Security.SqlMembershipProvider" connectionStringName="LocalSqlServer" enablePasswordRetrieval="false" enablePasswordReset="true" requiresQuestionAndAnswer="true" applicationName="/" requiresUniqueEmail="false" minRequiredPasswordLength="4" minRequiredNonalphanumericCharacters="0" passwordFormat="Hashed" maxInvalidPasswordAttempts="5" passwordAttemptWindow="10" passwordStrengthRegularExpression="" /> </providers> </membership> <roleManager defaultProvider="AspNetSqlRoleProvider" enabled="true" cacheRolesInCookie="true" cookieName=".ASPNETCookbookVBSecurity951Roles" cookieTimeout="30" cookiePath="/" cookieRequireSSL="false" cookieSlidingExpiration="true" cookieProtection="All" > <providers> <remove name="AspNetSqlRoleProvider" /> <add name="AspNetSqlRoleProvider" type="System.Web.Security.SqlRoleProvider" connectionStringName="LocalSqlServer" applicationName="/" /> </providers> </roleManager> … </system.web> <!-- **************************************************************************** The following section provides public access to pages that do not require authentication. An entry must be included for each page or folder that does not require authentication. **************************************************************************** --> <location path="PublicPage.aspx"> <system.web> <authorization> <allow users="*"/> </authorization> </system.web> </location> <!-- **************************************************************************** The following section defines the pages that require authentication for access. An entry must be included for each page or folder that requires authentication with a list of the roles required for access to the page. Valid Roles are as follows. NOTE: The roles must be entered exactly as listed. User Admin **************************************************************************** --> <location path="Home.aspx"> <system.web> <authorization> <allow roles="User, Admin"/> <deny users="*"/> </authorization> </system.web> </location> <location path="AdminPage.aspx"> <system.web> <authorization> <allow roles="Admin"/> <deny users="*"/> </authorization> </system.web> </location> </configuration>
|
Example 9-16. Login page (.aspx) <%@ Page Language="VB" MasterPageFile="~/ASPNetCookbookVB.master" AutoEventWireup="false" CodeFile="Login.aspx.vb" Inherits="ASPNetCookbook.VBExamples.Login" Title="Login" %> <asp:Content runat="server" ContentPlaceHolder> <div align="center" > Using Membership and Roles With SQLExpress (VB) </div> <div align="center"> <asp:Login runat="server" TitleText="" UserNameLabelText="Login ID: " PasswordLabelText="Password: " DisplayRememberMe="true" RememberMeText="Remember Me" LabelStyle-Css CheckBoxStyle-Css TextBoxStyle-Css > <CheckBoxStyle Css /> <TextBoxStyle Css /> <LabelStyle Css /> </asp:Login> <div align="center" > <br />Login ID=user, Password=user for access by member of User role <br />Login ID=admin, Password=admin for access by member of Admin role </div> <br /> <input type="button" value="Attempt Access without Login" onclick="document.location='Home.aspx'" /> <br /><br /> <input type="button" value="Access Public Page" onclick="document.location='PublicPage.aspx'" /> </div> </asp:Content>
|
Example 9-17. Home page (.aspx) <%@ Page Language="VB" MasterPageFile="~/ASPNetCookbookVB.master" AutoEventWireup="false" CodeFile="Home.aspx.vb" Inherits="ASPNetCookbook.VBExamples.Home" Title="Home" %> <asp:Content runat="server" ContentPlaceHolder> <div align="center" > Using Membership and Roles With SQLExpress (VB) </div> <table width="60%" align="center" border="0"> <tr> <td align="center"> <asp:LoginName runat="server" /> </td> </tr> <tr> <td align="center"> <br /> <asp:LoginStatus runat="server" LogoutText="Log Out" LogoutAction="RedirectToLoginPage" /> </td> </tr> </table> </asp:Content>
|
|