Building Packages
Once you've decided how to divide your components into packages, you need to build the packages themselves. The six key packaging tasks during application development are as follows:
- Create the package.
- Add components to the package.
- Set activation properties.
- Configure security.
- Set transaction properties.
- Export the package.
We'll discuss each of these steps in detail in the sections that follow.
Creating Packages
To create a package, start the MTS Explorer. In the left-hand pane, highlight the name of the computer on which you want to create the package, and then select the computer's Packages Installed folder. From the Action menu, choose New and then Package to start the Package Wizard. The Package Wizard lets you install a prebuilt package or create a new one. In this chapter, we'll focus on creating new packages; in Chapter 14, we'll look at installing prebuilt packages.
Click the Create An Empty Package button then enter the name of the new package. It is generally a good idea to include the name of your company or of the application in the name of the package to reduce the chances of naming collisions between different applications. After you have entered a name, click the Next button and then specify the package identity.
By default, the package identity is set to Interactive User—that is, the user account logged onto the computer on which the package is installed. This default is usually an acceptable setting during application development. However, if your package requires access to resources that are not available to the interactive user, you should set the package identity to a specific user account with the appropriate permissions.
Once you have selected a package identity, click the Finish button to exit the Package Wizard. Your empty package should appear in the Packages Installed folder. If you open the Properties window for your package, you will see the package name and ID displayed on the General tab, as shown in Figure 10-4. This tab includes a Description text box in which you can enter a short description of your package.
Tools for Package Management
The most straightforward way to create and manage MTS packages is by using the MTS Explorer. The MTS Explorer is a SnapIn, an application extension, for the Microsoft Management Console (MMC). You can use the MTS Explorer to administer and monitor MTS servers.
MTS also provides a programmable interface to its administrative services. The MTS 2.0 Programmer's Reference, included in the Microsoft Windows NT 4.0 Option Pack documentation and current versions of the Platform SDK, documents administrative objects that you program using Automation. These objects are scripting-language friendly, so you can use VBScript to write command-line scripts to automate administrative tasks.
In this book, we'll focus on using the MTS Explorer to perform management activities.
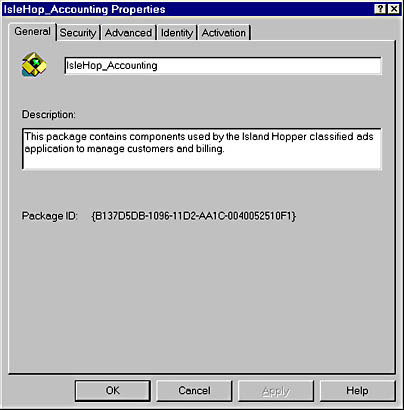
Figure 10-4. The Properties window for a newly created package.
Adding Components to a Package
With your package created, you can start adding components to it. In the left-hand pane of the MTS Explorer, highlight your package and then select its Components folder. From the Action menu, choose New and then Component to start the Component Wizard. The Component Wizard lets you install new components or import components that are already registered on your computer. Importing a component does not install the interface or method information required to set interface properties or to configure access to the component from a remote client. Generally, you should install components instead of importing them.
Click the Install New Component(s) button to move on to the Install Components step, shown in Figure 10-5, in which you can select the files containing your components. Select the DLL that contains the component you want to install. If the component uses an external type library or a proxy/stub DLL, add those files as well. After you have added your component files, the Install Components wizard step displays information about the files you added and the components they contain. If you check the Details check box, you will see more information about file contents and the components that were found. If MTS cannot find your component's type library, your component will not appear in the list.
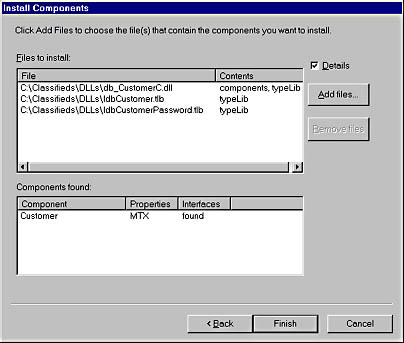
Figure 10-5. Adding components to a package.
After you have selected all the files for the components you want in the package, click the Finish button. Your components should now appear in the Components folder for the package.
NOTE
Be sure that the Hidden Files option is set to Show All Files in the Windows Explorer. Otherwise, you might not see any DLLs in the Component Wizard Add Files dialog box.You can also add components to your package by dragging a component DLL from the Windows Explorer and dropping it on the package in the MTS Explorer.
Setting Activation Properties
Once you have created a package, you need to specify whether it is a library package or a server package. By default, all new packages are server packages. To change the activation property, highlight your package in the left-hand pane of the MTS Explorer. From the Action menu, choose the Properties command to display the Properties window for the package. Select the Activation tab, as shown in Figure 10-6, and then select the type of package you want.
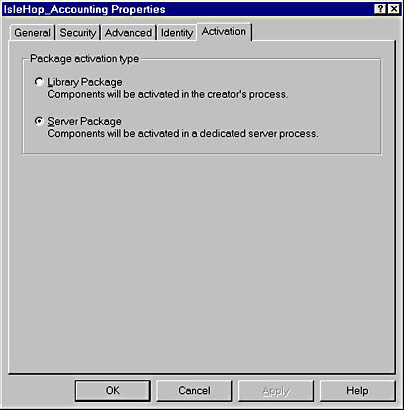
Figure 10-6. Setting the Activation property for a package.
Configuring Security
If you have identified security requirements for your COM classes, you should also configure the security settings for your packages. To configure these settings, follow these steps:
- Decide whether any authorization checking is needed for the components in the package.
- Define the roles used by the package.
- For each component, decide whether authorization checking is needed.
- If a component requires authorization checking, assign roles to the component.
- For each interface exposed by each component, decide whether the interface is accessible to all roles assigned to the component. If it is not accessible, assign roles to the interface.
- Set the authentication level for the package.
As you go through this process, refer to Figure 10-7, which illustrates how MTS performs authorization checks.
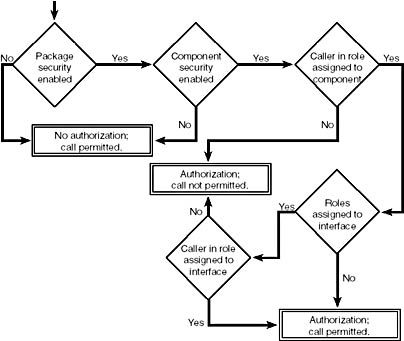
Figure 10-7. MTS authorization checking.
Enabling package authorization checks
If any components in your package require authorization checks on incoming calls, you must enable authorization checking for the package as a whole. If you do not require any automatic authorization checks, you can disable authorization checking for the package. As long as the authentication level is not set to NONE, programmatic security is available for all server packages, regardless of whether authorization checking is enabled.
To enable or disable authorization checks, highlight your package in the left-hand pane of the MTS Explorer. From the Action menu, choose the Properties command to display the Properties window for the package. Select the Security tab, as shown in Figure 10-8, and then check or uncheck the Enable Authorization Checking check box.
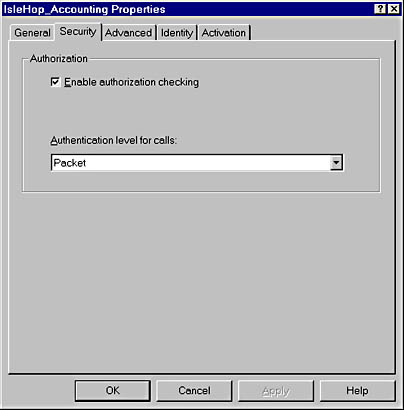
Figure 10-8. MTS package security settings.
Defining package roles
If you have enabled automatic authorization checks for your package or if you call IsCallerInRole to perform programmatic security checks within a component, you should define roles for your package. You must define all the roles used by all the components in a package at the package level.
To define a role, expand your package in the left-hand pane of the MTS Explorer and then highlight its Roles folder. From the Action menu, choose New and then Role, and enter the role name in the dialog box that is displayed. Click OK to close this dialog box, and your role will appear in the Roles folder for the package. If you want to provide some documentation about the role, you can enter a description in the role's Properties window, as shown in Figure 10-9.
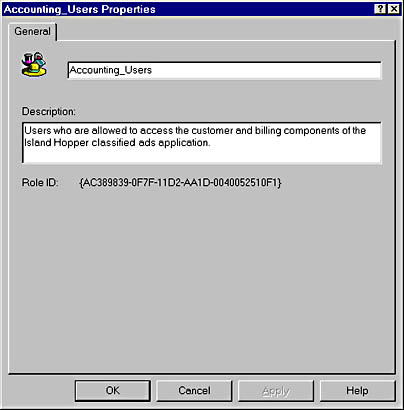
Figure 10-9. Defining a role in MTS.
Typically, you will not populate roles with user accounts during development, except for testing. We will look at populating roles in detail in Chapter 14.
Disabling component authorization checks
By default, if you have enabled authorization checking for a package, all the components within the package will have authorization checking enabled. If there are components within the package that do not require authorization checking for calls into the package, you can disable authorization checking for those components. You will still be able to use programmatic security, even if authorization checking is disabled.
To enable or disable authorization checking, highlight your component in the left-hand pane of the MTS Explorer. From the Action menu, choose the Properties command to display the Properties window for the component. Select the Security tab, and then check or uncheck the Enable Authorization Checking check box, as shown in Figure 10-10.
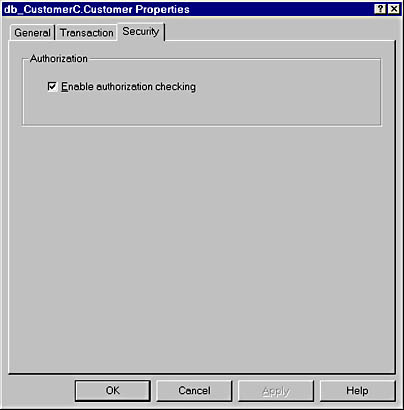
Figure 10-10. Disabling component authorization checks in MTS.
Assigning roles to components
If authorization checking is enabled for a component, you must assign roles to that component. Only callers that are members of roles assigned to the component will be permitted to create or access component objects. You must include all the roles that are permitted to access any interface exposed by the component in the roles assigned to the component.
To assign a role to a component, expand the component in the left-hand pane of the MTS Explorer and then highlight the Role Membership folder. From the Action menu, choose New and then Role to open the Select Roles dialog box, shown in Figure 10-11. This dialog box displays all the available roles in the package and allows you to select the roles permitted to access the component.
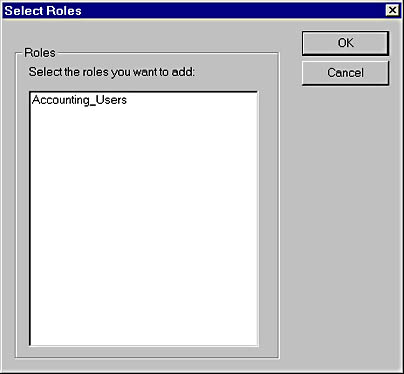
Figure 10-11. Assigning roles in MTS.
Assigning roles to interfaces
If you have enabled authorization checking for a component and you need to restrict access to particular interfaces exposed by the component, you can also assign roles to individual interfaces.
To assign a role to an interface, expand the component in the left-hand pane of the MTS Explorer and then expand its Interfaces folder. Next expand the specific interface you want to configure and highlight its Role Membership folder. From the Action menu, choose New and then Role to open the Select Roles dialog box. Select the roles for the interface, and then click the OK button to save your changes.
NOTE
The roles you assign to a specific interface must also be assigned to the component as a whole. Otherwise, clients will receive a permission denied error when they attempt to create instances of the component and MTS writes a message to the Windows NT application log identifying the user who was denied access. Also remember that MTS 2.0 does not perform interface-specific authorization checks when the component is accessed via IDispatch.
Setting the authentication level
The final step in configuring security for your package is specifying the authentication level used for calls to objects. The authentication level determines how often COM authenticates the caller's identity, as well as whether data packets in the call are secured.
By default, MTS uses packet-level authentication, which means that every data packet transmitted on the network during a COM method call is checked to verify that it comes from the expected caller. However, no checks are made to determine whether the packets have been tampered with, and the packet data is not encrypted. If you require data integrity checks or packet encryption, you should set the authentication level appropriately. Note that these higher authentication levels can impose a severe performance penalty because every packet must be inspected.
To set the authentication level, highlight your package in the left-hand pane of the MTS Explorer and display its Properties window. Select the appropriate authentication level from the drop-down list on the Security tab, shown in Figure 10-8.
When the authentication level is set to anything other than NONE, MTS will provide security information to server packages. The ObjectContext IsSecurityEnabled method will return TRUE, and the IsCallerInRole and ISecurityProperty methods can be used. If you do not need any security information or authorization checks, you can set the authentication level to NONE. This setting will completely disable MTS security features for the package.
Security configuration is a shared responsibility between developers and system administrators. System administrators are responsible for enforcing company security policies. To do this, they might need to adjust your security settings to enable authorization checking for additional components, categorize users into different roles, or provide more stringent authentication checks. You should clearly document any assumptions made by your component implementations regarding available roles, authentication levels, and so on. This documentation will help system administrators avoid breaking your components.
Setting Transaction Properties
Component developers are also responsible for setting the transaction properties of every component installed into MTS. You should set the transaction property for your component so that it will update managed resources correctly, regardless of whether the component's clients are transactional.
You can use the MTS Explorer to set the transaction properties of your components. First highlight the component and open its Properties Window. Select the Transaction tab, as shown in Figure 10-12, and specify the level of transaction support required by your component.
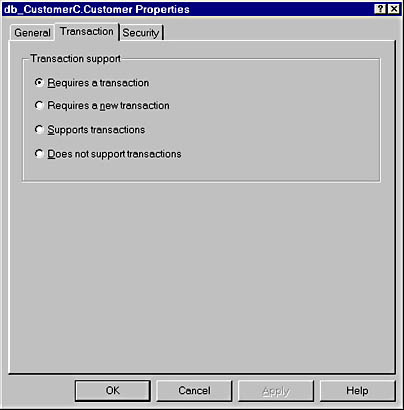
Figure 10-12. Setting a component's transaction property in MTS.
You might also be able to set transaction properties for your components using your development tool. MTS defines custom type library attributes that can be used to add the transaction property to a coclass in an IDL file. If you have an IDL file you can edit, simply include the MTXATTR.H header file in your IDL file and add the transaction property setting to your coclass definition, as shown here:
#include <mtxattr.h> . . . [ uuid(74DC33EF-5B52-11D1-99F8-00600840299E), helpstring("bus_Invoice Class"), TRANSACTION_REQUIRED ] coclass bus_Invoice { [default] interface Ibus_Invoice; }; NOTE
If your development tool manages the IDL file or generates a type library for you, it might provide a way to set the transaction properties as well. Check your tool's documentation for details.
Exporting Packages
Once you have created your packages, you need to make them available for deployment. Remember that a package is simply a collection of catalog entries that contain package settings and reference one or more component files. These catalog entries need to be persisted so that they can be transferred to another machine.
To export a package, highlight the package in the left-hand pane of the MTS Explorer. From the Action menu, choose the Export command to display the Export Package dialog box, as shown in Figure 10-13. Enter the name of the package file you want to create. All the component files will be copied to the same directory as the package file. Creating a unique directory for each package will make it easier to keep track of which files need to be included on distribution disks.

Figure 10-13. Exporting an MTS package.
If you have populated package roles with the user accounts that will be used in deployments, check the Save Windows NT User Ids Associated With Roles check box. Normally, developers will not use this option. It is primarily intended for system administrators who need to move or copy deployed packages to new machines.
When the package export settings are to your liking, click the Export button to export the package. A package file will be created in the location you've specified, and all the component files will be copied to that location. The export utility will also create a client install program, which is written to the Clients subdirectory of your package location. When executed from a client computer, the client install program copies the necessary proxy/stub DLLs and type libraries to that computer and updates the client's system registry with information required by DCOM, including the name of the server machine.
To minimize the size of your client install programs and eliminate unnecessary registry entries, you might want to export two versions of your package. The first version, which we'll call the full package, includes all the package components. During deployment, this package will be installed on server machines. You can delete the Clients subdirectory for the full package since it won't be used. Then remove the components that aren't accessed directly by clients from your package. Export the package again to a different location. We'll call this package the client package. During deployment, the client package will be temporarily installed to generate client install packages that point clients to the deployed server machines. You can delete the Clients subdirectory for the client package if it does not point to a server machine you want clients to use.
By default, client install programs will point clients to the machine from which the package was exported. If you do not want your development machine name to appear in client install programs, highlight My Computer in the left-hand pane of the MTS Explorer. From the Action menu, choose the Properties command to display the Properties window. Select the Options tab, shown in Figure 10-14, and enter a dummy name as the Remote Server Name value. All client install programs you generate will now point clients to this dummy machine name. During deployment, system administrators can re-export the client package to point to the correct server machine.
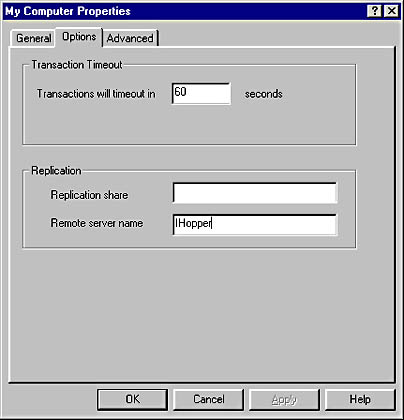
Figure 10-14. Entering a Remote Server Name.
For in-house deployment, simply sharing the exported package directories might be sufficient. If not, you will need to create distribution disks and a setup program. If this step is necessary, be sure that you keep all the files for each package, including the package file, in the same directory so that the MTS Explorer import utility can install your packages.
EAN: 2147483647
Pages: 98