Section 1. Start a New Project
1. Start a New Project
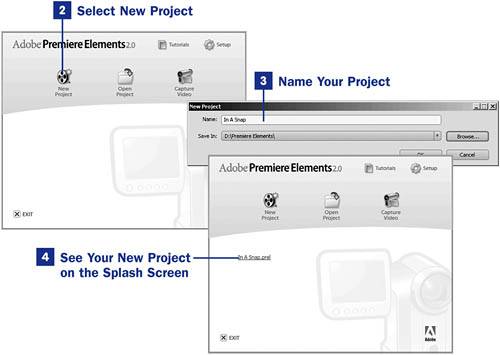
2 Customize Your Workspace 3 Nest Your Panels to Save Desktop Space 4 About Video Capture 14 Add Media with the Adobe Media Downloader Chapter 1 provided enough information for you to start a video project. You might want to get together all the images and clips you will be using to create your video masterpiece. It never hurts to be organized. The more organized you are for a project, the more time you will have to spend on future projects (or other things). In this task, you'll learn how to start a new project in Premiere Elements and give it a name and storage location on your computer.
Put together a storyboard, just like the pros. You can download free storyboards and get tips on how to use them; just search for storyboard on the Internet. A storyboard is a panel, or series of panels, on which a set of sketches is consecutively arranged depicting the important changes of scene and action in a series of shots (as for a film, television show, or commercial). Put together a list of images, video clips, and tapes to capture (and place them in their own folder on your computer, with a label such as Next Project). Add thoughts on transitions that you might like to use and what menu might look good for this project. The more you do on the front end, the easier it will be when you start putting your video project together in Premiere Elements.
If you've already launched Premiere Elements, you can still access your existing projects. From the main menu, select File, Open Project or File, Open Recent Project. You can also return to the splash screen by selecting File, Close. |
 SEE ALSO
 TIPS
TIPS
EAN: 2147483647
Pages: 199