103. Create a Title from Scratch  BEFORE YOU BEGIN BEFORE YOU BEGIN
95 About Titles 99 Create Rolling and Moving Credits 101 Create a Star WarsStyle Credit Roll
 SEE ALSO SEE ALSO
98 Customize a Title Text Font 102 Save Your Title
Even though Premiere Elements comes with hundreds of title templates, sometimes you just can't find a template that will accomplish what you want. What do you do then? That's what this task is all about. Here we will provide the instruction you need to successfully create a title from scratch. With virtually unlimited fonts, styles, colors, backgrounds, and various other options, I doubt there is a limit to what you can do. You can even create your own unique background in Photoshop Elements and use that as your title. 103. Create a Title from Scratch 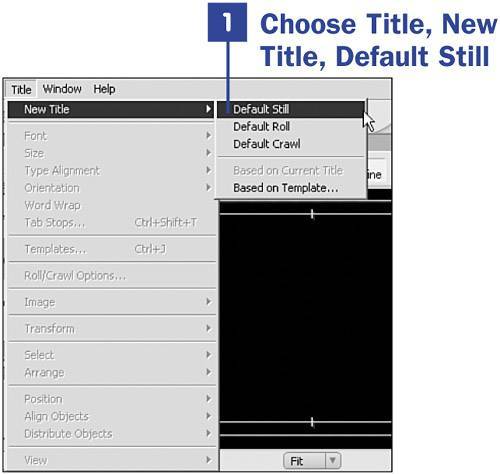
1. | Choose Title, New Title, Default Still
From the main menu, choose Title, New Title, Default Still. The New Title dialog box opens, where you can name your new title.
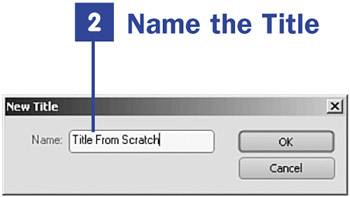
| 2. | Name the Title
In the New Title dialog box, type a name for your title and click OK. The Titles workspace opens.
In the Titles workspace, you will see a blank canvas to work with. Now it is up to you and your imagination. For this task, you will add a shape, horizontal and vertical text, and an image, just to get your creative juices flowing.
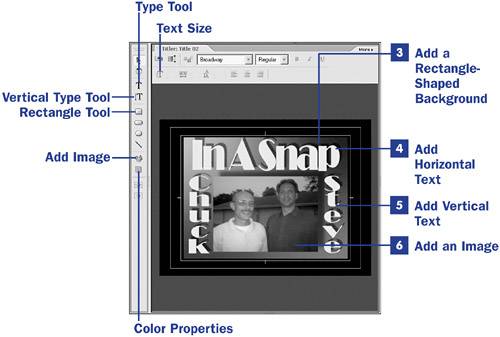
| 3. | Add a Rectangle-Shaped Background
Click the Rectangle tool, and then click in a corner of the Titler panel. Drag the mouse to create a rectangle to cover the inside margin box (the Title Safe Margin). After you have the rectangle the correct size, open the Color Properties dialog box by clicking the Color Properties button. Select a four-color gradient, your colors, and a drop shadow. For details on the color properties and how to use them, see 98 Customize a Title Text Font.
 NOTE NOTE
For details about the tools and menus available in the Titles workspace, see 95 About Titles. | 4. | Add Horizontal Text
Click the Type tool and then click on the area of the Titler panel where you want the text to appear. Before you start typing, select the font you want to use by clicking the Font selection; a drop-down menu shows all the available fonts. Pick a font. To the right of the Font drop-down list are font attributes (bold, italic, and underlined). Use these options the same as you do in most word-processing applications such as Microsoft Word. To change the size of the text, click the Text Size button and drag the mouse to the right to make the text larger, or to the left to make the text smaller.
TIP To center your text vertically or horizontally, use the centering tools in the Title toolbar, located below the Color Properties. | 5. | Add Vertical Text
Add vertical text by clicking the Vertical Type tool and then clicking the area of the Titler panel where you want the text to be placed. The same options mentioned in step 4 are available to change the font and the text characteristics.
| 6. | Add an Image
Click the Add Image button to open a browse dialog box that will allow you to find an image for your title. Select the image you want to use and click OK to open that image in the Titler panel. To resize the image to fit in the available space, right-click the image and choose Transform, Scale from the context menu. In the Scale dialog box that opens, enter a number greater than or less than 100%. Entering a number greater than 100% makes the image larger; entering a number less than 100% makes the image smaller.
|
TIPS To add an image to your title, use the Add Image button or choose Image, Add Image from the main menu bar or a context menu. You cannot drag an image clip from the Media panel to the Titler panel. If you have photo-editing software such as Photoshop Elements, you can use that to create a unique background for your title. The image you create can have transparent areas that video can show through, or you can create transparent cookie-cutter shapes. Premiere Elements works very well with Photoshop Elements; all the images you create in Photoshop Elements can easily be imported into Premiere Elements, retaining all the image characteristics and properties.
NOTE At any time, you can click the Selection tool and then click any item in the Titler panel to drag, reposition, or resize the item.
|