Section 78. Add a Lens Flare
78. Add a Lens Flare
33 Add or Move a Clip on the Timeline 61 Add and Customize an Effect 68 About the Properties Panel 74 About Advanced Effects
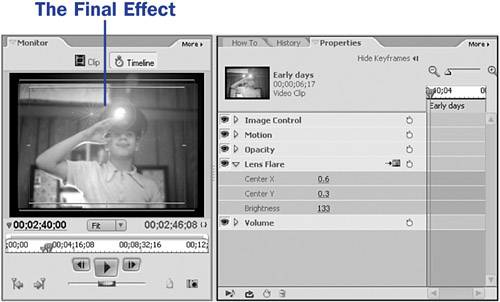
63 Reset or Remove an Effect The Lens Flare effect can add interest to a video clip, particularly when used in conjunction with another effect. Keyframing a lens flare can add excitement to a 3D movement, such as the Camera View effectthe flare can appear as a brief highlight on a rotating graphic or can track with another effect's motion. The Lens Flare effect can also be used to highlight, or draw attention to, an area of your clip, like the sparkle of a shiny object or the flash of a knife blade.
To make the Lens Flare effect appear for only a moment, zoom into the Timeline (press the + key) and use the Split Clip tool described in 36 Split a Clip to slice your clip. Nudge the CTI about five frames to the right and slice the clip again, creating a tiny, isolated segment of the original clip. Apply the Lens Flare effect to this segment. Your clip will still play seamless over the slices, but the flash of light will appear for only those few, isolated frames. (Unfortunately, although you can use keyframes to move or temporarily brighten a Lens Flare effect, you can't use them to make the Lens Flare suddenly appear and then disappear; for that, you must split the clip.) The Lens Flare effect is one of three effects categorized as Render effects. This means that, rather than merely affecting the screen image, they actually render, or add, something to the screen image that wasn't there before (see 80 Add a Lightning Bolt Effect). You can add several copies of the Lens Flare effect to a clip, by the way, with the result being as if many lights or stars were shining into the camera lens while you were filming.
After you begin applying effects to your clip, you'll find that the quality of the image in your playback has apparently deteriorated. On slower computers, playback might even seem jumpy or irregular. This is because your computer is creating a soft render of the clip on-the-fly. Also notice that the affected clip is marked by a red line above the clip on the Timeline. To see a better example of what your clip will look like on final output, press Enter to render the Timeline. The red line above the clip turns green when rendering is complete, and the quality of your playback will be an accurate representation of what your final output will look like. |
 BEFORE YOU BEGIN
 SEE ALSO
 TIP
TIP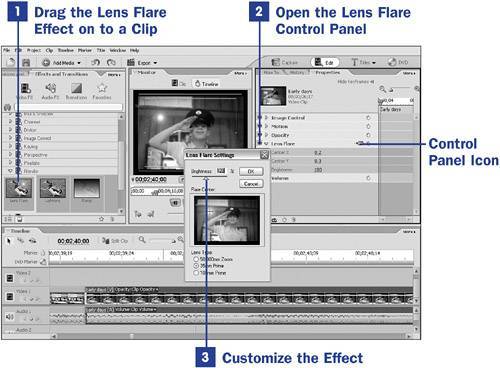
EAN: 2147483647
Pages: 199