Web Forms
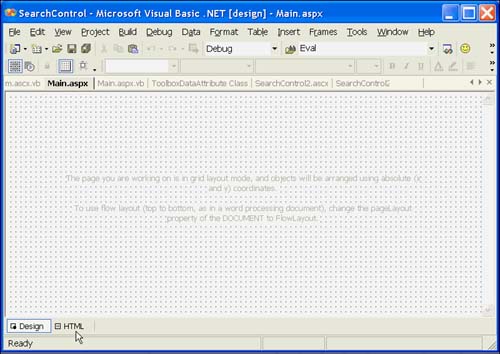
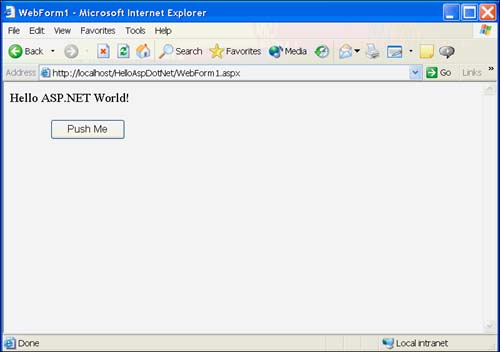
Web Forms Web Forms are one of the new, exciting features in Microsoft's .NET initiative. Web Forms are instances of the System.Web.UI.Page class. The benefit is that Web Forms support WYSIWYG user interface design and your favorite .NET programming language as the code behind the form. The result is that programming in ASP.NET is a lot like programming Windows Forms. ASP.NET takes the design view in the .aspx, combined with the code behind the form in the .aspx.vb module, and automatically renders HTML. The automatically rendered HTML is browser- agnostic for styles and layout, or you can target a specific browser and version. Web Forms DesignerThe Web Forms Designer has two views: the design view and the raw HTML format view. You can toggle between views by clicking the tabs at the bottom of the designer (see Figure 19.1). Figure 19.1. Switch between the WYSIWYG design view and the raw HTML format. You can perform as much design as you want in either format. For Visual Basic programmers, the design view may be more intuitive than the HTML view, but in the latter you can manually enter code in raw HTML format. Alternatively, the .aspx file may contain XML, WML, HTML, and ECMAScript (JScript and JavaScript). Thus far I have found that a combination of the design and HTML views allows me to achieve the greatest ease of use and flexibility. Choosing Grid or Flow Control ModeYou can toggle the Page.PageLayout property between GridLayout and FlowLayout. The GridLayout will be familiar to Visual Basic developers. GridLayout paints dots on the page during design mode, making it easy to place controls in precise locations. Although you can place controls anywhere on a page by dragging and dropping in GridLayout mode, you cannot directly enter text. Tip Page properties are modified by selecting the DOCUMENT object in the Properties window. If you want to directly enter text on the page, you need to switch to FlowLayout mode. In FlowLayout mode you can type text directly on the page, but any Web Forms controls or HTML controls will be left-justified. You can switch back and forth between GridLayout and FlowLayout at any time during design. As an alternative to switching to FlowLayout mode to add text to a page, you can elect to use a Web Forms Label control to place text on a page. Adding a Web Forms Control to a Web FormListing 19.1 contains the obligatory Hello World example application, which is available on this book's Web site. The HelloAspDotNet.sln contains a single Web Forms button. When the button is clicked, text is written to the page (see Figure 19.2). Figure 19.2. HelloAspDotNet. sln demonstrates basic Web Forms design. To create the Web application shown in Figure 19.2, follow these steps:
Web Forms Code Behind the FormJust as you would when designing a Windows application, you can double-click controls in the Web Forms designer to generate event handlers. We want to add code that displays the "Hello ASP.NET World!" text as shown in Figure 19.2. Listing 19.1 shows the code behind the Web Form, and Listing 19.2 shows the raw HTML code generated by the designer after the button is placed on the page. Listing 19.1 The code behind a Web Forms Page1: Public Class WebForm1 2: Inherits System.Web.UI.Page 3: Protected WithEvents Button1 As System.Web.UI.WebControls.Button 4: 5: #Region " Web Form Designer Generated Code " 6: 7: 'This call is required by the Web Form Designer. 8: <System.Diagnostics.DebuggerStepThrough()> _ 9: Private Sub InitializeComponent() 10: 11: End Sub 12: 13: Private Sub Page_Init(ByVal sender As System.Object, _ 14: ByVal e As System.EventArgs) Handles MyBase.Init 15: 'CODEGEN: This method call is required by the Web Form Designer 16: 'Do not modify it using the code editor. 17: InitializeComponent() 18: End Sub 19: 20: #End Region 21: 22: 23: Private Sub Button1_Click(ByVal sender As System.Object, _ 24: ByVal e As System.EventArgs) Handles Button1.Click 25: 26: Response.Write("Hello ASP.NET World!") 27: 28: End Sub 29: 30: End Class A quick glance at the listing and you will note many similarities between Windows Forms code and Web Forms code. Both Windows and Web applications use common object-oriented idioms. For example, both are implemented as classes. Both Windows and Web applications have designer-generated code, including the use of attributes and initialization code. Both kinds of applications use event handlers. If you look closely at line 23, you will see that a Button.Click event handler in an ASP.NET page is identical to the signature of a click handler in a Windows Forms application. The code in ASP.NET applications is CLR code. You might not use all of the same classes when building Web Forms as when building Windows Forms, but the language is exactly the same. ASP.NET provides all of the benefits of the .NET Framework, including inheritance, managed code, and visual design. Listing 19.2 Raw HTML generated by the designer [View full width] 1: <%@ Page Language="vb" AutoEventWireup="false" 2: Codebehind="WebForm1.aspx.vb" Inherits="HelloAspDotNet.WebForm1"%> 3: <!DOCTYPE HTML PUBLIC "-//W3C//DTD HTML 4.0 Transitional//EN"> 4: <HTML> 5: <HEAD> 6: <title>WebForm1</title> 7: <meta name="GENERATOR" content="Microsoft Visual Studio.NET 7.0"> 8: <meta name="CODE_LANGUAGE" content="Visual Basic 7.0"> 9: <meta name="vs_defaultClientScript" content="JavaScript"> 10: <meta name="vs_targetSchema" content="http://schemas.microsoft.com/intellisense/ When you are visually designing your Web Forms, the designer is generating the HTML code for you. The benefit is that you do not have to type the terse HTML code; the Web Forms Designer takes care of this for you. If you have worked with HTML or ASP in the past, you might recognize many of the elements in Listing 19.2. The <HTML></HTML> tags define the content of the HTML document on lines 4 and 18. A <HEAD></HEAD> section is defined on line 5 through 11, and the body of the document is defined on lines 12 through 17. Lines 13 through 16 represent the pagebounded by the <form> tagand the button is rendered as the <asp:Button> tag on lines 14 and 15. Clearly, it is easier to drag a button on the design view of the form than it is to remember this code. The Codebehind attribute on line 2 indicates the file that contains the code behind the form (see Listing 19.1). Building and Running the ASP.NET ApplicationWhen you build the ASP.NET application, all of the source files are compiled into a .DLL. In the example, HelloAspDotNet.dll is compiled, and consists of .aspx, .aspx.vb, and global.asax files. You can run the application by pressing F5 or browsing to the .aspx file in your browser. Enter http://localhost/HelloAspDotNet/WebForm1.aspx in the Address field of your browser to run the Web application. |


| | |
| Team-Fly |
| Top |
- Challenging the Unpredictable: Changeable Order Management Systems
- The Second Wave ERP Market: An Australian Viewpoint
- Enterprise Application Integration: New Solutions for a Solved Problem or a Challenging Research Field?
- The Effects of an Enterprise Resource Planning System (ERP) Implementation on Job Characteristics – A Study using the Hackman and Oldham Job Characteristics Model
- Relevance and Micro-Relevance for the Professional as Determinants of IT-Diffusion and IT-Use in Healthcare