| HOW TO USE LAB COLOR CHANNELS TO AVOID NOISE, AVOID COLOR HALOS, AND ADD TWICE THE SHARPENING This is another technique I learned from Dan Margulis (the undisputed king of Lab Color moves), and it does a brilliant job adding maximum sharpening (by applying the Unsharp Mask filter twice, with totally different settings) without causing any color or noise havoc. The reason this technique works so well is that you're applying both passes of sharpening to just the luminance of the image (the Lightness channel, where all the detail is held) which lets you avoid sharpening the color in your image (which is held in the "a" and "b" channels of Lab Color mode). Since you're avoiding the color channels, you can get away with applying more sharpening than you could to the RGB image, and you're doing it without harming the image. Thanks again to Dan for sharing his great two-pass technique. Step 1. | CONVERT THE IMAGE TO LAB COLOR MODE
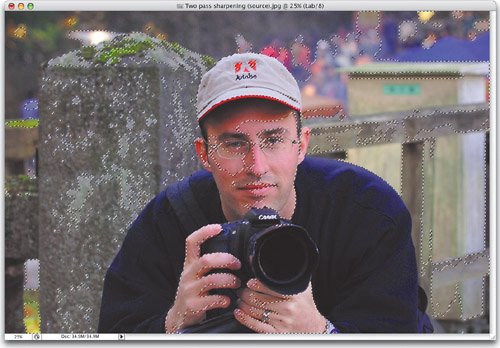
Open the image to which you want to apply two-pass sharpening. Go under the Image menu, under Mode, and choose Lab Color (as shown here). This is a shot I took of my Photoshop TV cohost, Matt Kloskowski, while we were out on a photo shoot in Nikko, Japan. (Of course, that has nothing whatsoever to do with the technique, but I thought you might be wondering "Hey, isn't that Matt?" or "How did that guy get an Adobe ball cap?" or something along those lines.)
 ©SCOTT KELBY | | | Step 2. | PRESS COMMAND-OPTION-1 (PC: CONTROL-ALT-1) TO LOAD THE LIGHTNESS CHANNEL AS A SELECTION
We're now going to load the Lightness channel as a selection (remember, we're in Lab Color mode, so there's a Lightness channel where all the detail is, an "a" color channel, and a "b" color channel). To load the Lightness channel as a selection, press Command-Option-1 (PC: Control-Alt-1).
 | Step 3. | NOW INVERSE THE SELECTION AND HIDE THE SELECTION BORDER
Once the selection is in place, we'll need to inverse it, so go under the Select menu and choose Inverse (or just use the keyboard shortcut Command-Shift-I [PC: Control-Shift-I]). Once your selection is inversed, we want to keep that selection in place, but hide it from view (so we can see how our sharpening looks, without the distracting selection border), so press Command-H (PC: Control-H).
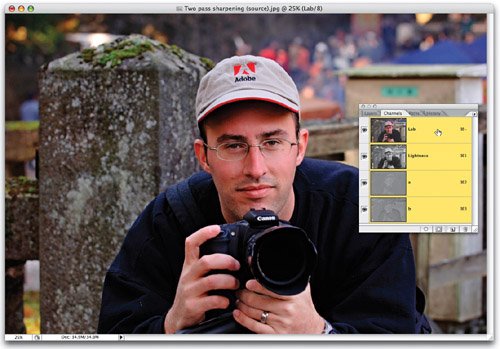
 | | | Step 4. | GO TO THE CHANNELS PALETTE AND TARGET THE LIGHTNESS CHANNEL
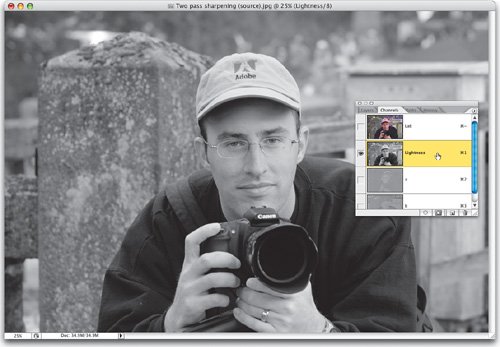
Now that our selection is hidden from view, go to the Channels palette and click on the Lightness channel. We're going to apply our sharpening to the selected area on just this channel. This lets us avoid applying our sharpening to the color channels, which (as you now know) can cause a host of annoying problems. The big advantage of doing our sharpening this way is that since we're avoiding many of the problem areas of sharpening, we can actually get away with applying more sharpening without damaging our images.
 | Step 5. | NOW WE'LL USE THE UNSHARP MASK FILTER
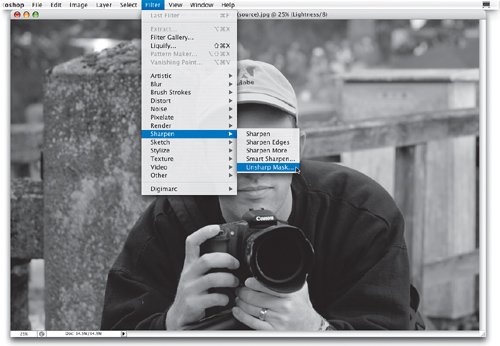
We can now apply our first pass of sharpening with the Unsharp Mask filter (found under the Filter menu, under Sharpen).
 | | | Step 6. | APPLY YOUR FIRST PASS OF SHARPENING. TRY AMOUNT AT 500%, RADIUS AT 1, THRESHOLD AT 2
When the Unsharp Mask dialog appears, for Amount choose 500%, set the Radius at 1 pixel, set the Threshold to 2 levels, and click OK. This will apply a good, solid sharpening to the selected area of the Lightness channel.
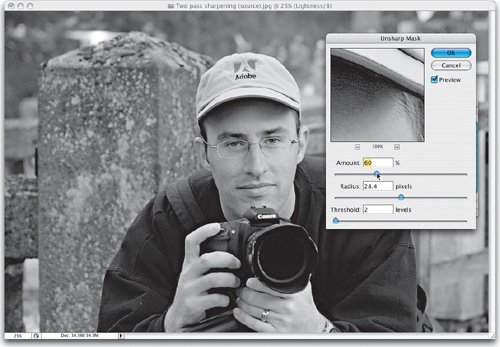
 | Step 7. | FOR THE SECOND PASS, LEAVE THE AMOUNT AT 500%, THEN INCREASE THE RADIUS UNTIL SHAPE REAPPEARS
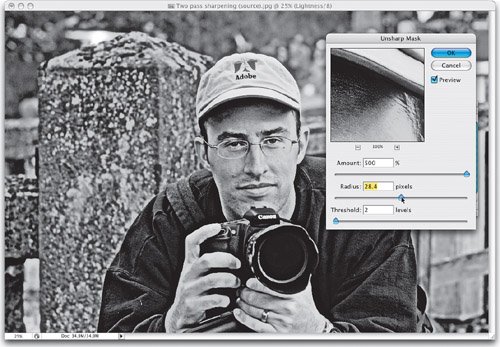
For our second pass of sharpening, open the Unsharp Mask filter again. Start by leaving the Amount set to 500%, but then drag the Radius slider all the way to the left. Then slowly raise the Radius by dragging the slider to the right, until the shape starts to appear back in the face. This two-pass sharpening is designed to be used on high-resolution images, and on a high-res image, your Radius setting will probably be somewhere between 15 and 30 pixels.
 | | | Step 8. | NOW LOWER THE AMOUNT TO AROUND 5060%, AND CLICK OK
Once the shape starts to come back into the person's face (or if the photo is of an object, when the shape returns to the object), lower the Amount to somewhere between 50% and 60% (just choose which looks best to you), then click OK.
 | Step 9. | DESELECT AND GO BACK TO THE LAB CHANNEL
Now, press Command-D (PC: Control-D) to Deselect (don't forget to deselectremember, you were applying this to a selection you loaded earlier, and it's still in place until you deselect it). Click back on the Lab channel in the Channels palette, or simply press Command-~ (PC: Control-~), to see your full-color image again.
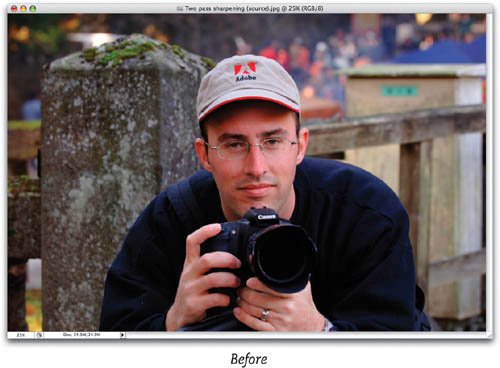
 | | | Step 10. | HERE'S A BEFORE AND AFTER OF THE TWO-PASS LAB COLOR SHARPENING
Here's a before and after of the two-pass Lab Color sharpening technique, with the original unsharpened photo on the top, and the two-pass sharpened photo on the bottom.
  |
|