| THIS IS A GREAT WAY TO LEARN THE CHANNELS PALETTE One of the most popular uses for channels is to store selections you've made so you can bring them back at any time while you're editing your image. For example, in the tutorial we're going to do here, you're going to start by putting a selection around a daisy. It's not an easy selection, and it'll probably take you a few minutes to select it all (well, it took me a few minutes anyway). Now, once you've taken the time to select that daisy (it just takes a selection tool and some patience), you can make as many changes as you want to that daisy, right? And when you're done, you'll deselect it right? But what happens if a few minutes (or even hours) later you decide you need to make a change to just that daisy? Well, you'll have to go through the entire process of selecting it all over again. That is, unless you saved the selection earlier, before you deselected. If you had saved that selection, then you could bring the daisy selection back in just seconds. That saved selection is saved as a channel and you can actually go and see it in the Channels palette. This new channel doesn't disturb your existing Red, Green, and Blue channels (that would trash the image). Instead it's saved as an additional channel called an "Alpha" channel (that's Adobe's name for extra channels), and you're about to create your own. Step 1. | MAKE A FAIRLY COMPLICATED SELECTION, LIKE THIS DAISY
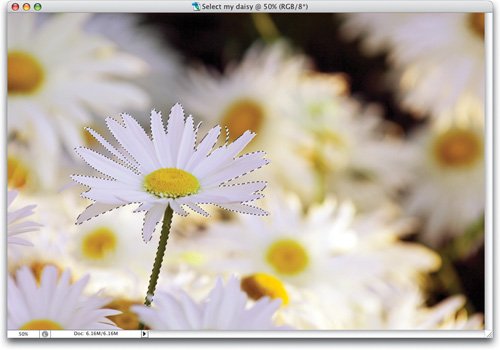
Our first step is to put a selection around the daisy in the image (as shown here). You can grab the Lasso tool (L) and just trace around the petals and stalk, or if you'd like some help, use the Magnetic Lasso tool (press Shift-L until you get it). Just click it once, release the mouse button, and then as you loosely trace around the petals, it snaps to the edges. If it starts going the wrong way, just click the mouse once and it will lay down a point. This is helpful at intersections where you're changing direction as you move around the flower. It doesn't matter which method you use, just take your time and select the entire flower (hold the Shift key to add to your selection; hold the Option [PC: Alt] key to subtract).
 ©SCOTT KELBY | | | Step 2. | GO UNDER THE SELECT MENU AND CHOOSE SAVE SELECTION
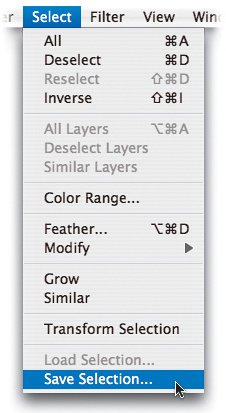
To save your selection as a channel, go under the Select menu and choose Save Selection (as shown here).
 | Step 3. | CLICK OK TO SAVE YOUR SELECTION AS A CHANNEL
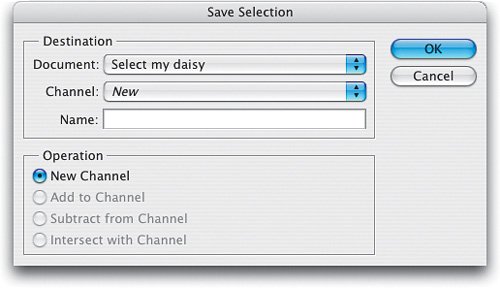
This brings up the Save Selection dialog (shown here). If you do nothing and click OK, it will save your selection as a new channel in the Channels palette, where it will appear with the default name of "Alpha 1." If you'd prefer a more descriptive name (like "Daisy Selection"), you can add it in the Name field by just clicking your cursor in the field and typing in "Daisy Selection." By the way, you don't have to name your channel here. You can change it later by double-clicking directly on the name "Alpha 1" in the Channels palette, typing in a new name, then pressing Return (PC: Enter).
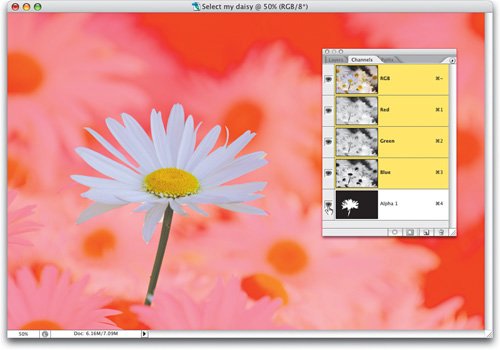
 | | | Step 4. | YOUR SAVED SELECTION APPEARS AS ALPHA 1, BELOW THE BLUE CHANNEL IN THE PALETTE
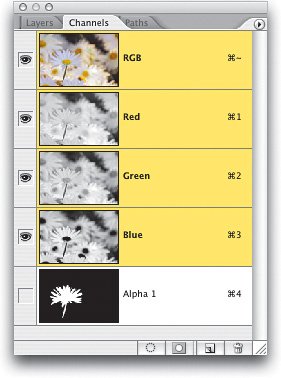
If you go and look in the Channels palette, you'll see that your color channels (the ones that make up your color image) are unchanged, but at the bottom of the palette, a new channel appears. In the thumbnail, you'll see the shape of a daisy in white, against a black background. That's your first new channel (this is a very proud moment). Note: If you don't make a selection first, and just create a new channel (by clicking on the Create New Channel icon at the bottom of the Channels palette, which looks shockingly similar to the Create a New Layer icon that appears at the bottom of the Layers palette), it will appear as solid black. Try it, you'll see what I mean, but then trash that extra channel (Alpha 2).
 | Step 5. | CLICK THE EYE ICON BESIDE ALPHA 1 TO VIEW YOUR RGB IMAGE AS A RED OVERLAY
Don't switch channels, but let's make our new channel, Alpha 1, visible by clicking in the first column beside Alpha 1. This makes the channel visible as an overlay. You'll notice two things: (1) Your daisy still appears in full color (that's because your selection cut a hole in the solid black channel), and (2) The black areas appear in a red tint. This is a throwback to how traditional masks for offset printing were cut. If they wanted to isolate the daisy, they'd take a knife and carefully cut a mask out of a red material making what was called a "rubylith." People with a printing background love this view because it looks familiar to them. Much like a butter churn or ox cart looks familiar to geezers (kidding).
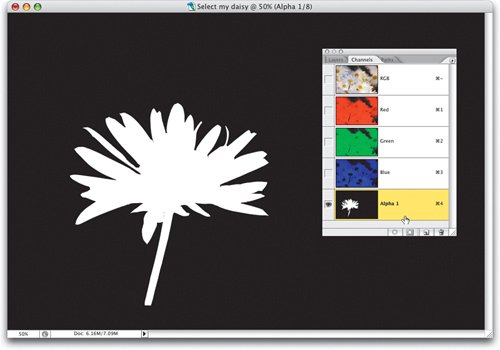
 | | | Step 6. | CLICK DIRECTLY ON ALPHA 1 TO SEE JUST THAT CHANNEL BY ITSELF (OR PRESS COMMAND/CONTROL-4)
If you want to see the individual Alpha channel itself (just like we viewed the individual Red, Green, and Blue channels earlier in this chapter), click on the RGB channel first, then press Command-4 (PC: Control-4) or just click directly on Alpha 1 in the Channels palette (as shown here). This makes just your Alpha channel visible, and the ability to see just this channel isolated by itself will be very important as we move further into the book. At this stage, you can edit your selection by painting in white or black. If you paint in white, it will add to your selection, so if you wanted to extend the selection of the stalk farther down, you'd paint the missing bottom of the stalk in white.
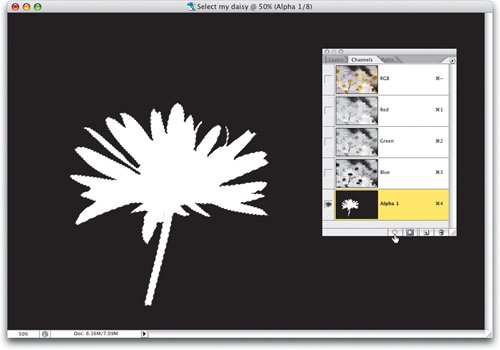
 | Step 7. | CLICK ON THE LOAD CHANNEL AS SELECTION BUTTON
Now you're seeing a visual representation of your selection. The white part is your selection, the black part is everything that's not selected. If you want to actually put your selection back into place, you can do so from here in the Channels palette. Just click on the Load Channel as Selection button at the bottom of the Channels palette (as shown here) and your selection will reappear. We call this "loading your selection" so if you hear that term later in the book, you'll know what it means.
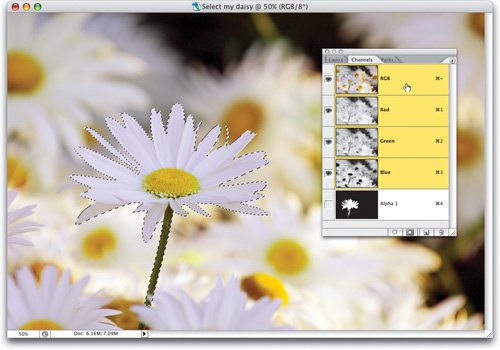
 | | | Step 8. | CLICK BACK ON THE RGB COMPOSITE CHANNEL TO SEE YOUR SELECTION IN PLACE
If you click back on the RGB channel (click directly on either the letters RGB, just to the right of those letters, or on the thumbnail to the left of the letters RGB), you'll see that your selection is back in place (remember, don't click on the eyeball columnthat's just for viewingclick on the channel itself). By the way, you'll also hear this RGB channel referred to as the Composite channel, or the RGB Composite channel, because it's a composite of all three colors. Okay, so that's one way to load a selection, clicking on the Load Channel as Selection button at the bottom of the Channels palette, but there are other ways that offer other advantages (as you'll see in the next step).
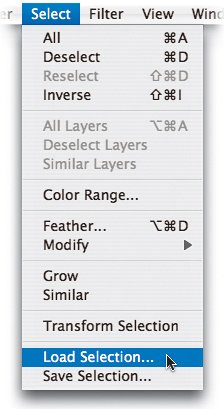
 | Step 9. | DESELECT, THEN CHOOSE LOAD SELECTION FROM THE SELECT MENU
First, let's Deselect the daisy so we can try a different method of loading the channel as a selection, so press Command-D (PC: Control-D) to Deselect. Another way to load a channel as a selection is to go under the Select menu and choose Load Selection (as shown here).
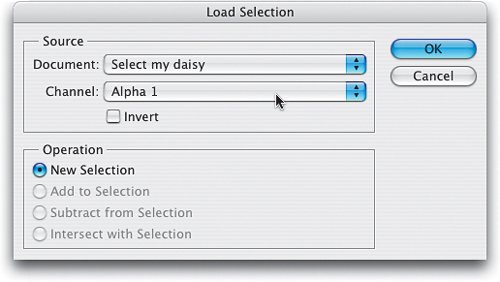
 | | | Step 10. | CHOOSE ALPHA 1 FROM THE LOAD SELECTION DIALOG
This brings up the Load Selection dialog (shown here). By default, it wants to load Alpha 1, but if you had more than one Alpha channel (you can have up to 56), you can choose which channel you want to load from the Channel pop-up menu (as shown). The advantages of using this Load Selection dialog are: (1) You can choose to Invert your channel as it's loaded, so you could have it load so that everything but your daisy was selected, making it easy to edit the background without disturbing the daisy, and (2) If you have one selection in place already, it lets you determine if the selection you're loading will add to that selection, subtract from it, or intersect with it. More on this later.
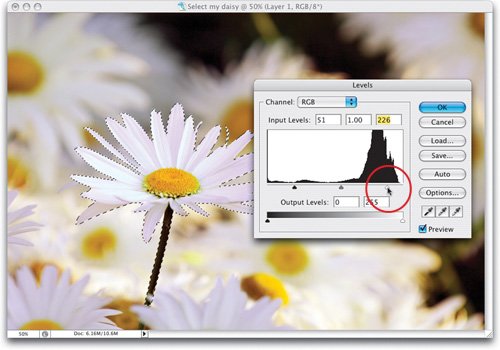
 | Step 11. | BRING UP THE LEVELS DIALOG, BRIGHTEN THE HIGHLIGHTS, AND DARKEN THE SHADOWS
Whichever method you choose to load your selection, we're going to edit the daisy to give you a real world example of how you might make use of loaded selections. Since the daisy is selected, any edits you make will only affect the daisy, right? So, press Command-L (PC: Control-L) to bring up Levels. When the dialog appears, we're going to add more contrast to the daisydrag the top left shadow slider to the right to darken the shadows in the petals a bit, then drag the top right slider to the left (as shown) to brighten the highlights in the flower, and click OK. We're doing this to help the flower stand out from the background.
 | | | Step 12. | INVERSE THE SELECTION
Now, go under the Select menu and choose Inverse. This inverses the selection so that everything except the daisy is now selected (we could have done this in the Load Selection dialog by turning on the Invert checkbox, but we wanted to make a change to the daisy first, before we started to edit the background).
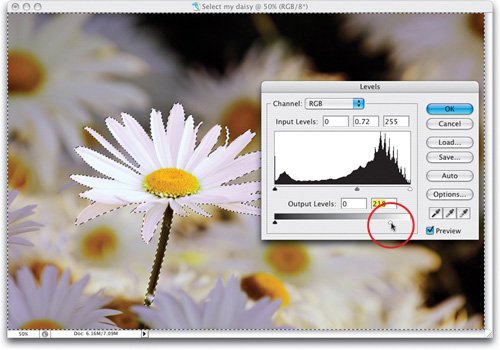
 | Step 13. | DARKEN THE BACKGROUND BY SLIDING THE LOWER RIGHT LEVELS OUTPUT SLIDER TO THE LEFT
Now press Command-L (PC: Control-L) to bring up Levels again. This time we're going to darken the background. Drag the top center slider to the right a bit to darken the midtones in the image, then go to the bottom right Output Levels slider and drag it to the left to darken the overall photo, then click OK. Now, Deselect by pressing Command-D (PC: Control-D).
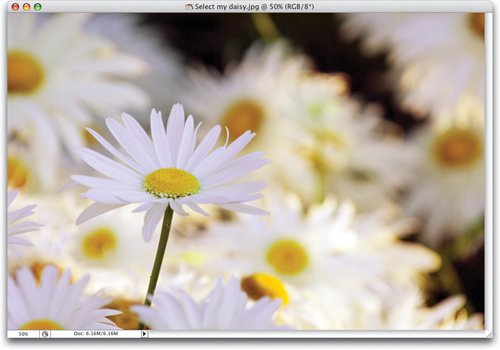
 | | | Step 14. | A BEFORE LOOK AT THE ORIGINAL IMAGE
Here's the original image, before we made any adjustments to the daisy in the left center.
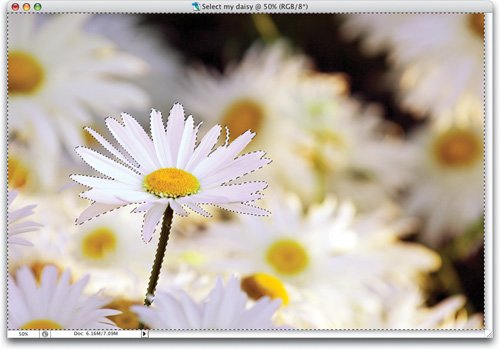
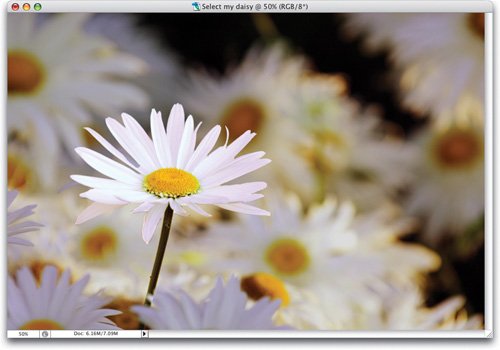
 | Step 15. | AFTER: WE RELOADED OUR DAISY SELECTION, DARKENED THE BACKGROUND, AND LIGHTENED THE DAISY
Here's the After image, after brightening the daisy, and darkening the background. You can see how it really stands out. Now, remember in the step before last how we deselected? Well, because we saved our selection, we can have that daisy reselected in just two seconds, without having to create an entirely new selection. In fact, use this keyboard shortcut to instantly load your Alpha 1 channel as a selection around your daisy: Press Command-Option-4 (PC: Control-Alt-4). Now, one last thinggo under the Filter menu, under Sharpen, and choose Unsharp Mask.
 |
CHANNELS SHORTCUTS | WINDOWS | MACINTOSH |
|---|
To select more than one channel at a time: | Press-and-hold the Shift key and click directly on the channels you want to select in the Channels palette. | Press-and-hold the Shift key and click directly on the channels you want to select in the Channels palette. | To duplicate a channel: | Right-click on the channel and choose Duplicate Channel from the contextual menu. | Control-click on the channel and choose Duplicate Channel from the contextual menu. | To delete a channel: | Right-click on the channel and choose Delete Channel from the contextual menu. | Control-click on the channel and choose Delete Channel from the contextual menu. | To name a new channel as you create it: | Press-and-hold the Alt key, then click on the Create New Channel icon. | Press-and-hold the Option key, then click on the Create New Channel icon. | To load a channel as a selection: | Press-and-hold the Control key and click directly on the channel you want to load in the Channels palette. | Press-and-hold the Command key and click directly on the channel you want to load in the Channels palette. | To load more than one channel as a selection: | Control-click on the first channel, then Control-Shift-click on any other channels you want to load. | Command-click on the first channel, then Command-Shift-click on any other channels you want to load. | To load the Luminosity channel of the image: | Press Control-Alt-~ (the Tilde key, located right above the Tab key). | Press Command-Option-~ (Note: If you are running Mac OS X Tiger, you will first need to turn off the shortcut for Move Focus to the Window Drawer.) | To save a selection as an Alpha channel: | Right-click inside the selected area in your image and choose Save Selection from the contextual menu. | Control-click inside the selected area in your image and choose Save Selection from the contextual menu. | To deselect a loaded channel selection: | Control-Alt-click on the loaded channel. | Command-Option-click on the loaded channel. | To create a new spot-color channel: | Press-and-hold the Control key, then click on the Create New Channel icon. | Press-and-hold the Command key, then click on the Create New Channel icon. |
|