Adjusting Exposure in CS2
|
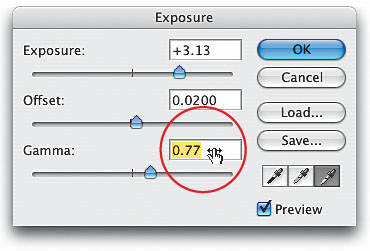
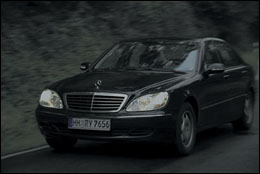
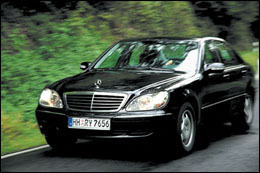
One of the greatest advantages of shooting in RAW format is that you can go into Photoshop's Camera Raw and adjust your Exposure setting after the fact. But if you weren't shooting in RAW, you were pretty much out of luck (you'd have to try to fix exposure problems using Curves or Levels). But in CS2, there's a dedicated Exposure control that you can use on JPEGs, but it works a little differently than the one in Camera Raw (since it was actually designed for use on High Dynamic Range images, but it still works with regular 8-bit photos). Step OneOpen an underexposed photo (we're continuing our tribute to German cars that I don't own with the photo shown here). Go under the Image menu, under Adjustments, and choose Exposure to bring up the Exposure dialog (seen in the capture in Step 2. While you're there, take a look at the three Eyedroppersthey work nothing like the ones in Levels and Curvesthey only affect the photo's luminance, so don't get any cute ideas). 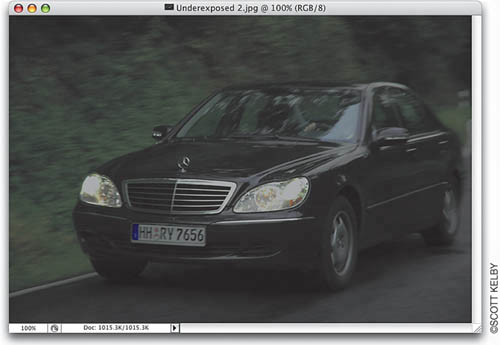 Step TwoThe Exposure slider acts like the exposure adjustment on your camera. Dragging the Exposure slider to the right (as we're doing here) mostly increases the photo's highlights, but also opens up some of the midtones as well (kind of like dragging the highlight Input slider in Levels to the leftit moves the mid-tones slider, too). This Exposure slider will generally do most of the work in fixing your image. 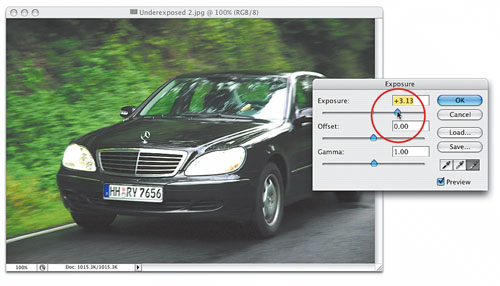 Step ThreeIf you drag the Offset slider to the right (above 0), it kind of works like the Levels shadow Output slider (the one on the bottom-left of the Levels dialog) in that it lightens the overall image. However, if you drag the Offset slider to the left (below 0), it increases the shadow areas without really affecting the highlights (kind of like what the Levels shadow Input slider would do if you dragged it to the right). I know, it's freaky. 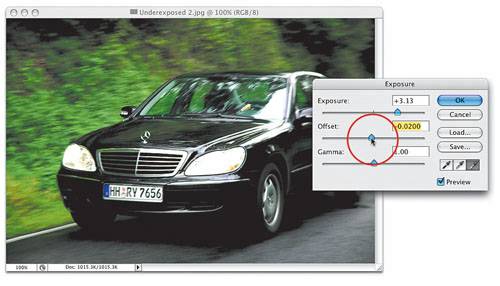 Step FourThe Gamma slider mostly affects the midtones and some highlights (kind of like the midtones slider in Levels). Dragging to the right opens up the midtone areas; dragging to the left darkens the midtones. 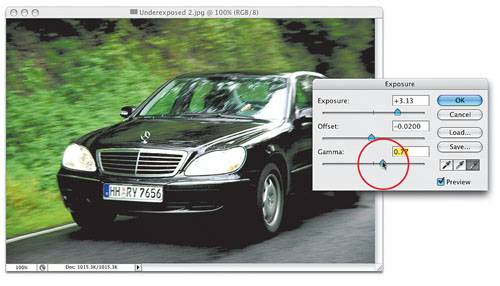 Tip Moving these sliders just a little can create a big adjustment, so here's a trick to make smaller adjustments: Hold the Command key (PC: Control key) and move your cursor over the number field you want to adjust. Your cursor will change into a scrubby slider, and now you can click-and-drag within that field to adjust in smaller increments. Step FiveWhen I adjusted the Exposure in Step 2, it blew out the detail in the headlights. Here's how I got around itI started over. First I duplicated the Background layer by dragging it to the Create a New Layer icon, and then I clicked on its Eye icon to hide it from view. Then, I ran Exposure (set to +1.40) on the Background layer, made the duplicate layer visible again and did Steps 2-4. Then, I clicked on the Add Layer Mask icon with the duplicate layer active, and using the Brush tool (B), painted over the headlights (in black) to reveal the +1.40 Exposure headlights on the Background layer. Give that a try. 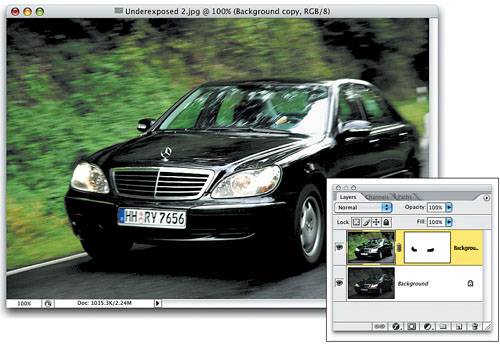 Before After (using the Exposure feature and adding a layer mask for the headlights) |

|
EAN: N/A
Pages: 187