Calibrating Your Monitor (The Cheapo Freebie Method)
|
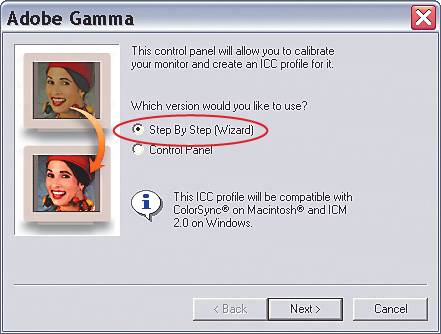
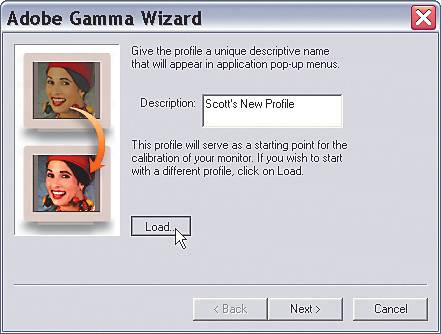
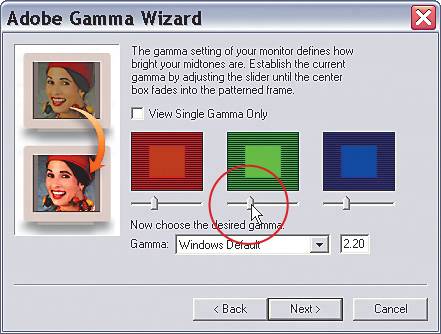
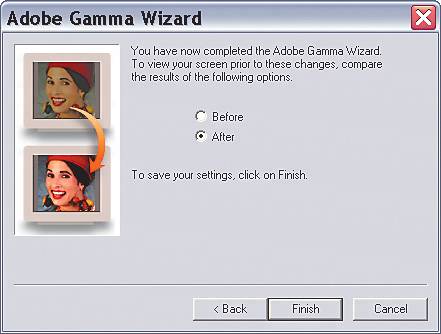
| If you have any hope of getting what comes out of your color inkjet printer to match what you see onscreen, you absolutely, positively have to calibrate your monitor. It's the cornerstone of color management, and basically there are two ways to do this: (1) Buy a hardware calibration sensor that calibrates your monitor precisely; or (2) use the free built-in system software calibration, which is better than nothing, but not by much because you're literally just "eyeing" it. We'll start here with the built-in freebie calibration, but if you're really serious about this stuff, turn to the next technique and learn the hardware method. Freebie CalibrationFirst, we'll look at the worst-case scenario: You're broke (you spent all available funds on the upgrade to CS2 and Clay Aiken's new CD), so you'll have to go with the free built-in system software calibration (which, as I mentioned, is better than not calibrating at all, but not by a whole bunch). Macintosh computers have calibration built into the system, but Windows PCs use a separate utility from Adobe called Adobe Gamma, so we'll start with that, and then we'll do the Mac freebie calibration. To get to Adobe Gamma on your Windows PC (if you're using Windows XP), go under the Start menu from the Taskbar, and then go to the Control Panel. Click on Adobe Gamma. 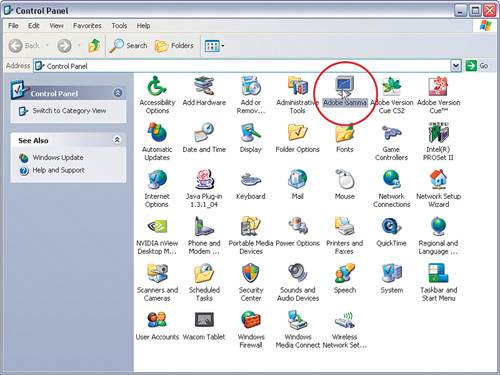 Step One (PC)This brings up the Adobe Gamma dialog. Choose Step By Step (Wizard), which will lead you through the steps for creating a pretty lame calibration profile. (Hey, I can't help itthat's what it does. Do you really want me to sugarcoat it? Okay, how's this? "It will lead you through the steps for proper calibration" [cringe].) Note: Results will vary depending on whether your monitor is a CRT, LCD, etc. Step Two (PC)Click the Next button and you'll be asked to name the profile you're about to create. Now, it's possible that when you first hooked up your monitor a manufacturer's profile was installed at the same time. Although that canned factory profile won't do the trick, it can save you some time because it will automatically answer some of the questions in the dialog, so it's worth a look to see if you have one. Click on the Load button, then navigate your way to the ICC profiles in your system (you should be directed to them by default). If you see a profile with your monitor's name, click on it and then click OK to load that profile. Step Three (PC)From here on out, you'll be prompted with various directions (some with little square graphics with sliders beneath them). It asks you to move the sliders and then judge how the colors look. This is the very essence of the term "eyeing it," and it's why pros avoid this method. Everyone sees color and tone differently, and we're all viewing these "test squares" under different lighting conditions, etc., so it's highly subjective. But heyit's free. Step Four (PC)The questions will continue (along the lines of the Spanish Inquisition) until it completes the calibration process, and then it offers you a before and after. You can pretty much ignore the Carmen Miranda before/after photothat's just for looksyour before and after will be nothing like that, but after you're prompted to save your profile, you're done. Step One (Mac)Now for the freebie calibration on the Macintosh: To find Apple's built-in monitor calibration software, go under the Apple menu and choose System Preferences. In the System Preferences dialog, click on the Displays preferences, and when the options appear, click on the Color tab. When the Color options appear, click on the Calibrate button to bring up the Display Calibrator Assistant window (shown in the next step).  Step Two (Mac)Now, at first this seems like a standard Welcome screen, so you'll probably be expecting to just click the Continue button, but don't do that until you turn on the Expert Mode checkbox. I know what you're thinking: "But I'm not an expert!" Don't worry, within a few minutes you'll be within the top 5% of all photographers who have knowledge of monitor calibration, because sadly most never calibrate their monitor. So turn on the checkbox and click the Continue button with the full confidence that you're about to enter an elite cadre of highly calibrated individuals (whatever that means).  Step Three (Mac)The first section has you go through a series of five different windows, and each window will ask you to perform a simple matching test using a slider. It's a "no-brainer," as Apple tells you exactly what to do in each of these five windows (it's actually the same for all five windows, so once you've read the first window's instructions, you're pretty much set). So, just follow Apple's easy instructions to get through these five windows, then I'll join you right after. 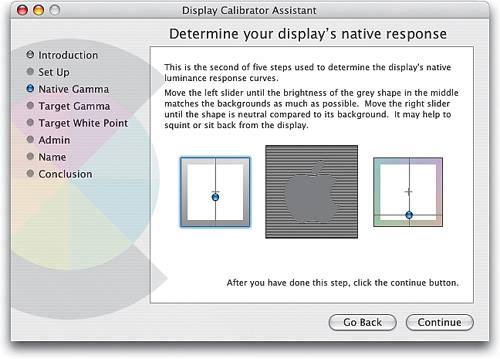 Step Four (Mac)Okay, so you survived the "five native response windows of death." Amazingly easy, wasn't it? (It even borders on fun.) Well, believe it or not, that's the hard partthe rest could be done by your 5-year-old, provided you have a 5-year-old (if not, you can rent one from Apple's website). So here we are at a screen asking you to Select a Target Gamma (basically, you're choosing a contrast setting here). Apple pretty much tells you "it's best to use the Mac Standard of 1.8," but it has no idea that you're a photographer and need something better. Most digital imaging pros I know recommend setting your gamma to 2.2 (the PC Standard), which creates a richer contrast onscreen (which tends to make you open the shadows up when editing, which is generally a good thing detail-wise). Drag the slider to PC Standard and see if you agree, then click Continue. 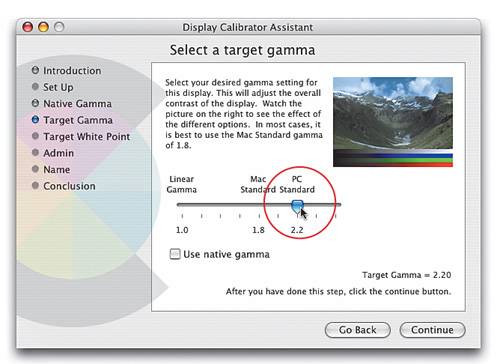 Step Five (Mac)Now it asks you to select a white point. I use D65 (around 6500 Kelvin, in case you care). Why? That's what most of the pros use, because it delivers a nice, clean white point without the yellowish tint that occurs when using lower temperature settings. With the slider set at D65, you can click the Continue button. The next window just asks if you're sharing your computer with other users, so I'm skipping that window, because if you are, you'll click the checkbox; if you're not, you won't. Snore. 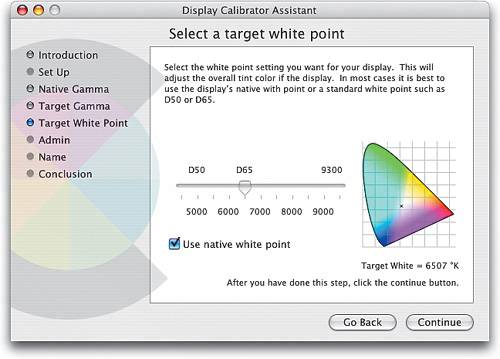 Step Six (Mac)When you click Continue again, you'll be greeted with a window that lets you name your profile. Type in the name you want for your profile, and click the Continue button. The last window (which there's no real reason to show here) just sums up the choices you've made, so if you made some egregious mistake, you could click the Go Back button, but seriously, what kind of huge mistake could you have made that would show up at this point? Exactly. So click the Done button and you've created a semi-accurate profile for your monitor (hey, don't complainit's free calibration). Now, you don't have to do anything in Photoshop for it to recognize this new profileit happens automatically (in other words, "Photoshop just knows." Eerie, ain't it?). 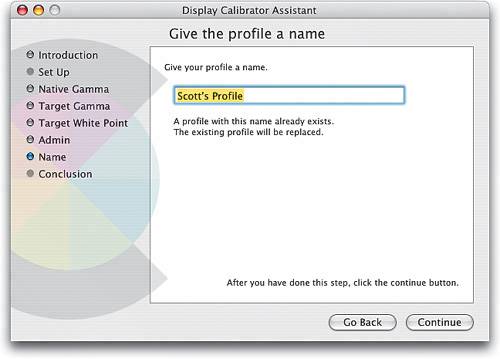 |
|
EAN: N/A
Pages: 187