Using the Crop Tool to Add More Canvas Area
|
| I know the heading here doesn't make much senseUsing the Crop Tool to Add More Canvas Area? How can the Crop tool (which is designed to crop photos to a smaller size) actually make the canvas area (white space) around your photo larger? That's what I'm going to show you. Step OneOpen the image that you want to add white canvas area to. Press the letter D to set your Background color to its default color of white. Now press Command-- (Minus key) (PC: Control-- [Minus key]) to zoom out a bit (so your image doesn't take up your whole screen), and then press the letter F. This lets you see the gray desktop area that surrounds your image. (Note: In the Layers palette, ensure the Background layer is active if you have more than one layer.)  Step TwoPress the letter C to switch to the Crop tool and drag out a cropping marquee border to any random size (it doesn't matter how big or little the marquee is at this point). Step ThreeNow, grab any side handle or corner point and drag outside the image area, out into the gray desktop area that surrounds your image. The gray area that your cropping border selects outside the image will be added as white canvas space in the next step, so position the border where you want to add the canvas space. 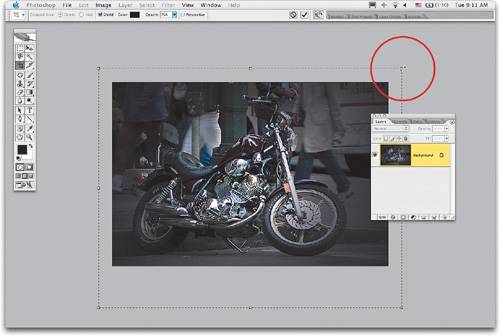 Step FourPress the Return (PC: Enter) key to finalize your crop, and when you do, the gray area outside your image will become white canvas space. In the example shown here, I added some text in the bottom canvas area using the Type tool (T). The headline is set in the font Adobe Garamond Condensed, as is the address and contact info. The store's name is set in the font Futura Extra Bold (also from Adobe).  |

|
EAN: N/A
Pages: 187
- Structures, Processes and Relational Mechanisms for IT Governance
- Integration Strategies and Tactics for Information Technology Governance
- Linking the IT Balanced Scorecard to the Business Objectives at a Major Canadian Financial Group
- A View on Knowledge Management: Utilizing a Balanced Scorecard Methodology for Analyzing Knowledge Metrics
- Governance in IT Outsourcing Partnerships