Adjusting Color (Calibrating)
|
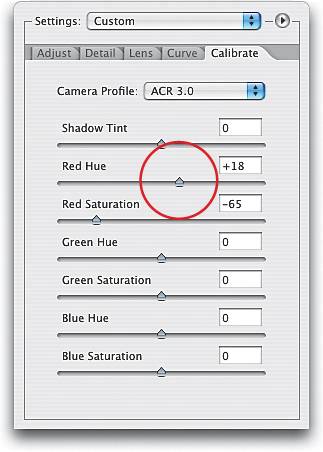
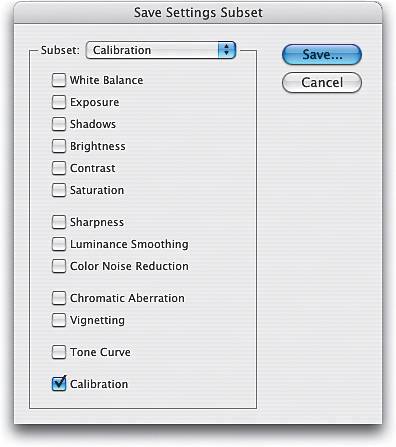
So far, everything in Camera Raw has been about adjusting the exposure, or the brightness, or the sharpness, or the white balance...and that's all well and good, but what if your photo is too red, or what if the white balance looks right, but something in the photo is still too blue? Here's what to do: Step OneLet's say after setting the exposure, brightness, etc., there's a part of your image that has too much red. To remove that red, go to the Calibrate tab (along the right side of the Camera Raw dialog) and drag the Red Saturation slider to the left, lowering the amount of red in the entire photo. If the red simply isn't the right shade of red (maybe it's too hot and you just want to tone it down a bit), drag the Red Hue slider until the red color looks better to you (dragging to the right makes the reds more orange). Step TwoIf all the images from your digital camera have this problem with red, you may want to save these calibration settings by choosing Save Settings Subset from the Settings flyout menu (it's the right-facing arrow to the right of the Settings pop-up menu). When the Save Settings Subset dialog appears, uncheck everything but Calibration (or choose it from the Subset pop-up menu), and then click Save. Now you can apply these settings to other images shot with that digital camera by choosing your saved subset from the Settings pop-up menu. Note: You can adjust your blues and greens in the same way. |

|
EAN: N/A
Pages: 187