Sending a Portfolio Presentation to a Client
|
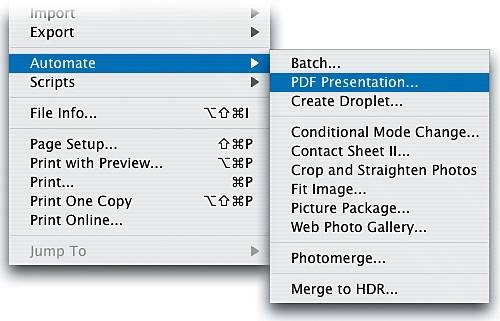
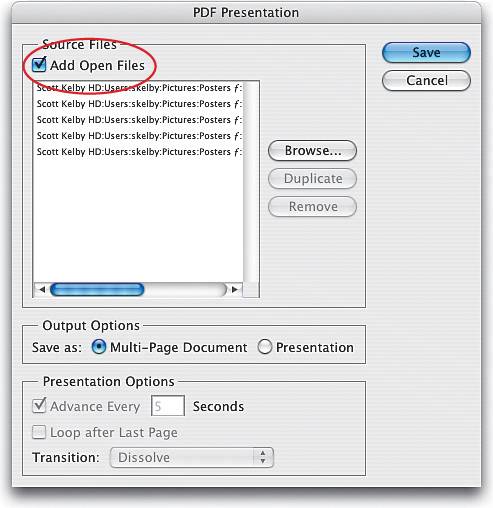
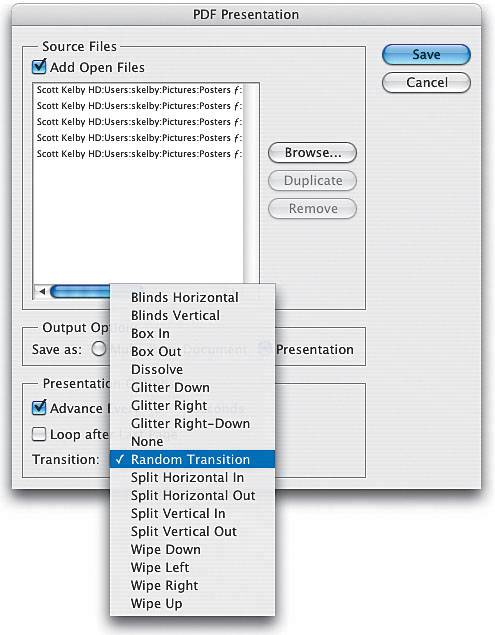
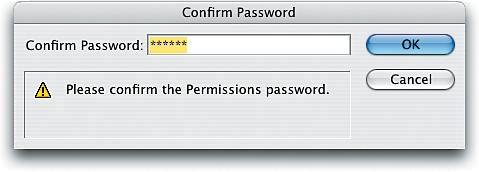
| In Photoshop CS2, there's a feature that takes a folder full of images, creates a slide show (complete with transitions), and compresses it into PDF format so you can email it easily to a client for proofing. This is perfect for showing your portfolio to clients, sending clients proofs of wedding shots or portrait sittings, and any of a dozen other uses, none of which I can happen to think of right at this particular moment, but I'm sure later today, when I'm at the mall or driving to the office, they'll come to me. Step OneOpen the photos you want to use in your PDF presentation (you actually have the choice of using photos you already have open in Photoshop or choosing a folder, but for this example, we'll start by simply opening a few photos). 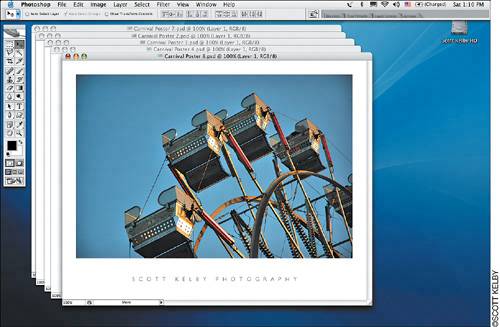 Step TwoThere are two ways to access PDF Presentation: (1) Go under Photoshop's File menu, under Automate, and choose PDF Presentation (as I chose here), or (2) choose PDF Presentation from within the Adobe Bridge by going under the Tools menu, under Photoshop, and choosing PDF Presentation. Step ThreeThis brings up the PDF Presentation dialog. To create a presentation using the photos you already have open in Photoshop, click on the Add Open Files checkbox at the top of the dialog, and a list of your open files will appear in the window by default. If you have a photo open that you don't want in your presentation, just click on the photo (in the list) and then click the Remove button (you can also add an image by clicking on the Browse button). Step FourIn the Output Options section of the dialog, click on the Presentation radio button. Under the Presentation Options section of the dialog is one of the coolest things about the PDF Presentation: You can choose a transition between slides, and they've got a pretty decent selection. A good way to find out which ones you like best is to create a test presentation and choose Random Transition from the Transition pop-up menu. That way, once you take a look at your test presentation, you'll quickly know which ones fit your style. In this Options section, you can also choose how many seconds you want each image to appear onscreen before advancing to the next image, and you can choose whether you want the presentation to loop (repeat) when it reaches the end. Step FiveWhen you click the Save button, a standard Save dialog appears, where you need to name your file. Now, you'd think this is where the story ends, but actually clicking the Save button here brings up another dialog. 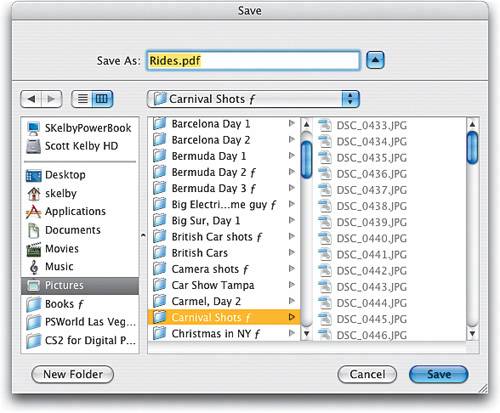 Step SixWhen the Save Adobe PDF dialog appears, from the Adobe PDF Preset pop-up menu, choose Smallest File Size (since you're sending these to a client via email, you probably want to keep your file size small so it transfers quickly, and so the email doesn't bounce back because your attachment is too large). Also, I would turn on the View PDF After Saving checkbox (under the General Options section). You don't have to view the PDF after saving, but it's always a good idea to see exactly what you're sending the client before you send it, just in case something didn't come out the way you wanted. 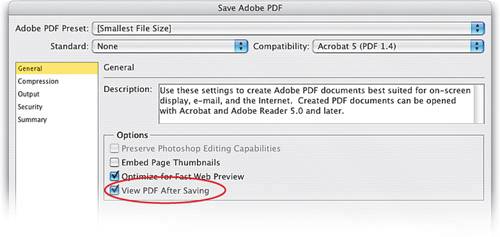 Step SevenIn the list of categories on the left side of the dialog, click on Compression. This category shows the quality of the JPEG images that your client will see. Because we chose Small File Size in the previous step, the Image Quality is automatically set to Medium Low. Although this setting doesn't create the cleanest, most pristine images, that's okay because we don't want to send final high-res images this way. (Remember, this is just for proofingif you sent high-quality images, your client might find a way to cut you out of the picture, so to speak, because the proofs are "good enough.") 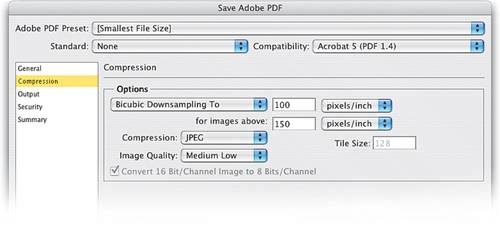 Step EightReturn to the list of categories on the left side of the dialog and click on Security. Since you're emailing this presentation to clients, it's important to protect your images from being "liberated" by your clients, which lets them sidestep any payment to you, the photographer. So, in the Permissions section, I recommend turning on the checkbox that reads "Use a password to restrict printing, editing and other tasks," and then enter a password in the Permissions Password field. Then, from the Printing Allowed pop-up menu, choose None. By doing this, you're protecting yourself because now your clients can't just print out full-color prints of your PDF to their color inkjet, or copy your photographs out of the PDF and place them into another application for printing. It pretty much ensures that your low-res proofs remain in your PDF and that you get paid for your work. 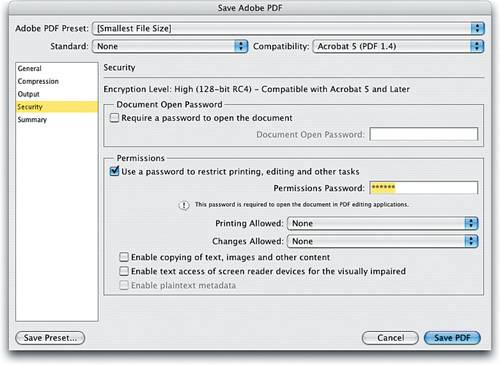 Step NineWhen you click on the Save PDF button, a pop-up dialog will appear asking you to confirm your password. Enter your password, click OK, and Photoshop CS2 creates a PDF file for you, ready to email to your clients. When your clients open your emailed PDF, it launches Adobe Reader, goes into Full Screen mode (displaying your photos on a black background), and the presentation begins. And because you set up security preferences on this PDF, your clients won't be able to access the printing and photo-editing options in Reader. (Note: To return to Adobe Reader and end your slide show, just press the Escape key on your keyboard.) The capture here shows the first slide in a PDF presentation, right before it transitions to the next photo.  |
|
EAN: N/A
Pages: 187