Letting Your Clients Proof on the Web
|
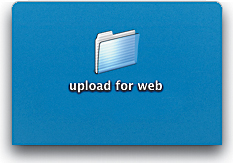
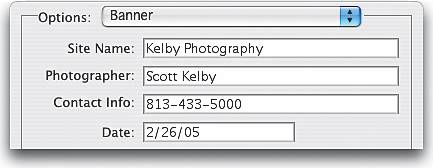
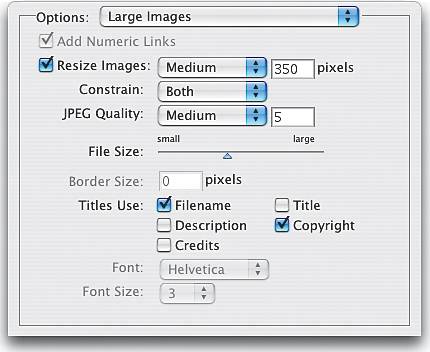
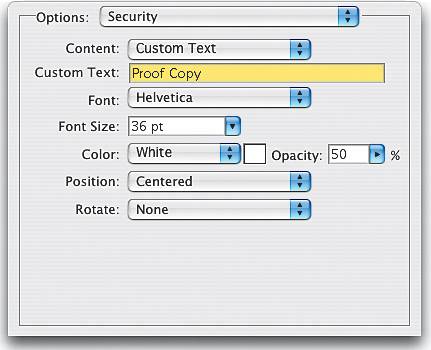
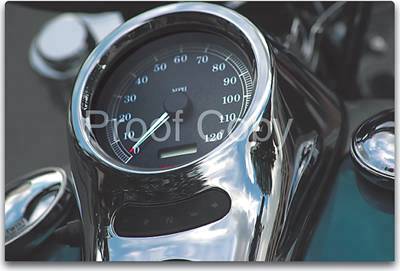
| Giving your clients the ability to proof online has many advantages, and that's probably why it's become so popular with professionals. Luckily, Photoshop has a built-in feature that not only automatically optimizes your photos for the Web, it actually builds a real HTML document for you, complete with small thumbnail images, links to large, full-size proofs, your e-mail contact info, and more. All you have to do is upload it to the Web, and give your client the Web address for your new site. Here's how to make your own: Step OneCreate a new blank folder on your desktop (you will later store your Web gallery images here). Step TwoIn the Adobe Bridge, navigate to a folder of images, and then Command-click (PC: Control-click) on all the photos you want to appear on your Web page (or Shift-click the first and last photos in your folder). Now, go under the Tools menu, under Photoshop, and choose Web Photo Gallery. Note: You can also get to the Web Photo Gallery from within Photoshopit's under the File menu, under Automate. 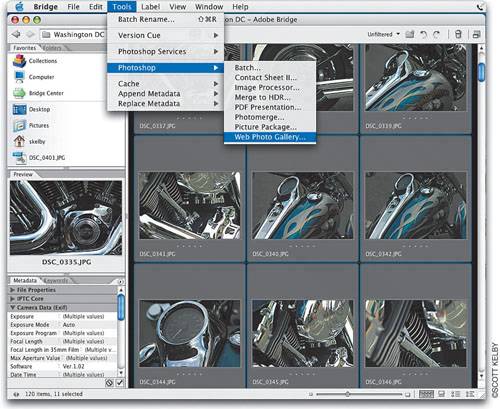 Step ThreeThis brings up the Web Photo Gallery dialog. At the top is a Styles pop-up menu of presets that you can choose as different Web page layouts. As you choose a style, a thumbnail preview of each template appears in the far-right column of the dialog (below the Cancel button). In this example, I chose Dotted BorderWhite on Black, which creates a website with rows of thumbnails that display full size (on their own separate pages) when they're clicked on. Just below the Styles pop-up menu is a field for entering your e-mail address (which will appear prominently on your Web page) so your client can easily contact you with choices from the online proofs. 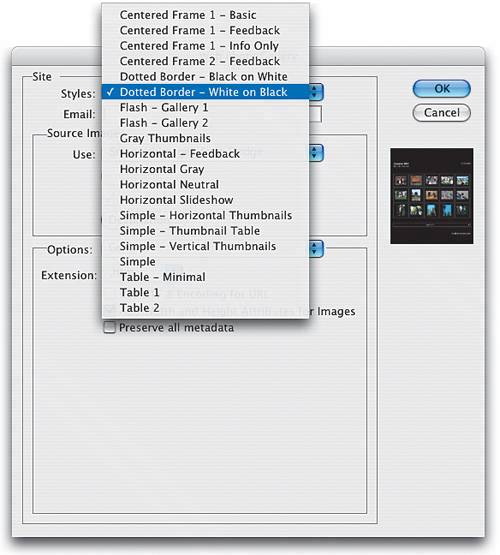 Step FourIn the Source Images section of the Web Photo Gallery dialog, specify the location of the photos you want to put on the Web (the Bridge in this case), and then determine which folder these Web-optimized images will reside in for uploading (the folder you created in Step 1). When you click on the Destination button, a dialog appears that lets you navigate to the folder in which you want to save your images. Choose the folder you created in Step 1 and click Choose (or OK on a PC). Note: Although we're using images from the Bridge for this technique, you can also create a Web Photo Gallery using a folder of photos on your hard disk. To do this, choose Folder (instead of Selected Images from Bridge) under the Source Images section. 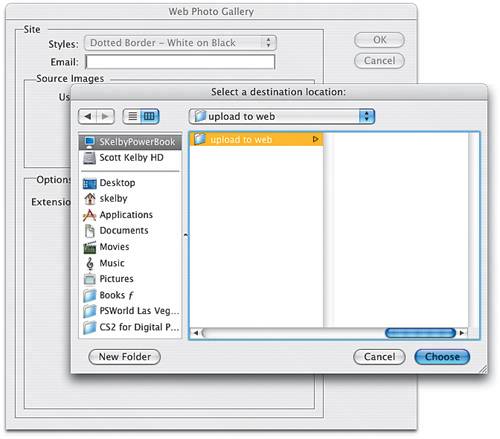 Step FiveIn the Options section of the dialog, choose Banner from the pop-up menu to enter the headlines and subheads for the site. Step SixGo to the Options pop-up menu again and choose Large Images. Options will appear allowing you to choose the final size and quality of the full-size photos displayed on your Web page. You can also choose titles to appear under each photo in the Titles Use section. I recommend checking the Copyright checkbox, which will display your copyright info under each photo. Note: For this to work, you have to embed your copyright info in the photo first by going under the File menu, choosing File Info, and entering your copyright text in the Copyright categories. Step SevenChange the Options pop-up menu to Security, and then in the Content pop-up menu choose Custom Text. This makes fields available where you can enter text that will appear right across your large-sized photos. This is where you might add things like "Proof Copy," "Not for Printing," or "Not for Duplication." You can also specify the Font Size, Font Color (I chose White), Opacity (which I lowered here), and Position in this section. Tip When you add custom text, here's an example of how the text will appear over your photo. Step EightClick OK and Photoshop will do its thingresizing the photos, adding custom text, making thumbnails, etc. Then it will automatically launch your Web browser and display the HTML Web page it created for you. If you click on any of the thumbnails, it will take you to a page with a larger version of that photo, and there you'll find buttons to move to the next photo, previous photo, and back to the home page (which is shown here). Your contact info appears at the bottom, and if you've included an email address, a live email link will be included as well. Note: In the example shown here, I made the thumbnails larger125 pixels to be exactby choosing Thumbnails in the Options pop-up menu. 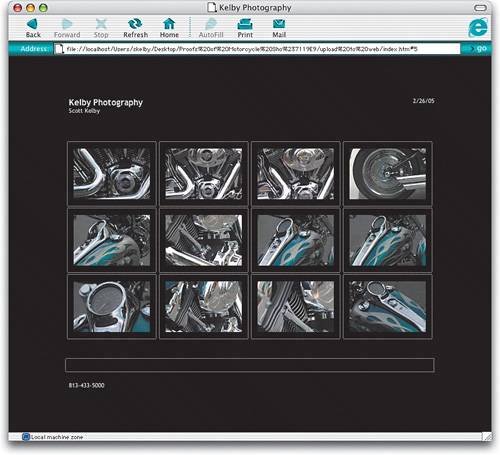 Step NineIf you look in that folder you created earlier, you'll find that Photoshop automatically created all the files and folders you'll need to put your Web Photo Gallery live on the Web, including your home page (index.htm). Note: If your browser didn't launch automatically in the previous step, open this index document using your Web browser to see your gallery. 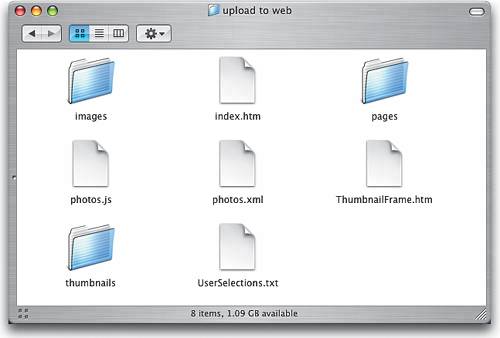 |
|
EAN: N/A
Pages: 187