Removing Love Handles
|
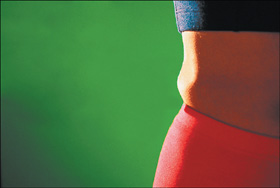
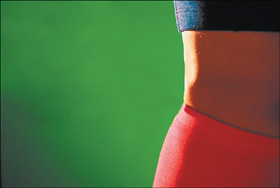
| This is a very handy body-sculpting technique, and you'll probably be surprised at how many times you'll wind up using it. It uses Liquify, which many people first dismiss as a "toy" for giving people "bug-eyes" and "huge lips," but it didn't take long for professional retouchers to see how powerful this tool can really be. Step OneOpen the photo that has a love handle repair just waiting to happen. (I know this is probably the last person in the world to need a love handle removal, but when you're looking through stock photos, finding a person who doesn't have a perfect physique is nearly impossible.)  Step TwoGo under the Filter menu and choose Liquify. When the Liquify dialog appears, click on the Zoom tool in the bottom of the Toolbox on the left-hand side of the dialog. Then, drag out a selection around the area you want to work on to give you a close-up view for greater accuracy. 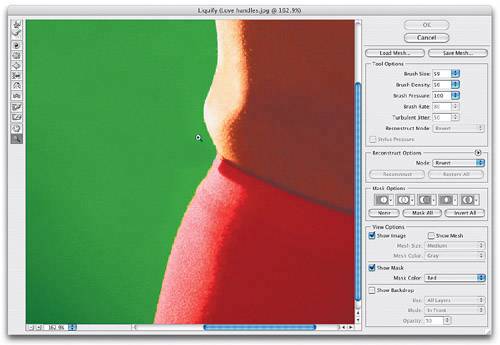 Step ThreeGet the Push Left tool from the Toolbox (it's the sixth one down from the top). It was called the Shift Pixels tool in Photoshop 6 and 7, but Adobe realized that you were getting used to the name, so they changed it, just to keep you on your toes. Then, choose a relatively small brush size using the Brush Size field near the top-right of the Liquify dialog. Now paint a downward stroke starting just above and outside the love handle and continuing downward. The pixels will shift back in toward the body, removing the love handle as you paint. 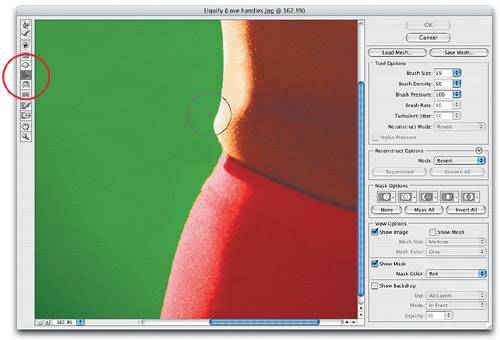 Step FourWhen you click OK, the love handle repair is complete. (Note: If you need to remove love handles on the left side of the body, paint upward rather than downward. Why? That's just the way it works.) Before After |
|
EAN: N/A
Pages: 187