Adding Your Studio s Identity to Lightroom s Interface
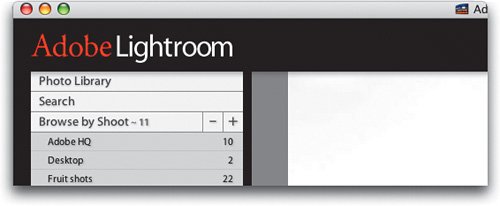
Adding Your Studio's Identity to Lightroom's InterfaceThere may be another application that has this feature, but I sure haven't seen it. It's called the Identity Plate, and what it does (among other things that you'll learn later on in this book) is replace the Adobe Lightroom nameplate (which appears in the upper-left corner of the window) with either your name, your studio's name, or even a graphic of your logo. It really does a great job of giving the appearance that you're using a program created especially for your studio. Step OneHere's the standard Adobe identity nameplate that appears in the top-left corner of the Lightroom interface. To customize this nameplate, go under the Lightroom menu and choose Identity Plate Setup. Step TwoThis brings up the Identity Plate Editor (shown here). The first thing you need to do is turn on the Enable Identity Plate checkbox in the upper-left corner of the dialog. Now, whatever you enter in the name field (the large black text field on the left) will appear where "Adobe Lightroom" used to appear in the Lightroom window. By default, whatever you enter in the name field appears in the font Zapfino, but you can change that (as you'll soon see). By the way, if you change the font, you can also change the fonts the module names are displayed in (in the text field on the right), so that they either match or at least complement each other.  Step ThreeIf you want to change the typeface, just highlight the type (you can choose different fonts for different words, as shown here where I'm using the same fonts Adobe does: Minion and Myriad) and then click the Font Panel button, which appears under the type field on the left side of the dialog. This brings up a Font panel where you can choose your type-face, size, and color. 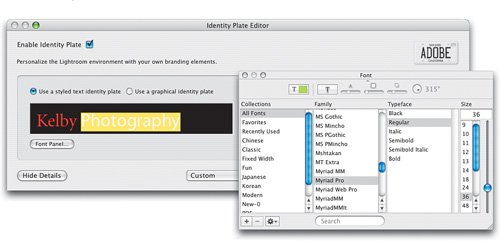 Step FourHere's how the new nameplate will look within Lightroom once you click OK, if you just edit the type and change the font. 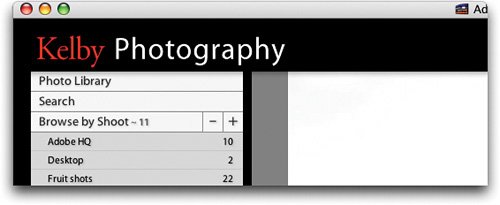 Step FiveIf you prefer to use a graphic, rather than just text, then turn on the Use a Graphical Identity Plate radio button above the name field. Then click-and-drag your graphic (most popular file formats are supported) right into the name field (or click the Locate File button). Just make sure the graphic is not more than 60 pixels high.  |
EAN: N/A
Pages: 71