Color Correcting One Problem Area Fast
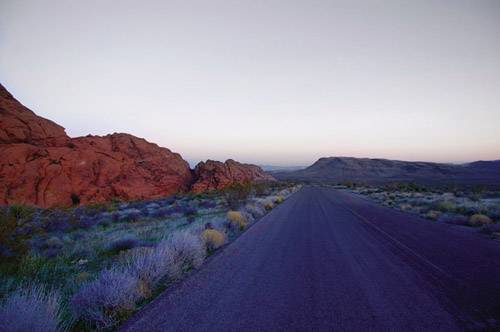
Color Correcting One Problem Area Fast!This technique really comes in handy when shooting outdoor scenes because it lets you enhance the color in one particular area of the photo, while leaving the rest of the photo untouched. Real-estate photographers often use this trick because they want to present a house on a bright sunny day, but the weather doesn't always cooperate. With this technique, a blown-out sky shot at daybreak can become a beautiful blue sky in just seconds. Step One©SCOTT KELBY  Open the image that has an area of color you would like to enhance, such as the sky. Step Two
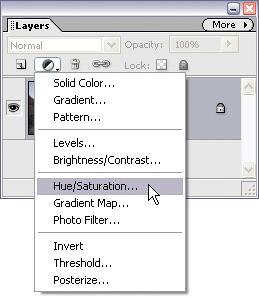
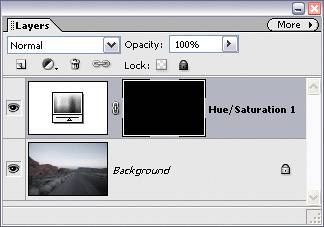
Go to the top of the Layers palette and choose Hue/Saturation from the Create Adjustment Layer pop-up menu (it's the half-black/half-white circle icon). A new layer named "Hue/Saturation 1" will be added to your Layers palette and the Hue/Saturation dialog will appear. Step Three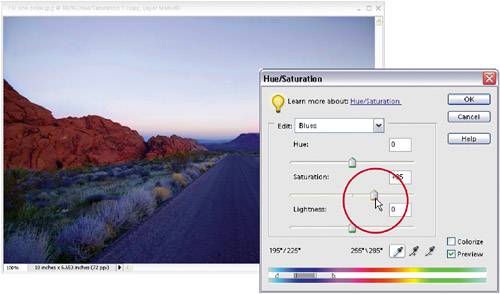 From the Edit pop-up menu at the top of the Hue/Saturation dialog, choose the color that you want to enhance (Blues, Reds, etc.), then drag the Saturation slider to the right. You might also choose Cyans, Magentas, etc., from the Edit pop-up menu and do the same thingdrag the Saturation slider to the right, adding even more color. In the example here, I increased the saturation of the Blues to 35. When your image's area looks as enhanced as you'd like it, click OK. Step Four
Your area is now colorized, but so is everything else. That's okay; you can fix that easily enough. Press the letter X until your Foreground color is set to black, then press Alt-Backspace to fill the Hue/Saturation layer mask with black. Doing this removes all the color that you just added, but now you can selectively add (actually paint) the color back in where you want it. Step Five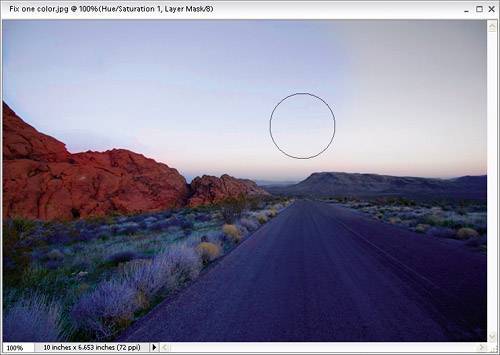
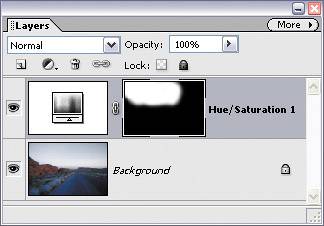
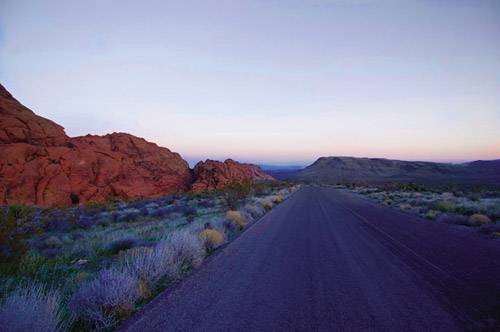
Press the letter B to switch to the Brush tool. In the Options Bar, click the down-facing arrow to the right of the Brush thumbnail, and in the Brush Picker choose a large, soft-edged brush. Press X again to toggle your Foreground color to white, and begin painting over the areas where you want the color enhanced. As you paint, the version of your enhanced photo will appear. For well-defined areas, you may have to go to the Brush Picker again in the Options Bar to switch to a smaller, hard-edged brush. 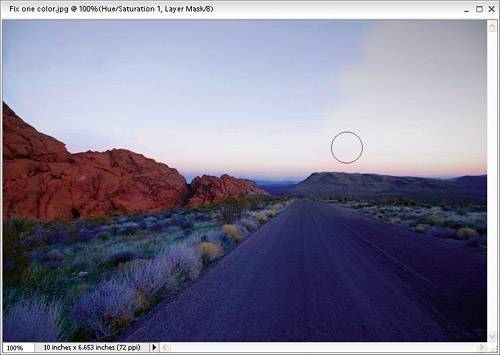 TIP If you make a mistake and paint over an area you shouldn't haveno problemjust press X again to toggle your Foreground color to black and paint over the mistakeit will disappear. Then, switch back to white and continue painting. When you're done, the colorized areas in your photo will look brighter. Before
After
|
EAN: 2147483647
Pages: 201