Tagging Your Photos (Tags are Keywords)
| Although finding your photos by month and year is fairly handy, the real power of the Organizer appears when you assign tags (keywords) to your photos. This simple step makes finding the exact photos you want very fast and very easy. The first step is to decide whether you can use the pre-made tags that Adobe puts there for you or whether you need to create your own. In this situation, you're going to create your own custom tags. Step One
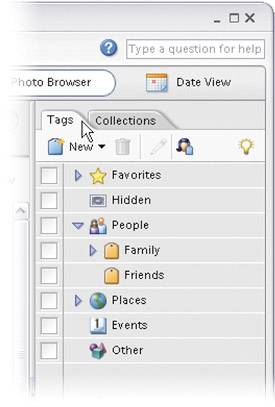
Start by clicking on the Tags tab on the right side of the Organizer. Adobe's default set of tags will appear in a vertical list. (By the way, if you don't see the Tags and Collections tabs on the right side of the Organizer, click on the words "Organize Bin" at the bottom-right corner of the Organizer window.) Step Two
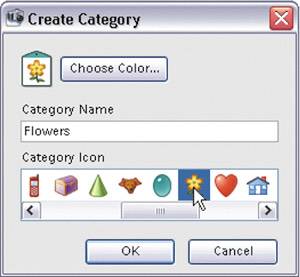
You'll start by creating your own custom category (in this case, we're going to create a category of all floral shots taken for your clients, who happen to own a greenhouse). Click on the New pop-up menu that appears just below the Tags tab itself and choose New Category. This brings up the Create Category dialog. Type in "Flowers." Now choose an icon from the Category Icon list and then click OK. (The icon choices are all pretty lame, but at least we can use the Flower icon.) Step Three
To create your own custom tag, click on the New pop-up menu again and choose New Tag. This brings up the Create Tag dialog. Choose Flowers from the Category pop-up menu (if it's not already chosen), then in the Name field, type "Close-Up Flower Shoot." If you want to add additional notes about the photo shoot, you can add them in the Note field, or you can choose a photo as an icon by clicking the Edit Icon button. Now click OK to create your tag. Step Four©SCOTT KELBY 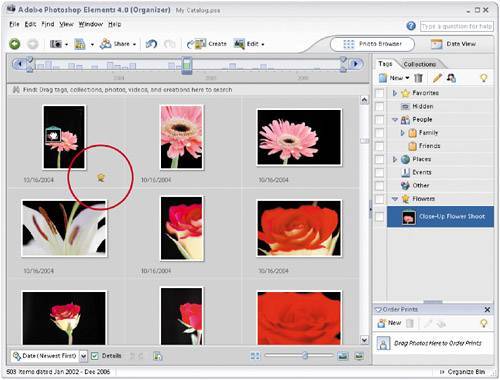 Now you'll assign this tag to all the photos from the flower shoot. In the Photo Browser window, scroll to the photos from that shoot. We'll start by tagging just one photo, so click on the Close-Up Flower Shoot tag that appears at the bottom of your Tags list and drag-and-drop that tag on any one of the photos. That photo is now "tagged." If you have the photo's Details visible (if not, turn on the Details checkbox at the bottom-left corner of the Browser window), you'll see a small tag icon appear below the photo's thumbnail (in this case, the Flower icon). Step Five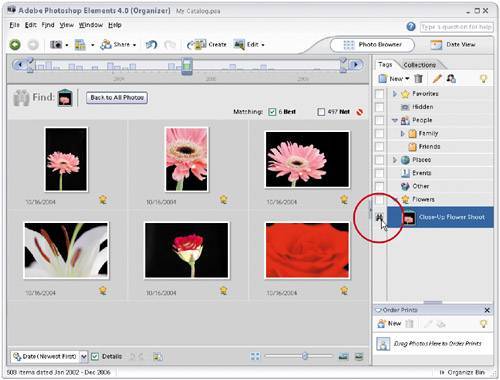 So at this point, we've only tagged one photo from the flower shoot. Drag-and-drop that same tag onto five more photos from the shoot so a total of six photos are tagged. Now, in the list of Tags on the right side of the Organizer, click in the small box in the column to the left of your Close-Up Flower Shoot tag (a tiny binoculars icon will appear in that box), and instantly, only the photos with that tag will appear in the Photo Browser window. To see all your photos again, click on the Back to All Photos button that appears at the top left of the Browser window. |

EAN: 2147483647
Pages: 201