Photo to Sketch in 60 Seconds Flat
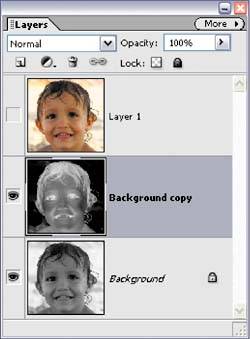
| I learned this technique from Rich Harris, the former creative guru over at Wacom Technologies. He sent me a bunch of PDFs with some special effects he had come up with, and this one just blew me away, so I asked Rich if I could include it in the book. It does the best job I've seen yet of converting a photo into a color pencil sketch. Step One©ISTOCKPHOTO/PHILIP LANGLEY 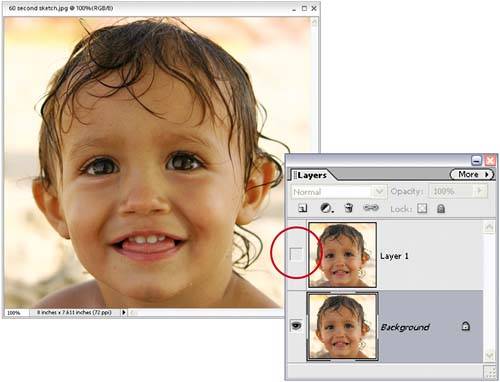 Open the photo you want to convert into a color sketch. Duplicate the Background layer by going to the Layer menu, under New, and choosing Layer via Copy (or by pressing Control-J). Hide this duplicate layer (Layer 1) by going to the Layers palette and clicking on the Eye icon to the left of this layer. Now click on the Background layer. Step Two
Press Control-Shift-U to remove the color from the Background layer (tech-nically, this is called "desaturating," but in Elements it's the Remove Color command, which is found under the Enhance menu's Adjust Color submenu). Then press Control-J to duplicate the gray Background layer (this copied layer is titled "Background copy"). Step Three
With the Background Copy layer active, press Control-I to invert the photo (giving you a photo-negative look). Step Four
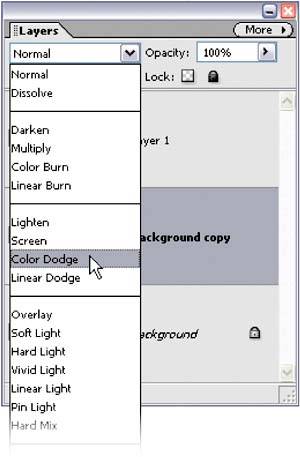
Go to the Layers palette and change the layer blend mode for the layer to Color Dodge. This turns your photo white (it looks like a blank document, but in the next step, you'll bring back the photo). Step Five
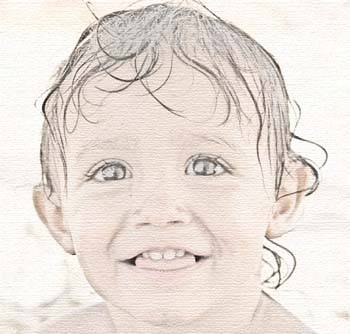
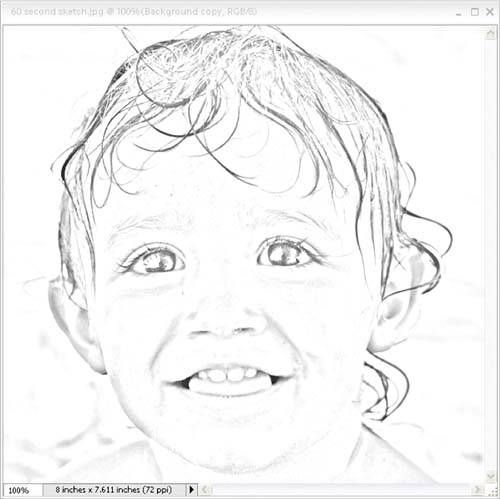 Go under the Filter menu, under Blur, and choose Gaussian Blur. When the dialog appears, drag the Radius slider all the way to the left, and then slowly drag it back to the right, and as you do your sketch will begin to appear. Click OK when the lines look dark, and the photo doesn't look too blurry. Step Six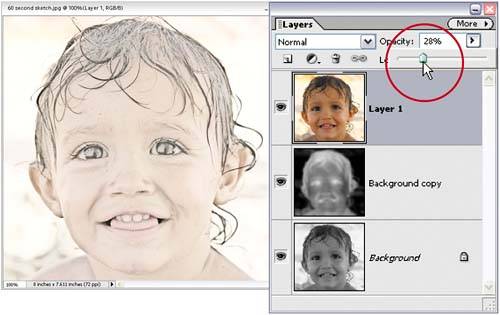 Go to the Layers palette and make the top layer (the color layer) visible again by clicking in the empty box where the Eye icon used to be. Now lower the Opacity of this layer to 20% to bring back a hint of the original color of the photo. Step Seven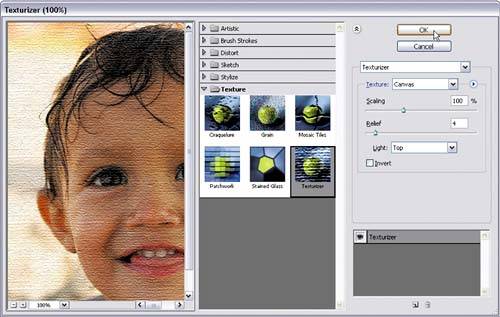 To add some texture to your sketch, go under the Filter menu, under Texture, and choose Texturizer. When the Texturizer dialog appears, you'll use the default settings (which are: Texture pop-up menu set to Canvas, Scaling set at 100%, Relief at 4, and Light set to Top). Click OK to apply your canvas texture. Now press Control-F to apply the filter again to make the effect a little more intense, completing the technique. Before
After
|


EAN: 2147483647
Pages: 201