Lessening Freckles or Facial Acne
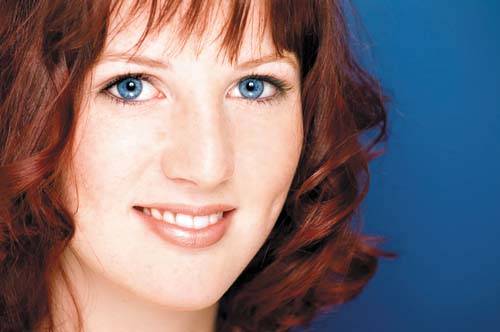
| This technique is popular with senior class portrait photographers who need to lessen or remove large areas of acne, pockmarks, or freckles from their subjects. This is especially useful when you have a lot of photos to retouch and don't have the time to use the methods shown previously, where you deal with each blemish individually. Step One©ISTOCKPHOTO/KATERYNA GOVORUSHCHENKO 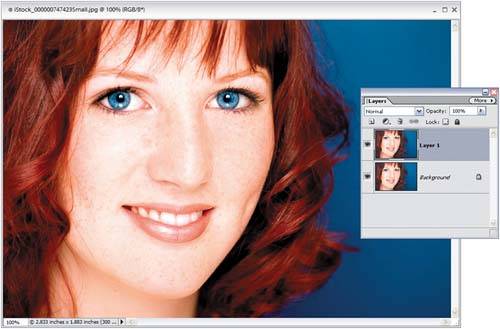 Open the photo that you need to retouch. Make a duplicate of the Background layer by going to the Layer menu, under New, and choosing Layer via Copy (or just press Control-J). We'll perform our retouch on this duplicate of the Background layer, named "Layer 1." Step Two
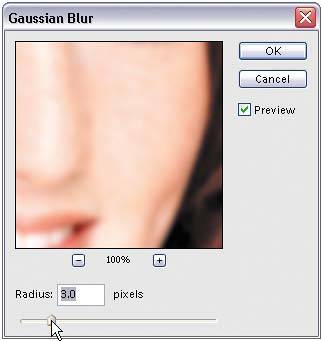
Go under the Filter menu, under Blur, and choose Gaussian Blur. When the Gaussian Blur dialog appears, drag the slider all the way to the left, then drag it slowly to the right until you see the freckles blurred away. The photo should look very blurry, but we'll fix that in just a minute, so don't let that throw you offmake sure it's blurry enough that the freckles are no longer visible. Click OK. Step Three
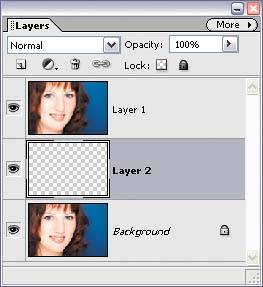
Hold the Control key and click once on the Create a New Layer icon at the top of the Layers palette. This creates a new blank layer (Layer 2) directly beneath your current layer (the blurry Layer 1). Step Four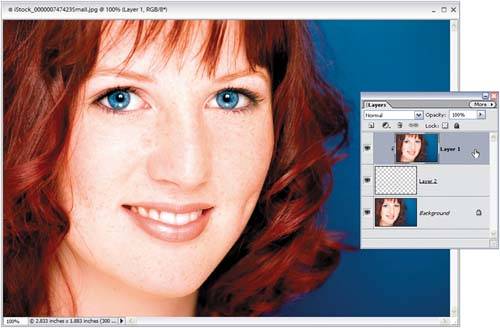 Now, in the Layers palette, click back on the top layer (the blurry Layer 1), then press Control-G to group the blurry layer with the blank layer beneath it (Layer 2). Doing this removes all the blurriness from view (and that's exactly what we want to do at this point). Step Five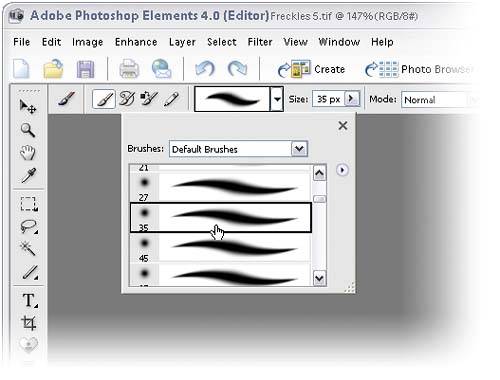 In the Layers palette, click on the middle layer (the blank Layer 2), as you're going to paint on this layer. Press the letter D to set your Foreground color to black. Press the letter B to switch to the Brush tool, then click on the Brush thumbnail in the Options Bar, and from the Brush Picker choose a soft-edged brush. Step Six
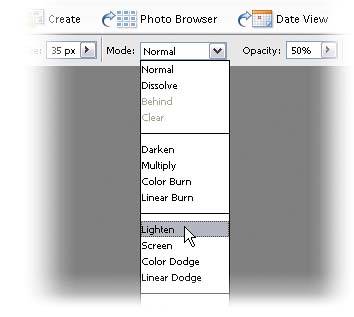
Lower the Opacity setting of your brush in the Options Bar to 50%, and change the Mode pop-up menu from Normal to Lighten. Now when you paint, it will affect only the pixels that are darker than the blurred state. Ahhh, do you see where this is going? Step Seven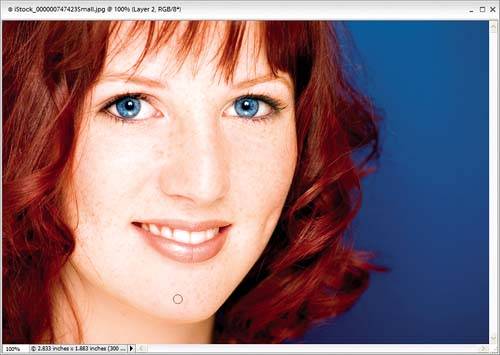 Now you can paint over the freckle areas, and as you paint you'll see them diminish quite a bit. If they diminish too much, and the person looks "too clean," undo (Control-Z), then lower the Opacity of the brush to 25% and try again. Before
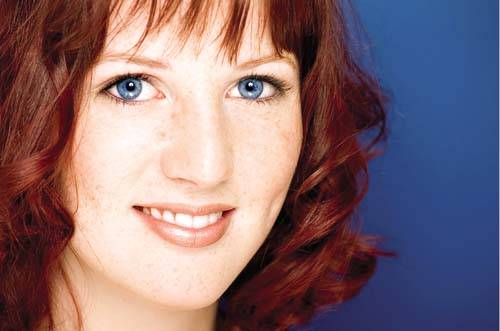
After
|
EAN: 2147483647
Pages: 201