| One of the more common types of controls you see inside applications is a slide control, where the user can select a value within a given range by moving a button that can move only in a single dimension (left and right, or up and down). These slide controls are, in fact, just a slightly modified version of drag and drop. You might even find yourself using multiple slide controls in a single application. Instead of creating each control from scratch, why not create one self-contained slide control that you can reuse? In fact, you could save this as part of a custom Library and reuse it in any Flash movie. So, what makes a slider control different from any other drag-and-drop interaction? For one thing, you need to constrain the movement of the object you're dragging to either a horizontal or vertical line. For another, sliders have a range. When you are using a slider, the call you make to the startDrag() method is a little different from what you've used before. Just so you understand exactly how this special call to startDrag is going to work, you need to understand the five arguments that you're going to pass to it. -
lock. A Boolean (true/false) that you use to lock the movie clip's center to the mouse pointer when you start dragging (true locks the pointer; false doesn't). -
left. Specifies the left-most limit of the drag area. -
top. Specifies the top limit of the drag area. -
right. Specifies the right limit of the drag area. -
bottom. Gives the bottom limit of the drag area. In the next exercise, you begin building a reusable slider control. Exercise 17.5 Setting Up the Graphics for the Slider Before you can start adding code to your slider, you need to get the basic graphics set up on the Stage. -
Open slider.fla located in the Chapter_17/Assets folder on the CD. -
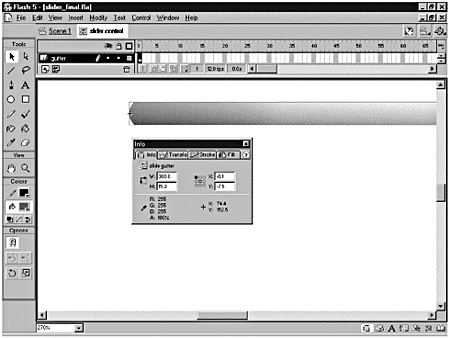
Open the Library. There are only two items, the slider button and the slide gutter. The button is what gets dragged, and the gutter is the visual object showing the extent of the range of the slider. Notice the Registration point for the slide gutter. It's on the left side of the graphic and centered vertically. Why? It just makes the calculations easierno negatives with which to deal. -
You already decided that this is going to be a generalized slider that you're going to reuse. That means it needs to be embedded in its own movie clip. Thus, create a new movie clip symbol (Insert > New Symbol) and name the new movie clip slider control. -
Rename layer 1 of the slider control movie clip gutter and drag a copy of the slide gutter movie clip from the Library onto the Stage. -
Center the slide gutter so that its Registration point lines up with the Registration point of your new movie clip. (See Figure 17.4.) Figure 17.4. Align the slide gutter so that its Registration point aligns with the Registration point of your new movie clip.  -
With the slide gutter movie clip selected, open the Instance panel and give the movie clip an instance name of gutter. -
Next you need to create the movie clip in which the slider button will be contained (remember that draggable buttons have to be embedded in their own movie clips). Create a new movie clip (Insert > New Symbol) named slider button MC. Drag a copy of the slider button from the Library onto the Stage and center it. Now it's time to add a little code to your button! This is the code that will make this movie clip draggable. It's pretty standard code, a lot like the drag-and-drop exercises you did earlier, with one exception. This time you use the startDrag() method's constrain arguments to constrain the dragging to a given area, and that area is going to be defined by the size of the gutter movie clip you already placed. Exercise 17.6 Adding the Code for the Drag-and-Drop Interaction You'll be locking the mouse to center, setting the left, top, and bottom limits to 0. You also will set the right limit by determining the width of the gutter movie clip. -
Inside the slider button MC, with the slider button still selected, launch the Actions panel and add the following code: on(press){ this.startDrag(true, 0, 0, _parent.gutter._width, 0); down = true; } on(release, releaseOutside){ this.stopDrag(); down = false; } The down variable you're setting is used a little later on to check whether you're dragging the movie clip at any given time. You might be wondering about the path you gave for the gutter movie clip. The reason that you have _parent first is that this movie clip (slider button MC) will live inside the main slide control with the gutter. Thus, to get "up" to the slide control movie clip and then down to the gutter, you have to go up by specifying _parent. -
Now hop back to the slider control movie clip by double-clicking it in the Library. Add a new layer to the top of the stack and name it slider. -
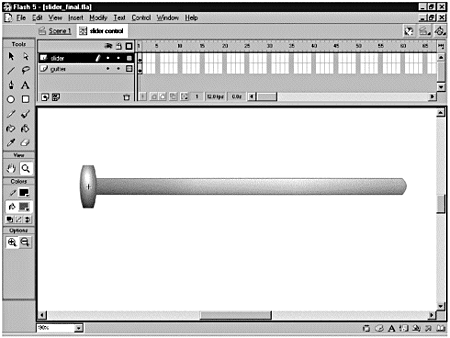
With the slider layer selected, drag a copy of the slider button MC onto the Stage. (See Figure 17.5.) Figure 17.5. The slide gutter and slider button movie clips in place inside the slider control movie clip.  You want to be able to capture information from your slider as it moves. Otherwise, what do you need a slider for? Every time the slider moves, you'll capture its current x position. (Remember how you set the Registration point? The left side of the slider control has a value of 0.) If you divide the current x position by the total width of the gutter, you always get a value between 0 and 1 (inclusive). This way, your data isn't tied to any particular range of values. -
Select the slider button MC you just placed on the Stage and add the following code: onClipEvent(mouseMove){ if (down){ _parent.onSlide(this._x/_parent.gutter._width); } } So, if the mouse moves and you happen to be dragging the slider, you'll send the onSlide function a value from 01. Believe it or not, that's all you have to do for your slider! Just about now you should start to scream, "But wait! What about that onSlide function?" That's actually part of the beauty of this object; the code that specifies what this object does when the slider is being dragged doesn't live inside the slider control! The onSlide() function is triggered by a load clip event. Think about that for a second. If onSlide() is triggered by a movie clip's load event, that means that the function can be customized for each and every instance of itself on the Stage. Now that's power. Exercise 17.7 Adding the Code for the onSlide() Function The best way to see the power of handling your code this way is to try it for yourself. You'll add two instances of the slider control to the Stage and then customize their onSlide() functions. -
Go back to your main timeline and drag a copy of the slider control movie clip onto the Stage. -
With the movie clip still selected, launch the Actions panel and enter the following code: onClipEvent(load){ function onSlide(val){ trace(val); } } This code is taking whatever value was passed to the onSlide() function and printing it in the output window. -
Save and test your movie. When you drag the slider, it spits out a value from 01. -
Drag another instance of the slider control movie clip onto the Stage. In this case, you want the values returned by the onSlide function to be from 100100. What to do? Simple. Multiply the value passed to the onSlide function by 200 (you need to account for all possible values from 100100). Round your new number and subtract 100 from it. Your new code should look like this: onClipEvent(load) { function onSlide(val){ trace(Math.round(val*200)-100); } } -
Save and test your movie. Slide away. You should see numbers only from 100100. As you can see, by isolating the code that performs the calculations in the load event, you can have as many sliders on the Stage as you need, with each one customized. In these two cases, you just printed the values from the sliders in the output window. You could have just as easily sent the values to a variable. In the next section, you take a look at one more interface element that you can use with Flash 5scrolling text.  |

