Cinematography and Perspective in Flash
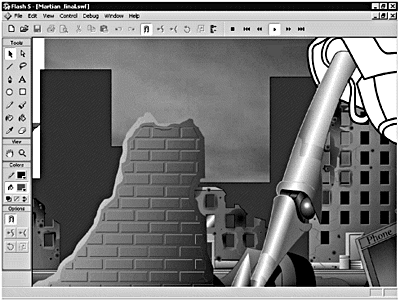
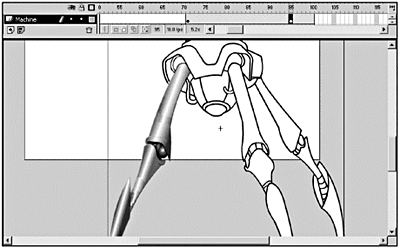
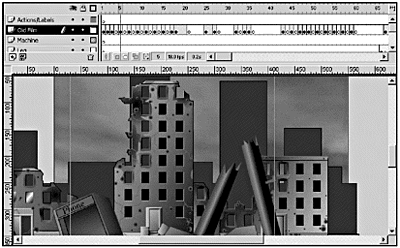
| Take a moment to play Martian_final.swf (use Martian_final_low.swf, if you have an older or slower machine). Each file is in the Chapter_11/Assets folder. Watch it several times, paying special attention to the movement of the background scenery , especially when it falls away as the Martian Terror Machine enters the scene. (See Figure 11.1.) Figure 11.1. The Martian Terror Machine enters the city toward the end of the final movie. Note The Martian Terror Machine is H.G.Wells' name , not mine, but it's cool nonetheless. I like to think he'd approve of my rendition . The animation makes use of a formula that relies on using a large amount of descriptive visual detail that is seen over a very brief period of time. The visual detail, combined with the perspective scrolling of the scenery, creates an interesting and realistic 3-D effect. On the surface, this looks like a complex animation, but actually, it's not. The entire sequence consists of four strips of scenery, two prop items, and a few lines thrown in for the "old film strip" effect. The entire animation is accomplished by using just tweening combined with a little frame-by-frame animation. You work on recreating this scene in the next several exercises. Start by examining the Library items in the base file, Martian.fla, which is found in the Chapter_11/Assests folder. Note If you have an older or slower machine, you might want to use the Martian_low.fla file instead. It's the same file, but with the gradients removed. In the Library, there are three folders:
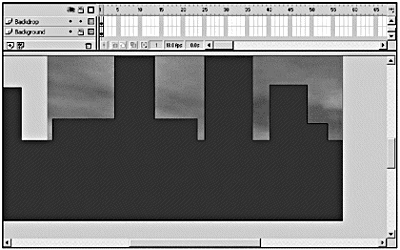
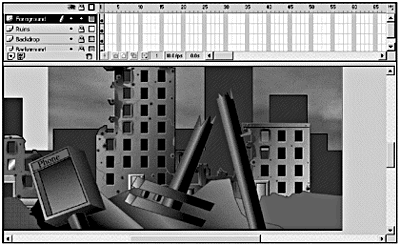
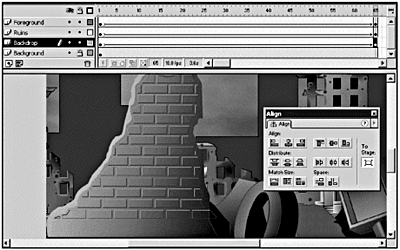
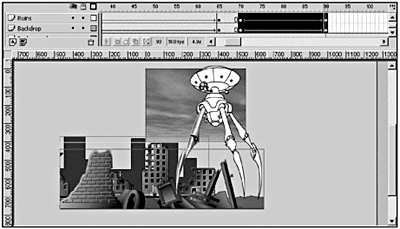
The three scenery symbols are all highly detailed, single-frame movie clips. Essentially, they're graphic "strips," similar to painted and cut-out cardboard scenery pieces. These graphic strips are going to move across the Stage from left to right. To make that work, part of the strip is always off Stage. When you create a scrolling scene like this, it's a good idea to create graphic strips that are longer than you think you'll need. That way, you can be sure that you won't run out of scenery when you start scrolling the scenes. After you're happy with the timing of the scrolling and everything is properly in place at the end of the animation, crop the images on the Stage to eliminate any unseen portions. This substantially cuts down on the final file size . Now that you've had a chance to acquaint yourself with the individual elements you'll be using in this movie, it's time to add them to the Stage. In the next section, you look at how you can use layers to achieve a feeling of depth. You also look at how you can tween graphic strips of different lengths to achieve the feel of moving down a 3-D city street. Note I originally planned to have the Sky JPEG slowly scroll across the screen with the rest of the scenery, but I decided to crop it and keep it stationary to reduce processor lag. Sometimes you have to make trade-offs between art and CPU usage! Note It might not look like it, but when completed, this is a small file (36Kb). It's kept that way by eliminating and cropping anything that leaves the viewable portion of the stagea rule of thumb worth mentioning. The graphic strips used for this exercise were quite a bit longer than the ones you have in the current movie. They were trimmed to size after it was determined how long they needed to be. In other words, after the tween was set up, it was easy to see which portions of the graphic would never need to be on the Stage. Simulating a Movie Camera and DollyRather than thinking of the Flash Stage as a camera, think of it as an electronic puppet show stage. Although Flash graphics are 2-D in nature, Flash's animation capabilities enable scenes and characters to enter and leave the Stage in a way that mimics an actual movie camera operating in a 3-D environment. The only fundamental difference is that the items on stage do the moving and the "camera" (Stage) remains stationary. Because there are no actual cameras to position in Flash, it's important for the artist/ animator to be innovative when it comes to designing and animating the graphics that enter the viewable portion of the Stage. By thinking ahead and building distortions of perspective into the graphics, you can achieve truly dynamic camera effects with a simple, basic motion tween. Setting the SceneAll the scenery symbols begin the animation with their right sides flush with the right side of the Stage. When the movie starts, they begin their journey across the Stage at different speeds, according to their order on the Stage. The top layer with the Foreground strip moves the fastest , the middle layer with the Ruins graphic strip moves a little slower, and the bottom layer, with the Backdrop graphic clip, moves even more slowly. Why is it set up this way? It's a perspective trick. You'll take a more in-depth look at how this works after you have all your graphic strips on the Stage. Tip Look at the base file's three scenery clips closely. The farther in the background the scene is supposed to be, the darker it is. That's another visual clue that helps create the illusion of perspective. Exercise 11.1 Preparing the Basic Scenery Setup Enough talking about what you're going to do; let's just do it. In this exercise, you place all the scenery elements, including the sky background, on the Stage and get them aligned properly so that you can begin the city scene animation.
Yet, it looks pretty cool, but you need some action here! Relative MotionIn the final movie, the three scenes moved at different speeds. The scene closest to you moved more quickly than the scenes that were farther away. The principle here is the same as what you have undoubtedly observed when you look out of a fast-moving car. Objects that are closer appear to move by faster than objects that are farther away. Don't believe it? Next time you are in a car that's moving at a good clip ( excuse me, but need I say that you should be the passenger in this car?), try focusing on objects that are right by the side of the road. It's pretty hard to do. However, it's easy to focus on distant objects; they appear to move more slowly. You animate the scenery clips across the same number of frames. The question is how do you get them to scroll at different speeds? The answer is remarkably simple. The key is that each clip is a different width. When you animate different width clips across the same number of frames, you get different relative speeds. Wide clips appear to scroll faster than narrow clips. Think about it in terms of physics. Speed is equal to distance traveled divided by the time of travel. For you, distance is the number of pixels between the left and right sides of the clip. The number of frames you use to animate the clip represent time. What the heck, let's do the calculations: Foreground: 1120 px/100 frames = 11 px per frame Ruins: 910 px/100 frames = 9 px per frame Backdrop: 818 px/100 frames = 8 px per frame The backdrop has the slowest speed and the foreground has the fastest speed. In the next exercise, you put this theory into practice. Exercise 11.2 Adding Some Motion When adding motion to your scenery, allow for three to four seconds of animation to pan all the way across the city. For the purposes of this movie, that translates to about 65 frames. With this type of scene, especially with the combination of tweening and gradients, you want the animation to be relatively short. Otherwise, you're talking about a huge file sizenot to mention maxing out the CPU.
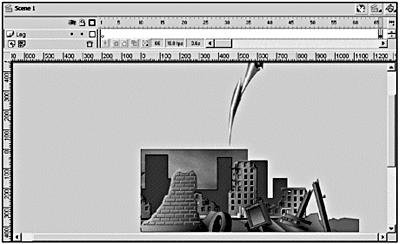
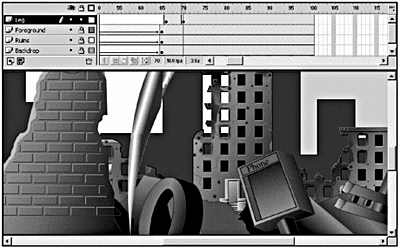
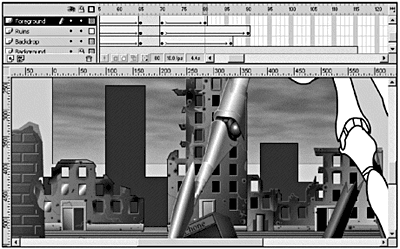
Once again, because each movie clip has a different width, you get the illusion of different speeds. The Foreground moves faster than Ruins, and Ruins moves faster than the Backdrop. What else do you need to have come into this movie? You need an invasion from Mars! Think back to the completed movie. At the end of the scenery scroll, a giant mechanical leg comes down in the middle of the scene. At around frame 65, the scrolling tweens come to a halt. This is where the disembodied Martian leg makes its brief, but dramatic, five-frame debut. This signals the arrival of its larger, fully complete sibling. Exercise 11.3 Introducing the Martian Terror Machine Leg In this exercise, you bring the Martian Terror Machine from off-Stage into the center of the city scene by using a simple tween combined with some scaling.
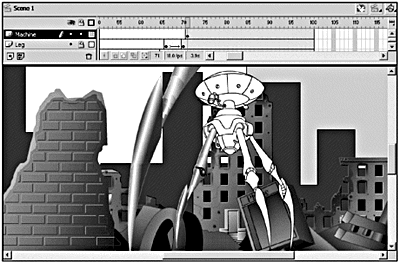
Why just bring in the Leg and not the whole Machine? Well, we do it that way to alleviate the processor lag of needlessly moving the entire Machine symbol five frames. Remember that when you work with vector graphics, you're making a lot of demands on your audience's computers. There are a lot of calculations involved both in tweening and using gradients. You have both here. The less you have to move around, the better off you are. Okay, if you saw that big metallic leg plop down right in front of you, your first inclination would be to look up and see what it was attached to. Don't you think? Enter the complete Martian Terror Machine. Panning Across Martian TerrorThe Martian Terror Machine is actually a graphic that is specially designed to integrate with the final frame of the animation. Hand-drawn, scanned, and traced, the leg portions are depicted from a dead-on perspective, while the upper body portions are drawn as though you were looking up at it. Because it was drawn this way, when the Machine tweens into place at the end, it seems as though the "camera" is actually moving to look up at it. Creating this type of effect is the art of building distortion of perspective into your graphics; it's a useful technique. It's all about creating an optical illusion of perspective. How do you do that? Start by observing the world around you. Go outside and look up at a tall building. If you're lucky enough to be in New York, you can use the World Trade Center for this. Observe what happens to the parallel lines of the building's sides. They appear to converge. In other words, they look closer together at the top than they do at the bottom. That's a visual clue you can carry with you. When you look up at something, or off into the distance at something, whatever you are looking at appears to be smaller the farther away from you it is. It's not really smaller; it's an optical illusion. After you understand this concept, you can re-create it. That's how the Martian Terror Machine worksthe legs, which are closer to you, appear to be proportionally larger than the body of the machine. Next, you'll take a look at how you're actually going to create the tween for the entry of the Machine onto the Stage. After the Martian leg is in place, two things happen simultaneously . The Machine tweens into position so that its "body" occupies the Stage, and the scenery begins to exit from view to the lower left of the stage. You'll scale down the Machine in size a little bit to fit it on the Stage. Scaling down the Machine symbol actually increases the dramatic effect by making it appear farther away, hence, taller. Note As soon as the scenes are no longer viewable on the Stage, you should terminate their timelines . This saves wear and tear on the processor. Exercise 11.4 Introducing the Martian Terror Machine In this exercise, you add the complete Martian Terror Machine to the Stage and scale it up so that it matches the size of the disembodied leg.
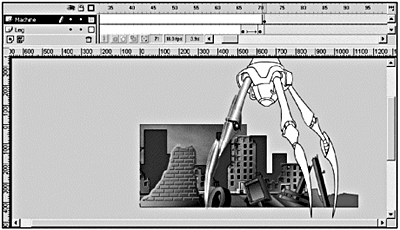
At the end of the scrolling sequence, the Martian Leg enters the scene and is replaced by the Martian Walker. In the next exercise, you pan the camera up to see the rest of the machine. Exercise 11.5 Panning Up the Martian Terror Machine Once again, you're going to use tweening to imitate the effect of a camera panning up the Machine body. This time, you use an angled tween rather than a simple side-to-side tween.
Okay, this just doesn't look right yet. You need to have the scenery move down and to the left during the pan to get a realistic effect. Think about what needs to happen. As the camera pans up, the scenery needs to disappear. Exercise 11.6 Losing the Scenery During the Pan The scenery shouldn't start receding until you begin to pan up the Martian Walker. You need to begin by inserting keyframes in the three scenery layers where the change in action occurs.
Now when the Martian Walker enters the scene, the city recedes below the Stage as you pan up toward the top of the Walker. Optimizing Your TweenTime to do some optimization. You need to tween the scenery layers only for as long as they are visible. Think for a moment about the order in which each piece of scenery leaves the screen. Once again, you're going to be dealing with perspective issues:
You're going to have to make some adjustments to the scenery tweens based on the order in which the pieces of the scenery leave the screen. Exercise 11.7 Optimizing the Scenery Tween There's no real science to adjusting these tweens (well actually there is, but do you really want a two-day physics lecture here?); you just have to eyeball it until it feels right.
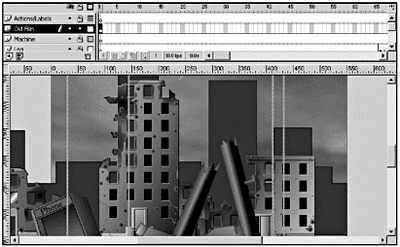
Not bad. That's a pretty slick animation without too much pain. Do be aware that this type of animationwith lots of gradients and tweeningwill be, by definition, processor intensive . Just remember that routinely removing frames that your tweens don't need and keeping your images cropped to their smallest possible sizes lightens the load. Simulating Damaged FilmThe Martian animation was created with the intention that it should look like something from the early 1950s. The damaged film effect works well here because it looks natural in a black and white or monochrome setting; the lighter scratch lines integrate well and it generally reinforces the "retro" style of the movie. An old Orsen Wells sound file that has the "cracks and pops" of a turntable needle would be a fine addition. Although creating the appearance of scratched or aged film is probably one of the easiest effects to accomplish in Flash, certain things should be taken into consideration for it to look convincing. Have a look at the Old Film layer in the Martian_final.fla file in the Chapter_11/Assets folder. As you can see, it uses frame-by-frame animation instead of tweening. You never achieve an effective scratched film effect using tweened lines because the scratches in old film rarely, if ever, move from side to side. Because scratches always are vertically oriented and viewed at 24 frames per second (on real film), it stands to reason that they appear as a sort of arbitrary blink. For a particularly long scratch, you get a longer blink. The simplest way to replicate this effect is to create a single frame with a few randomly spaced light gray vertical lines. You can duplicate this frame by inserting several keyframes. You then go in and edit the individual keyframes by hand, adding in blank keyframes to space out the scratches. How do you know when you've got it right? You're going to have to do a lot of testing. You want to make sure that you haven't overdone it. After you're happy with the sequence, copy the series of frames, paste them further down the timeline, and make additional adjustments. Just for sport, you can add a little squiggly line, like a piece of fuzz that you see in old movies. Copy and paste it randomly throughout the layer. It actually lends some authenticity to the scratches. You need to take special care when using this effect in a color animation, particularly when it comes to the color of the scratch lines. Scratch lines are much harder to integrate convincingly in a color vector animation than they are in a monochrome one. The result often appears to be more of a bizarre design element than old film. Now that you know the basics, it's time to get back into your file and age your "War of the Worlds" animation. Exercise 11.8 Simulating Damaged Film As mentioned, this is not a difficult technique, but it does take some practice to get it to look realistic. Hey, you can't call it art if you don't suffer for it.
As you can tell by studying it, there really is no system to imitating such an arbitrary effect. You have to play through the film enough times and make the necessary changes until you are satisfied with the final effect. "Test and weigh," as the saying goes. Sometimes a project demands fresh new video instead of damaged film. In the next section, you take a look at how you can import a video sequence into Flash and use it to create a new Flash movie. |
EAN: 2147483647
Pages: 257
