Installing a Primary Site Server
Now that you have created a viable deployment strategy for your SMS 2.0 site, decided how to install and configure your SQL Server, and confirmed the hardware and software requirements necessary for a successful installation of SMS 2.0, it's time to begin the installation process itself. This section will concentrate on the installation of an SMS 2.0 primary site server. Installing secondary site servers and other site system roles will be discussed in Chapters 3 and 4.
Installation Options
You can install your SMS 2.0 site server using a variety of techniques and options. You may install directly from the CD, or you can first copy the source files from CD to the local hard disk of the proposed site server or a network drive. If you choose to copy the source files to a drive location, be sure to copy the entire SMS 2.0 CD, as the installation process does require files located in the Alpha directories.
Once you have located the source files, you can run the installation interactively through the Systems Management Server 2.0 Setup Wizard by inserting the SMS 2.0 CD and choosing Set Up SMS 2.0 from the autorun menu shown in Figure 2-1, or you can run the installation from a Windows NT command line. The command-line syntax is shown here:
SETUP [/?] [/SCRIPT scriptname] [/UPGRADE] [/NODISKCHECK]
[/NOACCTCHECK]
The command-line method provides five switch options to initiate the setup process under different circumstances, as outlined in Table 2-2. If you execute the SMS 2.0 setup from the command line, you will still launch the SMS 2.0 Setup Wizard, which presents you with a series of nice, "user-friendly" installation screens that guide you every step of the way.
Two installation options are available once you begin the setup process: Express Setup and Custom Setup. Express Setup installs SMS 2.0 with a complete set of SMS 2.0 components and features including Crystal Info; Custom Setup lets you choose which components and features to install.
Table 2-2. Command-line switch options
| Switch | Description |
|---|---|
| /? | Displays a pop-up dialog box listing and describing each switch along with the command-line syntax. |
| /SCRIPT scriptname | Allows you to specify a path and script file, which provides the different pieces of information required during setup for unattended installation. |
| /UPGRADE | Allows to you specify an unattended upgrade from an earlier version of SMS. |
| /NODISKCHECK | Allows you to perform the installation without having SMS 2.0 check for available disk space first. Assumes you have already confirmed that you have the required amount of disk space available. |
| /NOACCTCHECK | Allows you to perform the installation without having SMS 2.0 check the specified service account for the appropriate level of permission and rights. Assumes that you have already created the account and have given it the appropriate administrative permissions and the Logon As A Service user right. |

CAUTION
Don't use Express Setup for sites with more than 500 clients. If you choose to install Crystal Info as one of your options in Custom Setup, the Setup Wizard will display a message box describing a Crystal Info limitation. In brief, the version of Crystal Info supplied with SMS 2.0 is meant for single SMS sites with fewer than 500 clients. It is a sample snap-in only. If you intend to use Crystal Info with larger sites, do not select Crystal Info for installation on your site server. Instead, create a separate site server for which the only optional SMS component you will select is Crystal Info. You will then need to make this site an SMS parent site for the actual site. Refer to the Microsoft Systems Management Server Version 2.0 Release Notes for more information about this workaround.
Table 2-3 outlines the SMS components and features that are installed and the default values that are set for each. Features, discovery methods, installation methods, and client agents have additional options that can be configured; these elements are discussed in their respective chapters later in this book.
Table 2-3. SMS 2.0 components installed during setup
| Component | Express Install | Default Value | Custom Install |
|---|---|---|---|
| SMS 2.0 Features | |||
| SMS site server | Installed | N/A | Installed |
| SMS Administrator Console | Installed | N/A | Installed |
| Crystal Info | Installed | N/A | Optional |
| NetWare Bindery support | Not installed | N/A | Optional |
| NetWare NDS support | Not installed | N/A | Optional |
| Network Monitor | Installed | N/A | Optional |
| Package automation scripts | Installed (Note: only scripts, not source files) | N/A | Optional |
| Product compliance database | Installed | N/A | Optional |
| Remote Tools | Installed | N/A | Optional |
| SMS Installer | Installation point created | N/A | Optional |
| Software metering | Installed | Enabled | Optional |
| Discovery Methods | |||
| Windows Networking Logon Discovery | Enabled | Every logon; Modify Logon Script option disabled | Disabled |
| Windows NT User Discovery | Enabled | Once a day at midnight | Disabled |
| Windows NT User Group Discovery | Enabled | Once a day at midnight | Disabled |
| NetWare NDS Logon Discovery | Disabled | N/A | Disabled |
| NetWare Bindery Logon Discovery | Disabled | N/A | Disabled |
| Heartbeat Discovery | Enabled | Once a week for Custom Setup; once a day for Express Setup | Enabled |
| Network Discovery | Disabled | N/A | Disabled |
| Installation Methods | |||
| Windows Networking Logon Client Installation | Enabled | N/A | Disabled |
| NetWare Bindery Logon Client Installation | Disabled | N/A | Disabled |
| NetWare NDS Logon Client Installation | Disabled | N/A | Disabled |
| Windows NT Remote Client Installation | Enabled for servers, workstations, and domain controllers running Windows NT | N/A | Disabled |
| Client Agents | |||
| Advertised Programs Client Agent | Enabled | Polls every 60 minutes for advertised programs; scheduled programs have 5-minute countdown | Disabled |
| Event To Trap Translator Client Agent | Enabled | N/A | Disabled |
| Hardware Inventory Client Agent | Enabled | Once a week | Disabled |
| Software Inventory Client Agent | Enabled | Once a week | Disabled |
| Remote Tools Client Agent | Enabled | All remote options enabled; user permission required; user notified; user can make changes | Disabled |
| Software Metering Client Agent | Enabled | Polls for configuration changes every 4 hours (240 minutes); licensing not enforced | Disabled |
Express Setup is a fast and easy way to install SMS 2.0 and is recommended for small stand-alone sites or test environments. Express Setup also installs a dedicated SQL Server 6.5 (with Service Pack 4 automatically applied) or SQL Server 7.0 on the same server; creates and configures SQL Server data devices for SQL Server 6.5, database files for SQL Server 7.0, and SQL Server parameters (as discussed in the section "SQL Server Requirements" earlier in this chapter); and creates all necessary service accounts. When installation is complete, the site server will assume the site system roles of CAP and distribution point. It will also assume the role of logon point if the site server is also a Windows NT domain controller. If it is not, Express Setup will configure all domain controllers in the site server Windows NT domain as logon points for the site.
![]()
NOTE
The Express Setup method is supported for servers running Windows NT Enterprise Edition and for servers running SQL Server 6.5, but not for servers running both applications together.
The Custom Setup option installs SMS 2.0 with the basic site server and SMS Administrator Console installed. All other SMS 2.0 features and components are options that can be selected as desired. You can always leave an option unselected and install it at a later time. If the option is selected, it will be installed, but not enabled by default. Once an option is installed, it cannot be uninstalled without removing and reinstalling SMS 2.0. The site server will assume the site system roles of CAP and distribution point. However, unlike Express Setup, if the site server is a domain controller, it will not assume the role of logon point until Windows Networking Logon Discovery or Windows Networking Logon Client Installation has been enabled.
Like Express Setup, Custom Setup installs a dedicated SQL Server 6.5 (with Service Pack 4 automatically applied) or SQL Server 7.0 on the same server; creates and configures SQL Server data devices for SQL Server 6.5, database files for SQL Server 7.0, and SQL Server parameters; and creates all necessary service accounts. If SQL Server has already been installed and configured on the proposed site server computer, you will be presented with only the Custom installation option.
Running Setup
To install a primary site server, follow these steps:
- Either execute Setup.exe from the command line, by inserting the SMS 2.0 CD and choosing Set Up SMS 2.0 from the autorun menu (shown in Figure 2-1), or enter the path to the SMS 2.0 source files and execute Autorun.exe to display the autorun menu.
- The welcome screen appears, as shown in Figure 2-2.
- Click Next to display the System Configuration screen, shown in Figure 2-3. At this time, Setup checks to see if you have any earlier versions of SMS installed or if the server is already functioning as an SMS site system.
- Click Next to display the Setup Options screen, as shown in Figure 2-4. If no current installation of an SMS site server or site system is detected, the first three options will be enabled. You can install a primary site, a secondary site, or just the SMS Administrator Console. If an existing SMS 2.0 site server is detected, the last three options will be enabled. In this case, you can upgrade the existing installation by adding additional SMS components, remove SMS 2.0, or modify or reset the installation—for example, by changing service account names and passwords or rebuilding a site control file. If the Setup Wizard detects a site server installation for an earlier version of SMS, only the Upgrade An Existing SMS Installation option will be enabled. In this case, select Install An SMS Primary Site and click Next.
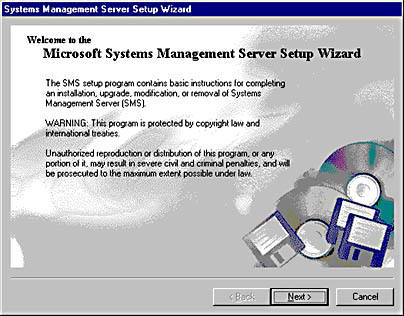
Figure 2-2. The Setup Wizard welcome screen.
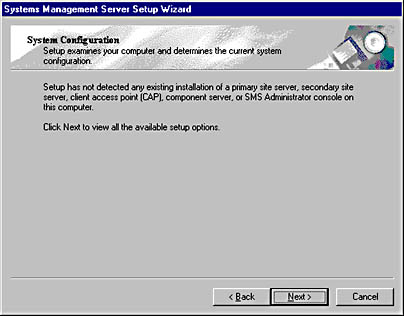
Figure 2-3. The System Configuration screen.
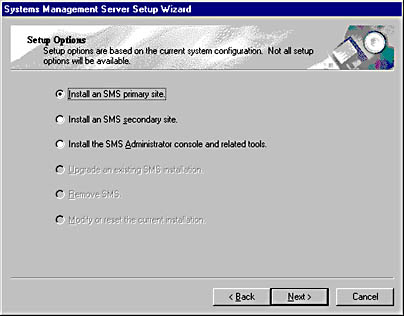
Figure 2-4. The Setup Options screen.
![]()
NOTE
If the Setup Wizard detects an existing installation of an SMS site system such as a CAP or a logon point, you will not be able to continue the installation until you remove that site system from the SMS site it is a member of.
- If you have not already installed SQL Server on the same server as the proposed site server, the Installation Options screen will appear, as shown in Figure 2-5. Choose Express Setup or Custom Setup.
- Click Next to display the License Agreement screen, shown in Figure 2-6. Read this agreement carefully, and signify your acceptance by selecting I Agree.
- Click Next to display the Product Registration screen, shown in Figure 2-7, and enter the name, the organization name, and the CD key located on the back of your SMS 2.0 CD case.
- Click Next to display the SMS Site Information screen, shown in Figure 2-8, which asks you to supply the three-character site code you want to assign to this site, a descriptive site name, and the Windows NT domain in which you are installing the site.
- Click Next to display the SMS Service Account Information screen, shown in Figure 2-9. Here you will need to specify the name and domain of the SMS Service account you will be using. If you have not created one yourself, either accept the default account SMSService or enter the name of the account you would like SMS to create. SMS will automatically assign it the appropriate group memberships and user rights. If you have already created this account using User Manager For Domains in Windows NT, specify it here using the convention domain\account. Be sure you have already assigned the account the appropriate group memberships in the SMS site domain (Domain Admins, Domain Users, and Administrators) and have given the account the Logon As A Service user right using the User Rights policy in Windows NT. Enter and confirm a password (preferably something other than password).
- Click Next to display the SMS Primary Site Client Load screen, shown in Figure 2-10. Enter the number of SMS clients that this site will manage, as you determined in your deployment strategy. The number that you enter here ultimately affects the size of the SQL database that SMS will create or that you have created ahead of time. An incorrect database device or file size will cause the installation to fail.
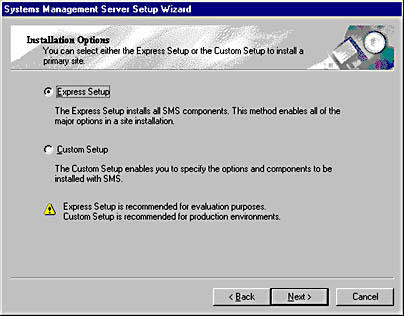
Figure 2-5. The Installation Options screen.
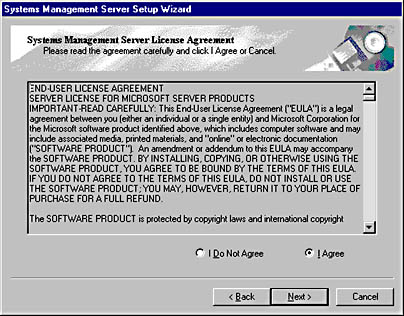
Figure 2-6. The Systems Management Server License Agreement screen.
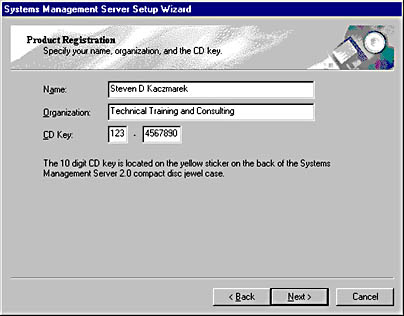
Figure 2-7. The Product Registration screen.
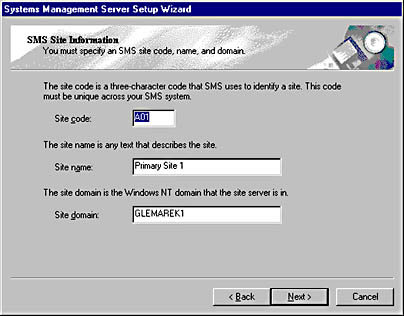
Figure 2-8. The SMS Site Information screen.
The site code is limited to three characters and must be unique across your SMS hierarchy. The site name is descriptive, limited to 50 characters (including spaces) and should reflect the location or function of the site, such as Awesome Computer Central Site or Finance Primary Site. It is usually a good idea to specify whether the site is central, primary, or secondary. Once this information is entered, it sticks—with the exception of the site name, which is merely descriptive. If you need to change the domain name or the site code later, you will need to remove this installation of SMS and reinstall it.
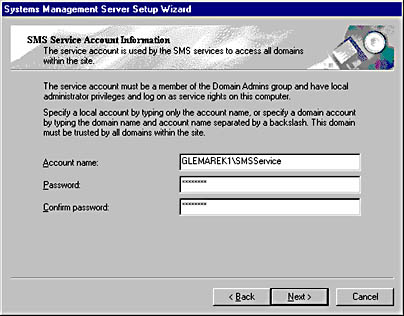
Figure 2-9. The SMS Service Account Information screen.
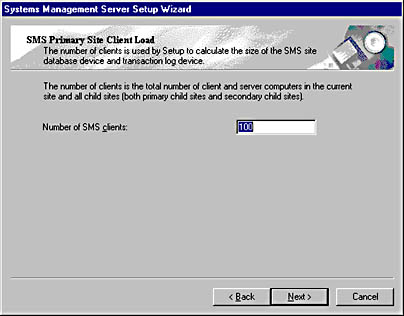
Figure 2-10. The SMS Primary Site Client Load screen.
At this point, the installation process will vary depending on whether you have choosen Express Setup or Custom Setup. Let's continue first with the Express installation options and then look at the Custom installation options.
Express Installation
- On the SMS Primary Site Client Load screen, click Next to display the SQL Server Administrator Account screen, shown in Figure 2-11. Since Express installation assumes that you will install a dedicated SQL Server on this same server, it will prompt you only for the SQL Server sa account password. It will not prompt you for any SQL database information. The Setup Wizard determines the database size based on the number of clients you entered in the previous screen, and it uses the default data and log names of SMSDATA and SMSLOG. Enter and confirm the password if necessary.
- Click Next to display the Concurrent SMS Administrator Consoles screen, shown in Figure 2-12, and enter the number of concurrent SMS Administrator Consoles you expect to be running in the site. SMS will add 5 user connections for each instance of the SMS Administrator Console to its default of 50 when configuring this parameter in SQL Server.
- Click Next to display the Completing The Systems Management Server Setup Wizard screen, as shown in Figure 2-13. Confirm your settings, and then click Finish. You can click the Back button from this and any previous screens to go back and modify your entries—and even to switch from Express to Custom installation.
- The Setup Wizard will ask whether it should create the SMS Service account for you, if you have not already created it. Choose Yes. SMS Setup will then prompt you for the SQL Product ID and the path to the SQL source files, as shown in Figure 2-14. After SMS Setup finishes installing SQL Server, it will complete the SMS installation.

Figure 2-11. The SQL Server Administrator Account screen.

Figure 2-12. The Concurrent SMS Administrator Consoles screen.
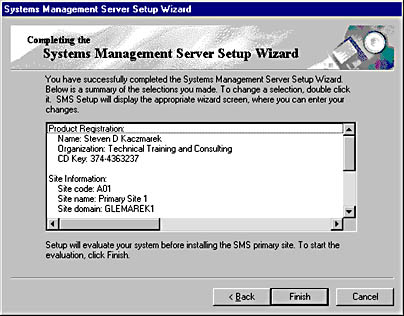
Figure 2-13. The Completing The Systems Management Server Setup Wizard screen.
Custom Installation
- If you are performing a Custom installation, the next screen you will see after the SMS Primary Site Client Load screen will be the SMS Server Platform screen, shown in Figure 2-15. The platform check box that is checked matches the platform of the server on which you are performing the site server installation. If you expect to support a site with mixed-platform site systems or clients, check the appropriate option.
- Click Next to display the Setup Installation Options screen, shown in Figure 2-16. You can select which SMS components you want to install at this time. As you check each option, a brief description is displayed in the Description box.
- Click Next to display the Dedicated Copy Of SQL Server screen, shown in Figure 2-17. This screen lets you specify whether the Setup Wizard should install a dedicated copy of SQL Server on the site server for you or whether you have already installed SQL Server yourself. Select Yes or No as appropriate.
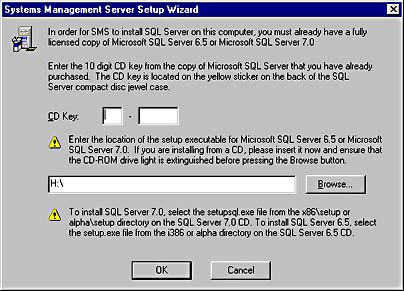
Figure 2-14. The SQL Server setup screen.
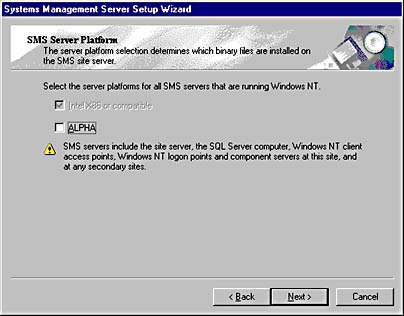
Figure 2-15. The SMS Server Platform screen.
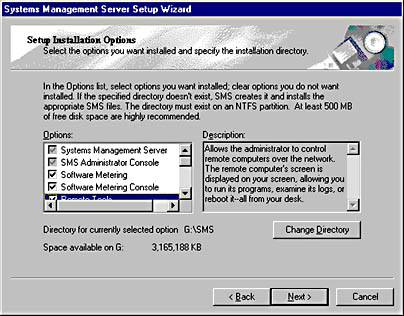
Figure 2-16. The Setup Installation Options screen.
The Setup Wizard will automatically select the NTFS partition with the most free disk space as the installation directory. Click the Change Directory button to select a different location.
Once again, the setup process branches depending on whether you choose Yes or No in the Dedicated Copy Of SQL Server screen. Let's proceed with the options you set when you choose Yes. Then we'll see what happens when you choose No.
Choosing to Install a Dedicated Local Copy of SQL Server
- Choose Yes, and click Next to display the SQL Server Administrator Account screen, shown in Figure 2-18. Since SMS will install SQL Server for you, you need to confirm the SQL Server sa account password.
- Click Next to display the SQL Server Installation screen, shown in Figure 2-19. Identify the installation drive and directory in which the Setup Wizard should install SQL Server. Once again, the Setup Wizard chooses the drive with the most free space.
- Click Next to display the Concurrent SMS Administrator Consoles screen, shown in Figure 2-12, and enter the number of concurrent SMS Administrator Consoles you expect to be running in the site. SMS will add 5 user connections for each instance of the SMS Administrator Console to its default of 50 when configuring this parameter in SQL Server.
- Click Next to display the Completing The Systems Management Server Setup Wizard screen, shown in Figure 2-13. Confirm your settings, and then click Finish. You can click the Back button from this and any previous screens to go back and modify your entries—and even to switch from Express to Custom installation.
- The Setup Wizard will ask whether it should create the SMS Service account for you. Choose Yes. Setup will then prompt you for the SQL Product ID and the path to the SQL source files, as shown in Figure 2-14. After the Setup Wizard finishes installing SQL Server, it will complete the SMS installation.
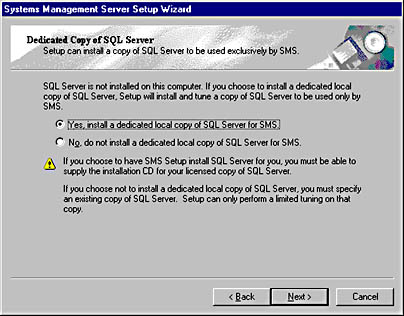
Figure 2-17. The Dedicated Copy Of SQL Server screen.
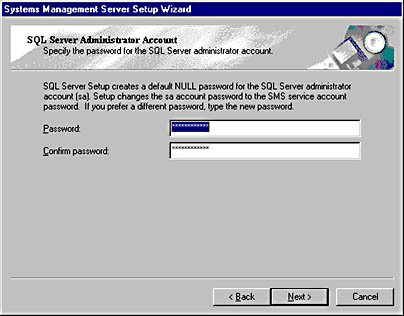
Figure 2-18. The SQL Server Administrator Account screen.
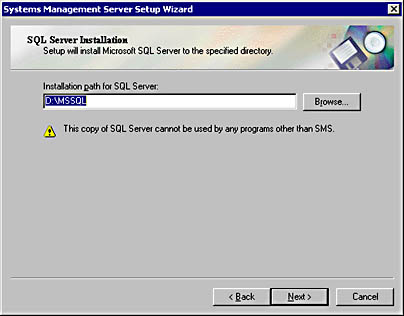
Figure 2-19. The SQL Server Installation screen.
Choosing to Not Install a Dedicated Local Copy of SQL Server
- Choose No in the Dedicated Copy Of SQL Server screen (Figure 2-17) and click Next to display the SQL Server Information For SMS Site Database screen, shown in Figure 2-20. Since choosing No implies that you have already installed SQL Server, this screen requires that you identify the name of the computer running SQL Server, which version (6.5 or 7.0) is installed, and whether SMS should use standard or integrated security. Make your selections as appropriate and click Next.
- If you choose standard security, you need to specify the SQL Server login ID and password for SMS to use, as shown in Figure 2-21.
- Click Next to display the SQL Server Devices For The SMS Site Database screen, shown in Figure 2-22. Here you'll be asked whether the Setup Wizard should create the database and any necessary devices. Choose No if you have already created the database and devices; otherwise, choose Yes.
- Choose Yes in the SQL Server Device For The SMS Site Database screen and click Next twice to display the SQL Server Device Directory Path For SMS Site Database screen, shown in Figure 2-25. Enter the location and path to the directory in which you intend to store the database and devices. Again, the Setup Wizard chooses the partition with the most free disk space.
- The software metering feature of SMS 2.0 requires its own SMS database. If you chose to install this option, clicking Next will display the SQL Server Information For Software Metering Database screen, shown in Figure 2-26. Here you'll be asked for the name of the SQL Server you'll be using for the software metering database and whether to use integrated or standard security, as you were when you set up the SMS database. Make your selections as appropriate, and click Next.
- If you choose to use standard security, the next screen will ask you to confirm the SQL Server login ID account and password, as you did earlier.
- Click Next to display the SQL Server Devices For The Software Metering Database screen, shown in Figure 2-27. This screen asks whether the Setup Wizard should create the software metering database and any necessary devices. Choose Yes or No as appropriate.
- Click Next to display the Concurrent SMS Administrator Consoles screen, shown in Figure 2-30, and enter the number of concurrent SMS Administrator Consoles you expect to be running in the site. SMS will add 5 user connections for each instance of the SMS Administrator Console to its default of 50 when configuring this parameter in SQL Server. If you leave the check box checked that allows the Setup Wizard to automatically configure SQL Server for the correct number of user connections, SMS will dynamically fill in the correct number in the Minimum Number Of SQL Server Connections text box. If you uncheck the check box, be sure to enter an appropriate number of user connections or your site server might not be able to access the SMS database.
- If SQL Server has been installed on the same server as your site server, proceed to step 10. If SQL Server has been installed on a different server, clicking Next will take you to the SMS Provider Information screen, shown in Figure 2-31.
- Click Next to display the Completing The Systems Management Server Setup Wizard screen, shown in Figure 2-13, and confirm your choices. You can click the Back button in any of these screens to return to a previous screen and modify your entries—and even to switch from Express to Custom installation. Click Finish to complete the installation.
- The Setup Wizard will ask whether it should create the SMS Service account for you, if you have not already done so. Choose Yes. The Setup Wizard will proceed to install SMS 2.0.
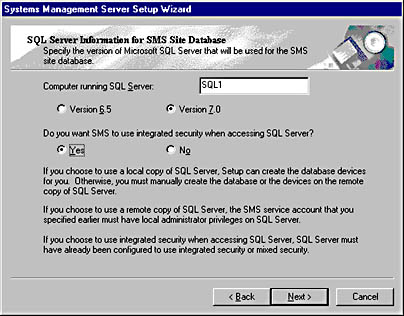
Figure 2-20. The SQL Server Information For SMS Site Database screen.
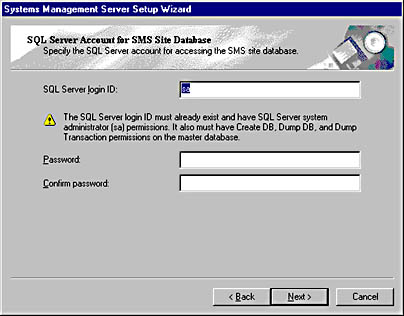
Figure 2-21. The SQL Server Account For SMS Site Database screen.
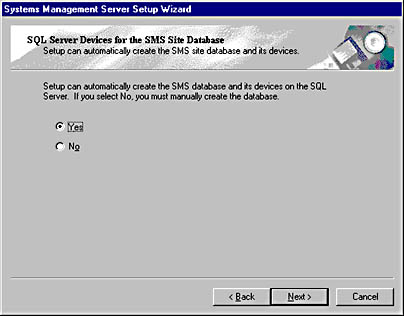
Figure 2-22. The SQL Server Devices For The SMS Site Database screen.
SQL 7.0 Installations If you chose Yes in the previous screen, click Next to display the default database name the Setup Wizard has created in the SMS Site Database Name screen, shown in Figure 2-23. The default name is in the form SMS_sitecode, where sitecode represents the three-character site code that you assigned to this site.
If you chose No in the SQL Server Devices For The SMS Site Database screen, the Setup Wizard will display a similar screen, also named the SMS Site Database Name screen, this time asking you to confirm the name of the database you already created and warning you as to size requirements. The minimum database and log file sizes are 50 MB and 20 MB, respectively. The numbers displayed will be calculated based on the number of clients you entered previously. The Setup Wizard allocates 100 KB per client.
SQL 6.5 Installations If you chose Yes in the SQL Server Devices For The SMS Site Database screen, the Setup Wizard will display the default database, database device, and log device names it will create in the SMS Site Database And Device Names screen, shown in Figure 2-24. The defaults are SMS_sitecode, SMSData_sitecode, and SMSLog_sitecode, where sitecode represents the three-character site code that you assigned to this site.
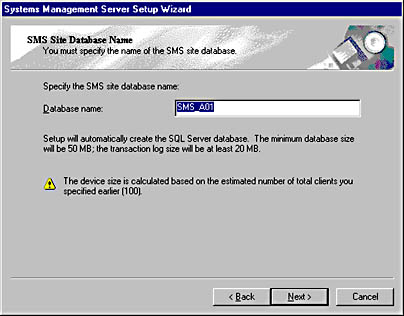
Figure 2-23. The SMS Site Database Name screen.
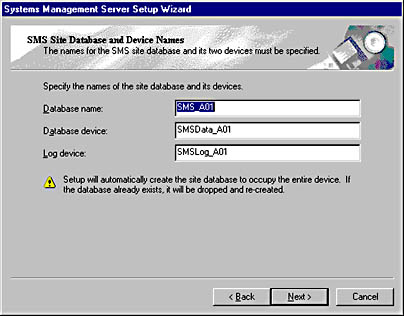
Figure 2-24. The SMS Site Database And Device Names screen.
If you chose No in the SQL Server Devices For SMS Site Database screen (Figure 2-22), the Setup Wizard will first display a message screen warning you as to size requirements. The minimum database and log device sizes are 50 MB and 20 MB. The numbers displayed will be calculated based on the number of clients you entered previously. SMS allocates 100 KB per client. Click Next to display the SMS Site Database And Device Names screen, as shown in Figure 2-24.
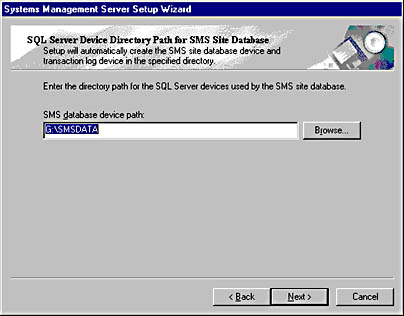
Figure 2-25. The SQL Server Device Directory Path For SMS Site Database screen.
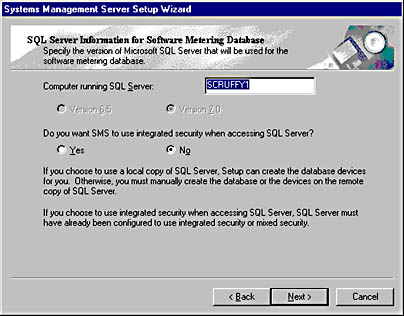
Figure 2-26. The SQL Server Information For Software Metering Database screen.
SQL 7.0 Installations If you chose Yes in the previous screen, the Setup Wizard will display the default database name that it will create in the Software Metering Database Name screen, shown in Figure 2-28. The default is SMS_sitecode_LicDB, where sitecode represents the three-character site code that you assigned to this site.
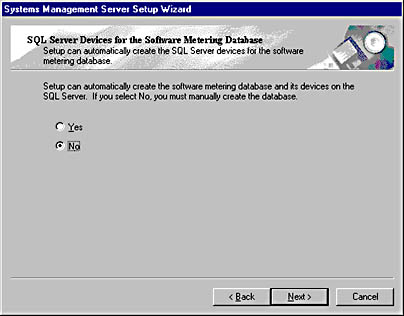
Figure 2-27. The SQL Server Devices For The Software Metering Database screen.
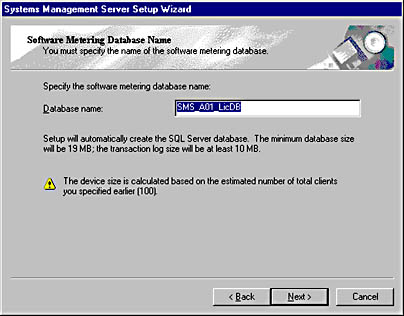
Figure 2-28. The Software Metering Database Name screen.
If you chose No in the SQL Server Devices For The Software Metering Database screen (Figure 2-27), the Setup Wizard will display a screen similar to the one shown in Figure 2-28, this time asking you to confirm the name of the database you already created and warning you as to size requirements. The minimum database and log file sizes are 19 MB and 10 MB.
SQL 6.5 Installations If you choose Yes in the SQL Server Devices For The Software Metering Database screen and click Next, the Setup Wizard will display the default database, database device, and log device names that it will create in the Software Metering Database And Device Names screen, as shown in Figure 2-29. The defaults are SMS_LicDB_sitecode, LicData_sitecode, and LicLog_sitecode, where sitecode represents the three-character site code that you assigned to this site.
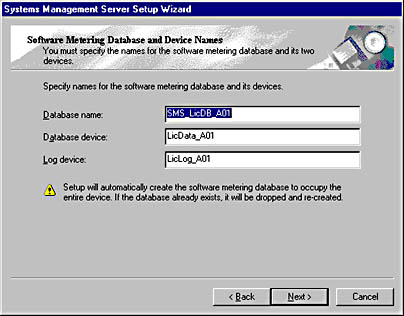
Figure 2-29. The Software Metering Database And Device Names screen.
If you choose "No" in the SQL Server Devices For The Software Metering Database screen, the Setup Wizard will display a message screen warning you as to size requirements. The minimum database and log device sizes are 19 MB and 10 MB, respectively. Click Next to display the screen shown in Figure 2-29.
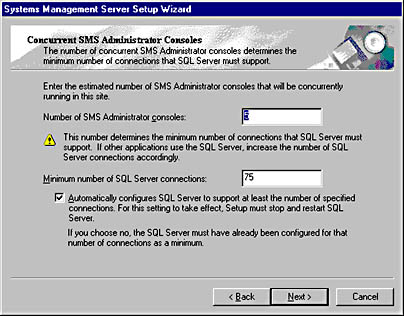
Figure 2-30. The Concurrent SMS Administrator Consoles screen.
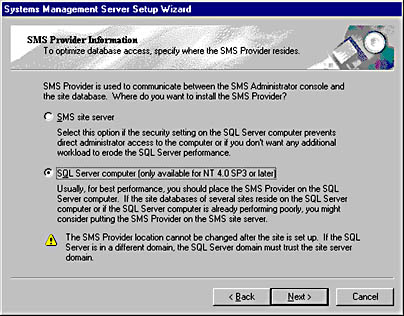
Figure 2-31. The SMS Provider Information screen.
Recall from Chapter 1 that the SMS Provider accesses the SMS database through the WMI Common Information Model (CIM) repository for the SMS Administrator Console. In this screen, you specify whether to install the SMS Provider on the site server or the SQL server. In general, optimum performance access is achieved when the SMS Provider is installed on the SQL server. However, if doing so would result in poorer performance, if the SQL server is home to other SMS site databases, or if security on the SQL server prevents the administrator from directly accessing that computer, you should place the SMS Provider on the site server.
If you have followed these steps closely, you have now successfully installed an SMS 2.0 primary site server on your Windows NT server! If you performed a custom installation, you made choices as to which SMS components you wanted to install. The next section discusses the process of adding components to your site server.
Planning: Installing Service Pack 1As we all know, products such as SMS will continue to mature over time. As SMS becomes more widely used in different networking environments, unusual or anomalous activity, affectionately referred to by many of us as "undocumented user features," will be discovered and addressed. Short-term fixes for problems of this nature usually come in the form of patches. Longer-term fixes, including product enhancements, usually take the form of a service pack.
In July 1999, Microsoft issued SMS 2.0 Service Pack 1. This service pack includes several patches and other fixes for known issues that were recorded in the initial release. It also includes enhancements to SMS that add additional functionality and configuration options. These fixes and enhancements include an updated version of the online Systems Management Server Administrator's Guide and are documented in detail in the Microsoft Systems Management Server Version 2.0 Service Pack 1 Release Notes. Here we'll go over the process of installing the service pack on your site server.
First you need to obtain the Service Pack 1 source files. These can be ordered on CD from Microsoft or downloaded through the SMS Web page, at http://www.microsoft.com/smsmgmt. The source files will also be available through the various Solution Provider programs offered by Microsoft. Future releases of the SMS 2.0 source file CD will include Service Pack 1, and setup from this CD can proceed as described in this chapter when we talk about how to install a primary site server.
You need to provide the service pack utility with the location of the original SMS 2.0 source files. It will copy these source files to a server location you specify and then update them with the service pack version. The updated source files can then be used to either install new SMS site servers or update existing sites.
If you downloaded the service pack from a Web site, follow these steps to update your source files:
- Execute the self-extracting file Smsupdi.exe. This file will expand the service pack source files and launch the SMS 2.0 CD Image Update Utility Installation Wizard, shown in Figure 2-32.
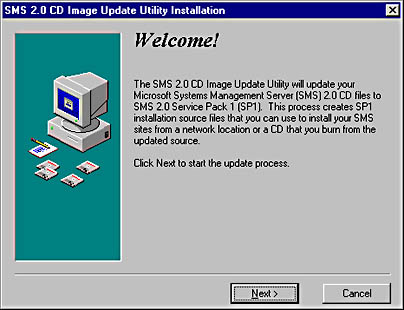
Figure 2-32. The SMS 2.0 CD Image Update Utility Installation Wizard Welcome screen.
- Click Next to display the License Agreement screen, shown in Figure 2-33, and click the Display License Agreement button to display the license agreement for the service pack. After reading the license agreement, click the Agree button to close the display.
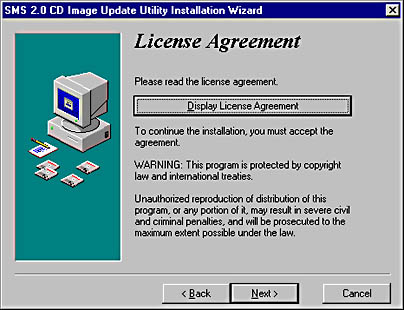
Figure 2-33. The License Agreement screen.
- Click Next to display the Select Destination Directory screen, shown in Figure 2-34. Here you will provide the service pack utility with the location of the SMS 2.0 source files to be updated. The source files must be located on a local or network drive. If the source files are on CD, choose the option The SMS CD Image Is Not On A Local Or Network Drive. This will cause the utility to first copy the source files to a designated local or network directory and then update them with the service pack. If you have already copied the SMS 2.0 source files to a local or network drive, choose the option The SMS CD Image Is On A Local Or Network Drive. Click the Browse button to identify the local or network location that will host the updated source files.
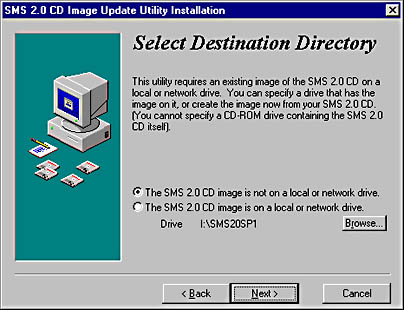
Figure 2-34. The Select Destination Directory screen.
- Click Next. If you chose the first option in step 3, the Copy The SMS 2.0 CD Image screen shown in Figure 2-35 is displayed. (If you chose the second option, proceed directly to step 5.) Use the Browse buttons to identify the location of the CD files and to specify or verify the destination directory for the updated source files.
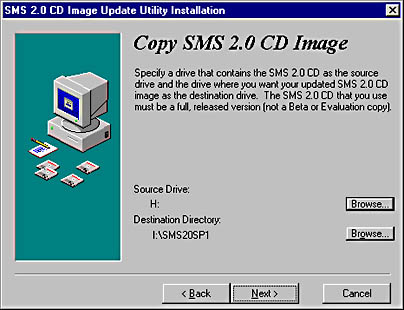
Figure 2-35. The Copy The SMS 2.0 CD Image screen.
- Click Next to display the Ready To Install! screen, shown in Figure 2-36. This screen indicates that the update process will take about 20 minutes to complete. Click Next to begin the process.
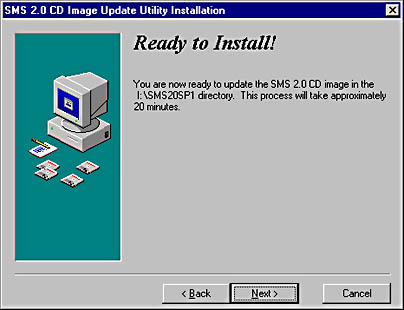
Figure 2-36. The Ready To Install! screen.
After the original SMS 2.0 source files have been updated, you can either install a new primary site server following the steps outlined earlier in the "Installing a Primary Site Server" section, or update the existing site server. Follow these steps to update the existing site:
- Using Windows Explorer, navigate to the updated source file directory (by default, Sms20sp1). Launch the SMS 2.0 Setup Wizard either by executing Smssetup\Bin\platform\Setup.exe, where platform refers to i386 or Alpha, or by running Autorun.exe from the main source file directory.
- The usual welcome screen and System Configuration screen will be displayed. Click Next on each screen until the Setup Options screen is displayed, as shown in Figure 2-37. Verify that the option Update An Existing SMS Installation is selected.
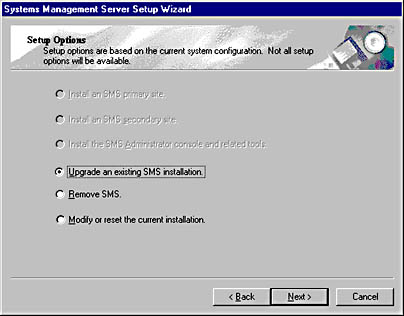
Figure 2-37. The Setup Options screen.
- Click Next to display the Completing The Systems Management Server Setup Wizard screen (Figure 2-13). Click Finish on this screen to begin the update process.
A progress bar will track the progress of the update process. You'll notice that SMS components and services are first stopped, then the source files are updated, and last the SMS components and services are restarted. When the process is complete, your site will have been successfully updated with SMS 2.0 Service Pack 1.
When you have finished installing Service Pack 1, open and read the updated Microsoft Systems Management Server Version 2.0 Release Notes to review the changes that have been made to the product. Throughout the rest of this book, we will assume that you have applied SMS 2.0 Service Pack 1 to your site server and we will approach SMS features and functionality with that focus.
EAN: 2147483647
Pages: 167
- Chapter III Two Models of Online Patronage: Why Do Consumers Shop on the Internet?
- Chapter V Consumer Complaint Behavior in the Online Environment
- Chapter VI Web Site Quality and Usability in E-Commerce
- Chapter XVII Internet Markets and E-Loyalty
- Chapter XVIII Web Systems Design, Litigation, and Online Consumer Behavior