Modifying Installation Scripts Using the Installation Expert
After we have created the installation script, we can begin the process of modifying and customizing it to fit our specific needs. As we've seen, the Installation Expert and Script Editor allow us to modify our installation scripts. In this section, we'll look at how to modify installation scripts using the Installation Expert. But first let's look at the installation attributes.
Installation Attributes
Six sets of installation attributes need to be considered when modifying installation scripts, as follows:
- Installation Interface Enables you to configure the settings used by the SMS Installer-generated executable during installation.
- ApplicationFiles Enables you to configure specific components to install based on the type of installation you select.
- Runtime Support Enables you to configure uninstall support and to add additional components for Microsoft Visual Basic or Visual FoxPro. The Visual Basic components you select will affect how the Watch Application Wizard performs.
- User Configuration Enables you to set up the program groups and icons and to configure file associations for the installation.
- System Configuration Enables you to change or reconfigure the system environment during the installation process.
- Advanced Configuration Enables you to configure such items as the screen settings that will be displayed during the installation, language settings, and patch settings, as well as global attributes that will control the actual installation file.
You can configure these attribute sets in the Installation Expert window, shown in Figure 13-7. Select an installation attribute, and click Properties to display its Properties window, where you can customize the installation script through a relatively user-friendly graphical interface.
Modifying the Script
In this section, we'll customize the settings for our SMS Installer-generated executable file using the Installation Expert. In this example, we will also modify the script by editing the installation attributes to facilitate an "unattended" installation.
To modify the script using the Installation Expert, follow these steps:
- From the Installation Expert window, select Installation Interface from the Installation Attributes pane and click the Properties button or double-click on Installation Interface to display the Installation Interface Properties window, shown in Figure 13-16.
- On the Media tab, you can specify whether the SMS Installer-generated executable file will be a single file, used for network or Web distribution; or multiple files, used for floppy-based installation. For this example, verify that the Single File Installation option is selected. This will cause SMS Installer to generate a single executable file when we compile our script.
- Click on the Application tab, shown in Figure 13-17. On this tab, you can specify the application name that will be used in wizard screens and in the welcome screen. This name is also displayed with the program icon. The name you use should be descriptive of the product being installed. You can also enter or modify the default directory that the application will be installed to. This option should be set to the top-level directory used for the application installation. If appropriate, select the Place Default Directory Under Program Files check box to place the default directory in the Program Files folder on Windows 95, Windows 98, and Windows NT 4.0 systems.
- Click on the Dialogs tab, shown in Figure 13-18. This tab represents the dialog boxes the user will see when the script is run at a client computer. (You can also create your own custom dialog boxes and have them displayed through Script Editor.) To suppress all the dialog boxes that are displayed to the user for an unattended installation, clear all the screen options on this tab. The only item that the user will see will be a progress bar indicating that the installation script for the application is running. To enable uninstall or rollback support, select the Back Up Replaced Files option. If you want to facilitate a "silent" installation, you can also enable this option through Script Editor. For a detailed discussion on enabling this option, refer to the section "Enabling Rollback Support" later in this chapter.

Figure 13-16. The Installation Interface Properties window.
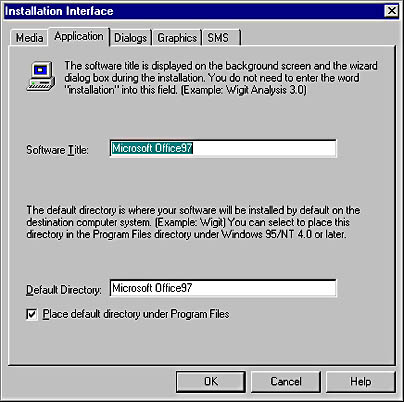
Figure 13-17. The Application tab of the Installation Interface Properties window.
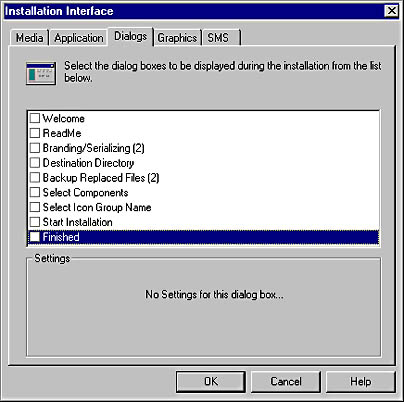
Figure 13-18. The Dialogs tab of the Installation Interface Properties window.
![]()
NOTE
A fully silent installation—one that does not display the progress bar or any dialog boxes—can be effected by running the compiled script on the client with a "/s" switch. If you are using SMS to distribute the SMS Installer file, be sure to include the "/s" switch on the command line for the program you create. Fully silent installations are best used on Windows NT computers, such as servers, which are rarely in a logged on state. Performing a silent installation on a user's workstation can cause problems because the user will be unaware that anything is happening. Unpredictable results can occur if, for example, the user decides to log off or restart the system while the script is running.
- Click on the Graphics tab, shown in Figure 13-19. You can configure this tab to display custom graphics, such as a custom logo, text boxes that display animation or tips, and so on, in the form of .BMP files during the installation. Figure 13-19 shows a sample bitmap added, although in our example we will not add any additional graphics.
- Click on the SMS tab, shown in Figure 13-20. These settings are used during a rollout of our application using the SMS distribution process. On this tab, you can specify whether to have the installation process generate a status MIF file for status reporting to SMS 2.0. If you choose to create an MIF file, enter the name for the status MIF files for installation and deinstallation of the application. You must supply a filename and the .MIF extension for both installation and deinstallation if you enable rollback or uninstall support. Select the Create Package Definition File check box if you want to create a package definition file (.PDF and .SMS) when creating the package for distribution through SMS 2.0.
- Click OK to return to the Installation Expert window. Select Application Files and then click Properties to display the Application Files Properties window, shown in Figure 13-21.
- On the Components tab, you can select a list of optional components for the installation. These options represent components the user can install during execution of the installation of the script. For example, suppose a custom Microsoft Access database installation contains three different database files that can be installed. You can identify each database as a component on this tab. (Then, on the Files tab, you can identify which database files are associated with each component.) Components are listed for the user during the execution of the installation script in the order in which they appear on this tab. You can add, sort, or modify the list of components using the Move Up, Move Down, Add, and Delete buttons.
- Click on the Files tab, shown in Figure 13-22. The Files tab contains four panes. In the top two panes, locate the folders or files you want to include in your script. In the lower two panes, select a location on the destination computer at which to install these folders or files. You can add or remove files to your installation. For example, if you needed to include customized Word templates as part of the installation, you could add them here. This example shows the files added during the installation of Office 97.
- Click OK to return to the Installation Expert window, select Runtime Support, and click Properties to display the Runtime Support Properties window, shown in Figure 13-23.
- On the Options tab, you can configure uninstall support, which is enabled by default, and specify the support drivers needed for the SMS Installer-generated executable file. For this example, we've left the default setting for Uninstall Support selected for rollback support.
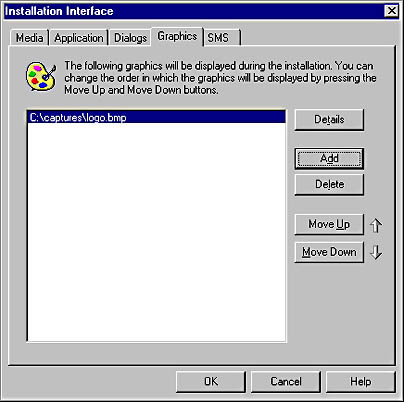
Figure 13-19. The Graphics tab of the Installation Interface Properties window.
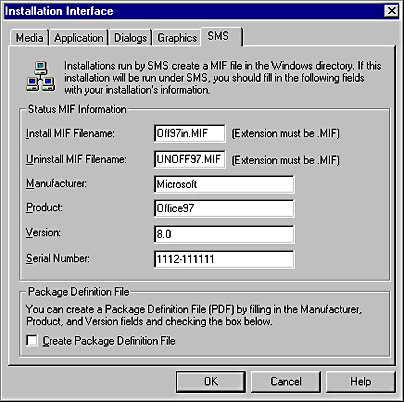
Figure 13-20. The SMS tab of the Installation Interface Properties window.

Figure 13-21. The Application Files Properties window.
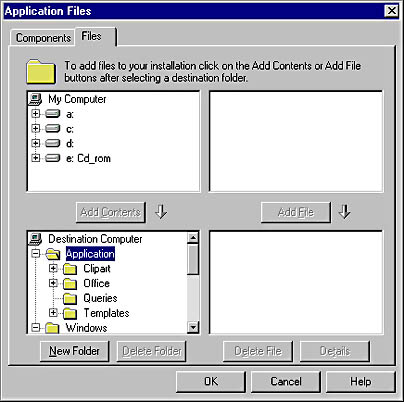
Figure 13-22. The Files tab of the Application Files Properties window.
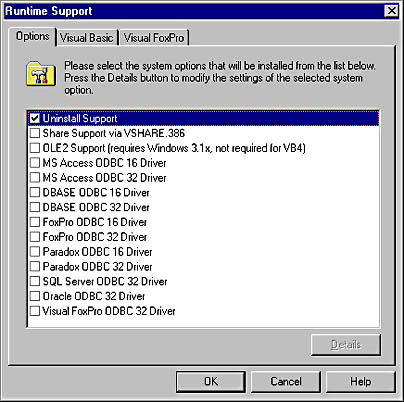
Figure 13-23. The Runtime Support Properties window.
![]()
NOTE
Two additional tabs are available for the Runtime Support attribute: the Visual Basic tab and the Visual FoxPro tab. On the Visual Basic tab, you can configure Visual Basic support, including the Visual Basic directory and application type. You can also select Visual Basic options such as runtime support. On the Visual FoxPro tab, you can configure Visual FoxPro support, including the Visual FoxPro directory and other options such as runtime support and OCX support. Refer to the Systems Management Server Administrator's Guide for more information about these tabs.
- Click OK, select User Configuration , and click Properties to display the User Configuration Properties window, shown in Figure 13-24.
- On the Icons tab, specify the name of the program group to which icons will be added. You can also specify additional icons to be added to the program group or even delete icons that should not be added to the program group. For example, you might choose to remove the Setup For Microsoft Internet Explorer 3.01 icon if you already have Internet Explorer 5.0 installed. Notice the icons added for Office 97.
- To verify modifications to file associations and INI files, click on the Associations tab and the INI Files tab. The Associations tab allows you to specify and modify file associations for files being installed; the INI Files tab allows you to specify the INI files and their entries requiring modification during setup. For example, if you know that you need to modify the net heap size entry in the System.ini file on a Windows 98 computer after an application is installed, you could do so on the INI Files tab as part of the installation script.
- To display the registry changes made during execution of the installation script, select the Registry tab, shown in Figure 13-25.
- You can modify certain registry settings from this tab. For example, in this Office 97 installation, we want to change the setting for the product ID. Under Destination Computer, navigate to the HKEY_LOCAL_MACHINE\SOFTWARE\Microsoft\MS Office 97 Professional\97.0.0.1117(1033)\Registration key, and select Product ID.
- Click Details to display the Registry Key Settings dialog box, shown in Figure 13-26. In this dialog box, you can make changes to the registry key settings. Click OK to close the dialog box, and click OK once more to return to the Installation Expert window.
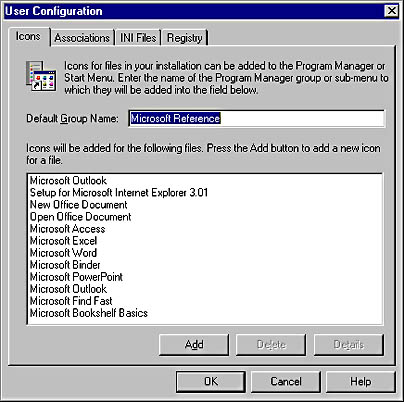
Figure 13-24. The User Configuration Properties window.
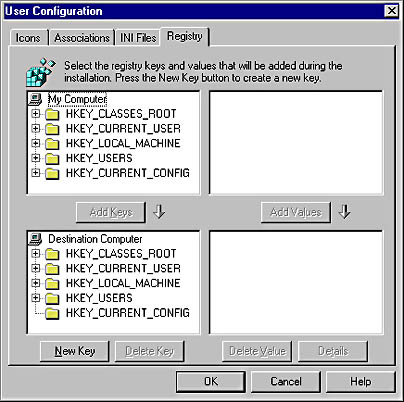
Figure 13-25. The Registry tab of the User Configuration Properties window.
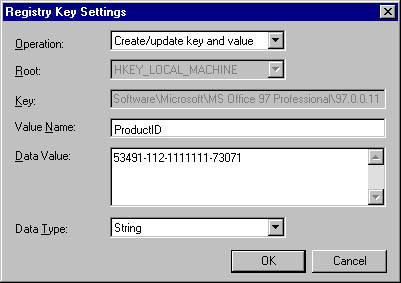
Figure 13-26. The Registry Key Settings dialog box.
The two remaining installation attributes—System Configuration and Advanced Configuration—should be verified and modified according to your specific target computer needs Although our Office 97 installation example does not make any modifications to these attributes, let's look at the two installation attribute Properties windows briefly. Keep in mind that you need to verify these settings just as we have verified our other attribute settings. To configure these Properties windows, follow these steps:
- In the Installation Expert window, select System Configuration, and click Properties to display the System Configuration Properties window, shown in Figure 13-27.
- On the Devices tab, add or delete devices or modify device properties on 16-bit Windows systems. This tab modifies the [386enh] section of the System.ini file.
- Click on the Services tab, shown in Figure 13-28. Here you can add system services to or modify system services in the Control Panel.
- Click on the Autoexec.bat tab, shown in Figure 13-29. On this tab, you can produce a script that will modify the system's Autoexec.bat file by adding new lines or appending to existing lines, such as altering the PATH statement or adding SET variable statements.
- Select the Config.sys tab, shown in Figure 13-30. On this tab, you can produce a script to modify the Config.sys file. After you configure each of these tabs, click OK to return to the Installation Expert window.
- Select Advanced Configuration and click Properties to display the Advanced Configuration Properties window, shown in Figure 13-31.
- On the Global tab, you can modify the installation file settings, such as compression, log settings, suppression of reboot message during silent installs, and use of an installation password.
- Click on the Screen tab, where you can select options for the installation progress bar settings and display background gradient of installation dialog boxes. Display color options used during the installation can also be selected here.
- Click on the Font tab to specify the default font used to display all installation screens and dialog boxes.
- Click on the Languages tab to configure the language settings used for the installation.
- Click on the Options tab, where you can specify the Script Editor, compiler, and Watch Application Wizard settings to be used by SMS Installer. You can also set options for specific DLLs to be ignored by the Watch Application Wizard.
- Click on the Patching tab, where you can create patching versions of files. You can select patching threshold levels based on a percentage of change to an existing file, configure memory settings used during the patch process, and configure the compression level for patch files.
- Click on the Compiler Variables tab, where you can configure the compiler used during the compilation of the installation script and enable user-prompted compiler variables when compiling from the command prompt.
- Click on the Signing tab, where you can set up a secure installation environment used in 32-bit installations. From this tab, you can also create a CAB-formatted installation file and supply the contents of Setup.inf, commonly used during setup to provide installation settings.
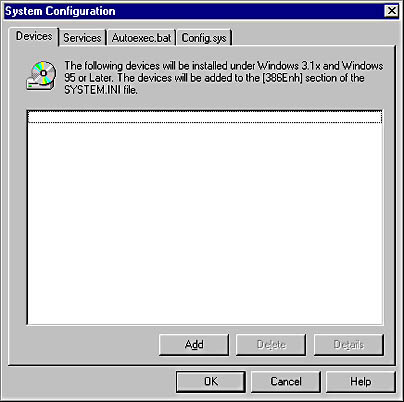
Figure 13-27. The System Configuration Properties window.
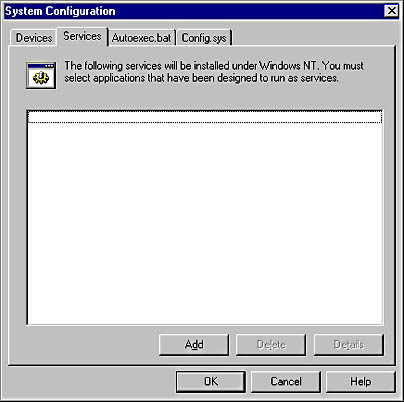
Figure 13-28. The Services tab of the System Configuration Properties window.
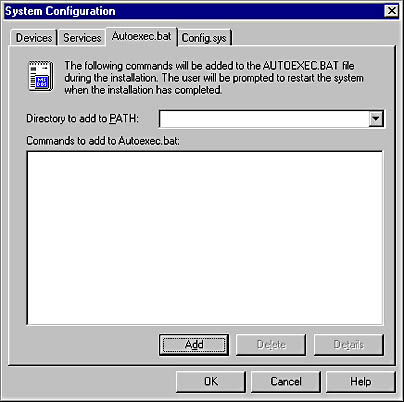
Figure 13-29. The Autoexec.bat tab of the System Configuration Properties window.
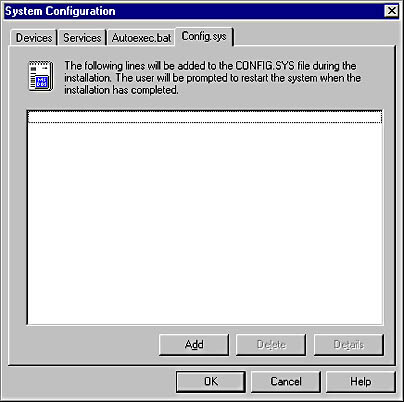
Figure 13-30. The Config.sys tab of the System Configuration Properties window.
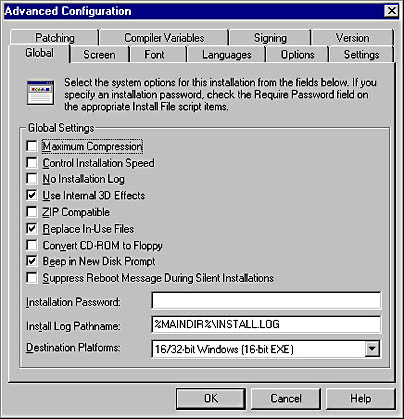
Figure 13-31. The Advanced Configuration Properties window.
![]()
NOTE
If you have applied SMS 2.0 Service Pack 1, you will see one more tab in the Advanced Configuration Properties window: the Version tab. Refer to the section "Updates to Systems Management Server Installer 2.0" later in this chapter for more information about this tab.
As you can see, these installation attributes will enable you to modify your installation script and help it to compile and run more smoothly. Although you can configure these options prior to running the Repackage Installation Wizard or the Watch Application Wizard, it is usually a good idea to return to the Installation Expert after running either wizard and verify all of your configuration options and settings.
![]()
MORE INFO
Refer to the Systems Management Server Administrator's Guide for more information about each tab in the installation attribute Properties windows.
EAN: 2147483647
Pages: 167