Methods of Trimming
| [ LiB ] |
Methods of Trimming
So far, I've only explained how to enter the Trim mode and how to exit it. Now let's explore the different methods of trimming. By default, you'll always enter the Trim mode as a dual-side Trim so I'll cover this method of trimming first.
Dual-Side Trimming
Whenever you enter Trim mode, you'll be performing a dual-side trim. A dual-side trim adds and subtracts the same amount of frames when you perform a trim. The results of a dual-side trim are that the length of the sequence is unchanged. If you add 20 frames on to the outgoing frame, you'll subtract 20 frames from the incoming side. Avid Xpress Pro uses the default dual-side trim when you enter Trim mode, in order to maintain sync issues.
The additional media to perform a trim comes from the "handles" or the portions of clips you did not include in the sequence. It might be obvious that Avid can trim away frames but it can also add frames when trimming. These added frames come from the original material you recorded. For example, your original clip is five minutes long but you only use 30 seconds of it in your sequence. The additional four minutes and 30 seconds of media can be accessed in Trim mode. If there are no handles, an edit cannot be trimmed .
NOTE
 TIP
TIP
Keep the concept of handles in mind when capturing your footage. It's always helpful to capture additional frames to be used as handles when you're editing. Also try to mark your IN point on clips a minimum of 15 frames into the clip and your OUT point a minimum of 15 frames before the end of the clip. These 15 frames will provide a basic handle when you need to trim an edit or add a dissolve.
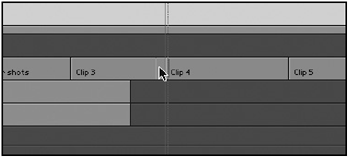
Take a look at what happens when a dual-side trim is performed. Notice the lengths of clips 3 and 4. You can trim clip 4 to start earlier (see Figures 4.10 and 4.11).
Figure 4.10. Before the trim is performed.
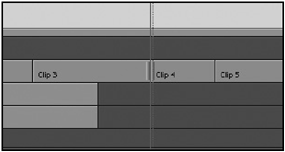
Figure 4.11. After the trim has been performed.
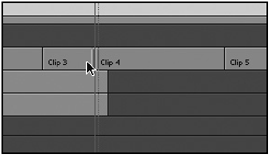
Dual-side trimming moves the edit point earlier or later in the sequence. The important factor to consider is that the combined duration of the two clips has not changed. If clip 4 did not have any extra footage at the beginning of the clip, this particular trim would not have been possible.
Single-Side Trimming
It is also possible to trim a single side of the transition. You can add or subtract frames to or from the outgoing or incoming media. The results of a single-side trim are that your overall length of the sequence is altered. When you perform a single-side trim, the other piece of media, incoming or outgoing, is not altered in length. Only the side you trim is altered .
Single-side trimming is an extremely powerful tool, but it can make clips break sync. Sync is when a clip has audio that matches the video. Because you're able to extend or shorten an individual track, breaking sync with other tracks is a factor to consider when using single-side trimming.
Take a look at an example of what happens when you perform a single-side trim to extend the outgoing media (see Figures 4.12 and 4.13).
Figure 4.12. Before the single-side trim.
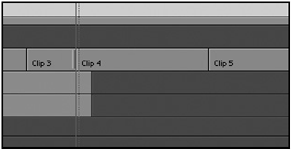
Figure 4.13. After the single-side trim. Notice how clip 4 stayed the same length but was " pushed " over.
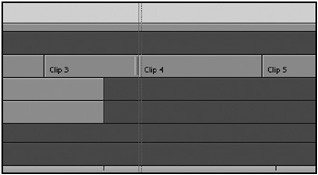
Notice that the incoming shot was simply pushed over. The length never changed of the incoming clip. The single-side trim affects only the outgoing media, which is now much longer. If the incoming media, clip 4, was in sync with an audio track, it would no longer be correct.
The same kind of trim can happen on the incoming clip. It too can be lengthened or shortened without affecting the duration of the outgoing clip (see Figure 4.14).
Figure 4.14. Trimming the incoming clip.
| [ LiB ] |
- ERP Systems Impact on Organizations
- Challenging the Unpredictable: Changeable Order Management Systems
- ERP System Acquisition: A Process Model and Results From an Austrian Survey
- A Hybrid Clustering Technique to Improve Patient Data Quality
- Development of Interactive Web Sites to Enhance Police/Community Relations