Editing in a Nest
| [ LiB ] |
Editing in a Nest
Before you can do anything that involves nesting, you must have an effect added to a clip in the Timeline. I'll use a variety of effects in this chapter to show how a nested effect looks after making changes inside of an effect or clip.
Entering and Viewing a Nested Effect
To display how you see inside of an effect, I'll use the Mask effect. To begin, apply the Mask effect from the Image category in the Effect Palette. Go to the Effect Editor and make a Mask over the video. By adding this to a clip in the Timeline, you'll be able to "step into" the effect to see the base video used. This example places a mask on a clip on V1 and makes it letterboxed (see Figure 11.1).
Figure 11.1. One clip with a Mask effect is on V1. After I added the effect, I edited the mask to be a letterbox.
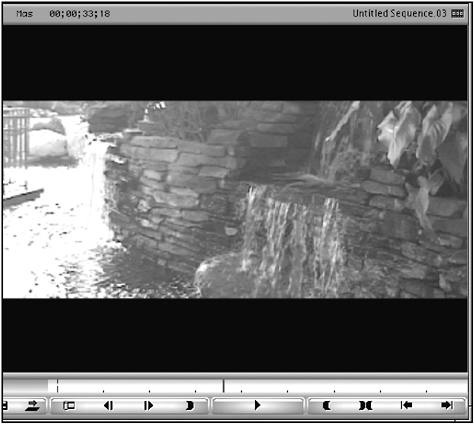
When you add an effect to a clip in the Timeline, think of it as adding a layer over the original clip. Because Avid Xpress Pro never actually alters any original material, the original clip is in a sense underneath the effect you added to it. For the example I'm using, I've applied a Mask effect, but underneath the Mask is my original shot. Suppose I like how the effect looks, but I want to change the footage inside the mask. Because I flagged the word "inside," I know I must nest into the effect to see the original footage. To step into the effect, click on the Step In icon, which is part of the Timeline toolbar (see Figure 11.2).
Figure 11.2. This icon allows you to step into an effect.
When you step into an effect, the Timeline changes and displays the original material, not the sequence you're working on. This can be very deceiving. The Timeline looks similar, but it's not. Below the bottom track you'll see the number 1 with a small arrow next to it. This indicates that you have nested into an effect one time. Look for this icon to make sure you're not in a nest when you continue editing. Also, at the very top of the Composer window on the record side, you'll see that the sequence name changes to Nested Effect (see Figure 11.3).
Figure 11.3. The sequence name changes to Nested Effect. This is one indicator that you have actually stepped into an effect or that you are inside the nest.

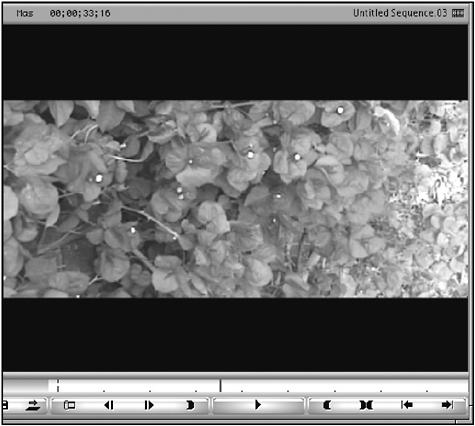
When you play the clip in the Timeline, it plays the original clip without an effect. Now that you are inside or nested in the effect, you can make changes. In this example simply change the footage nested inside the effect by performing a straight overwrite edit. The clip was a shot of a water garden; now it's a shot of some flowers (see Figure 11.4).
Figure 11.4. Changing footage inside of an effect is easy when you nest inside the effect.
NOTE
![]() CAUTION
CAUTION
When you're performing an edit inside of an effect (it's nested), make sure your edit does not exceed the original material. To avoid this, always mark an IN and OUT point on the record side.
To see the results of the changes you made inside a nest, you need to step back out of the effect. To step out, click on the Step Out icon in the Timeline's toolbar (see Figure 11.5).
Figure 11.5. This icon allows you to step out of an effect or a nest.
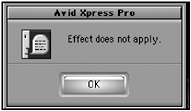
The Timeline will switch back to your edited sequence where the mask effect is applied. The only difference is that the footage inside the mask has been changed. Understanding this basic principle allows you to add multiple effects on one clip. For example let's say you wanted to add a mask effect to a clip and then you wanted to flip the clip inside the mask. If you try to drag the Flip Effect from the Effect Palette onto the clip that has the mask effect, it will remove the mask effect and replace it with flip effect. Other effects will prompt warnings. For example, let's say you wanted the clip that was flipped to be inside a picture-in-picture. If you drag the Picture-in-Picture icon from the Effect Palette, the following warning will appear (see Figure 11.6). Don't worry; this type of effect can be created. I'll explain shortly in the picture-in-picture section of this chapter.
Figure 11.6. When you try to add an effect to a clip that has a certain effect already applied, the following warning might appear. It depends on what kind of effect you're trying to replace.
Expanding a Nest
When you use the Step In and Step Out keys to enter into a nest or effect, you'll notice that the audio tracks are not displayed while you're inside the nest. This can be a problem if you are trying to cue up a certain effect, and then move or edit according to a sync point in your audio track. Avid Xpress Pro provides a second method for opening an effect or stepping into a nest. This method is called expanding a nested effect.
To open an effect using this method, follow these steps:
-
Edit a clip onto V1 in the Timeline.
-
Add an effect from the Effect Palette. For this example, the Mask effect is used.
-
Adjust the Mask effect to create a letterbox effect over the clip.
-
Choose one of the Segment Mode buttons from the bottom of the Timeline (see Figure 11.7).
Figure 11.7. The Segment Mode buttons inside the Timeline.

-
Double-click the clip that has the effect on it. If you're in the Effect mode, double-clicking the clip in the Timeline performs the same results.
-
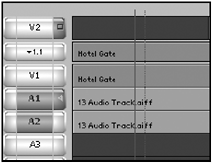
The clip opens up onto a track titled 1.1 (see Figure 11.8).
Figure 11.8. The original clip is displayed on the track titled 1.1.
-
Notice that the audio tracks are still displayed, allowing you to make changes while listening to the audio.
-
For this example, you can continue to build inside the nest. Add a Flop Effect to the clip on the track title 1.1.
-
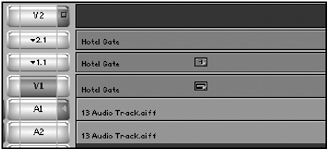
Using the Segment Mode buttons, double-click the clip that has the Flop Effect icon on it. Now the nest opens again, displaying the original clip on track 2.1 (see Figure 11.9).
Figure 11.9. Now the original clip appears on a track titled 2.1.
-
To close an Expanded Nested Effect, double-click on the original clip on V1. This will un-expand the entire nest.
Which method for working with a nest is better? I prefer stepping into the nest simply because this was the only method when Avid systems were first introduced and it places the clip I'm working on throughout the Timeline. The method of expanding the nest certainly has the advantage of listening to the audio as you edit, but it can also make Timeline space a premium. Bottom line the results are the same. Both methods allow you to add effects or make changes to the original material. Keep in mind that you can only nest into a clip if it has an effect on it. It doesn't have to be a segment effect.
Using a Transition Effect to Build a Nested Effect
Although any segment effect allows you to nest into it, certain transition effects also allow you to nest inside and make changes. This can be a great advantage as opposed to building an effect as a layer. Let's build a split screen effect first as layers than as a nested effect. The end results will be similar but, by using the nest method, you'll still have multiple layers available and will have more control over the border of the split screen. First, create a split screen effect with layers .
-
Make sure your Timeline has two video layers.
-
Add one shot to V1 and another shot to V2. Make sure they are the same length.
-
Place a 3D PIP effect on the top clip. This example uses the 3D PIP effect because it has cropping values.
-
Crop the top image so that it's half the screen. This is easy to do using the direct manipulation handles with the Crop tool.
-
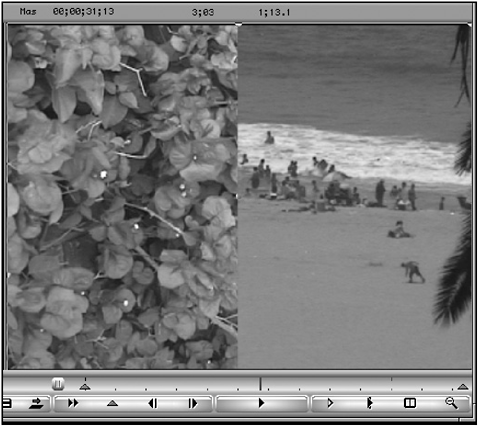
The results display a split screen (see Figure 11.10).
Figure 11.10. A split screen using two layers and the 3D PIP effect.
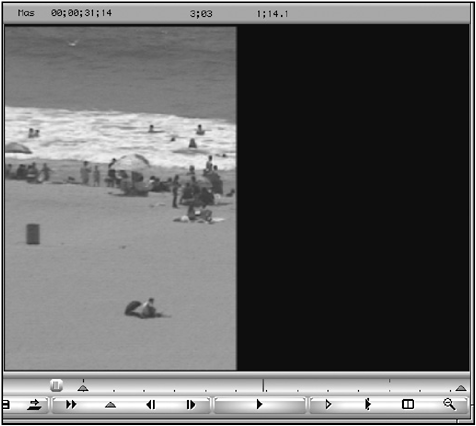
The problem with building this effect this particular way is that when you adjust the border of the PIP, it adjusts the entire image border, not the border between the split screens. Two tracks are now dedicated for this effect. If you incorporate the idea of nesting, the effect will look similar but the border adjustments will only affect the split screen border. To build a split screen using a nest, edit a clip on V1 and place the Horizontal Wipe effect on the clip. Remember, you need an effect to be able to work inside a nest. Once you place the effect on the clip, the image is cut into a split screen. Half the screen is the image you placed on V1 and the other half is black (see Figure 11.11).
Figure 11.11. Once you place an effect such as a wipe on an entire clip, it acts as a segment effect and automatically generates black.
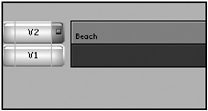
So where did the black come from? Avid Xpress Pro automatically generated the black. To replace the black, step inside the horizontal effect on V1. Two tracks appearthe top track contains the original material on V1 outside of the nest and the bottom track is empty (see Figure 11.12). This is where the black track was generated. To change the shot, edit a new piece of media into the bottom track.
Figure 11.12. The top track is the original material the bottom track is where the black channel or track was formed .
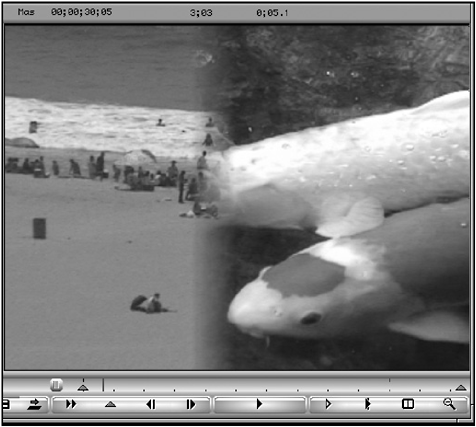
The results look very similar to the 3D PIP effect you built but, if you make any adjustments to the horizontal wipe, they affect only the border between the wipe, not around the entire image as with the 3D PIP, creating a nice look. In Figure 11.13, I also increased the softness of the wipe. I know this might seem like a long way to point a simple task but I hope it helps illustrate the difference between building an effect as a layer and building an effect as a nest.
Figure 11.13. These are the results of the horizontal wipe with a border and some softness.
Nesting in a Picture-in-Picture Effect
One of the greatest benefits of nesting is the capability to nest inside a PIP effect. For example, a PIP effect floats across the screen from the bottom to the top and while it moves, the image inside changes. Because the image "inside" changes, you'll need to nest inside to make the changes. Create a nested PIP effect by following these steps:
-
Add a clip to V1 in the Timeline.
-
Add a second clip to V2. For this example, make this clip shorter than the clip on V1.
-
Add a standard PIP to the clip on V2. By default, the image becomes 50% size and is centered.
-
Open the Effect Editor and click on the first keyframe in the PIP effect. This will deselect the end keyframe.
-
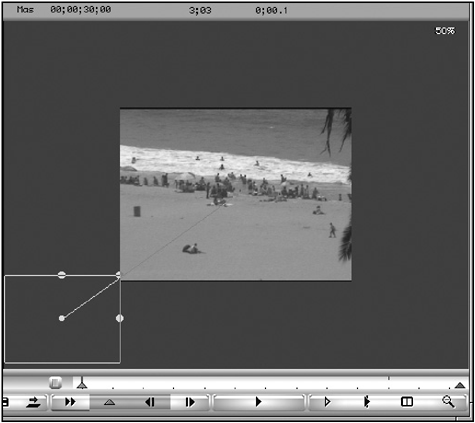
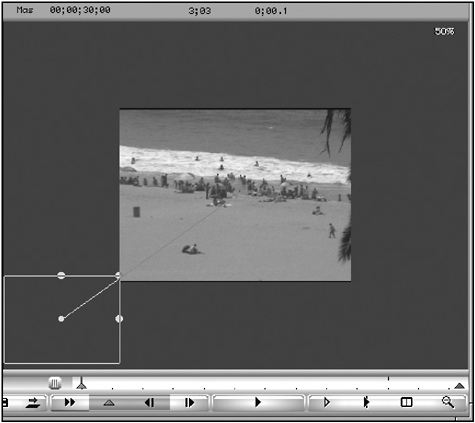
Position the PIP somewhere off the screen. In Figure 11.14, I'm zoomed out so I can see where the image will begin off-screen . These tools are covered in Chapter 9, "Advanced Effects."
Figure 11.14. The first keyframe has the image off the screen.
-
Click on the last keyframe and move the image across the screen to the opposite corner. So now you have a simple PIP effect floating across the screen.
-
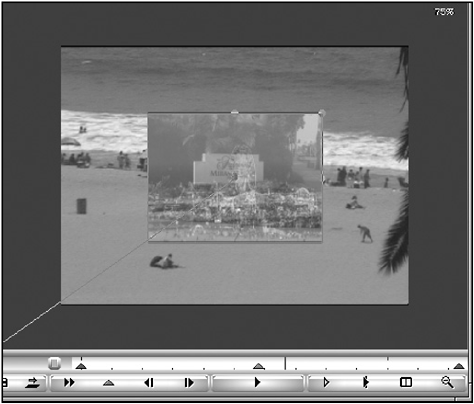
Place the Position Indicator on the PIP effect in the Timeline. Using the Step In button, nest inside the PIP. Inside the PIP are the original footage and a track of black (see Figure 11.15).
Figure 11.15. Inside a PIP effect, the original footage is placed on V2 and a black track is on V1.
-
Load a new clip into the source monitor and mark an IN point where you want an edit to start.
-
In the Timeline, move the Position Indicator somewhere near the middle. Mark an IN point and then move to the end of the Timeline and mark an OUT point.
-
Perform an overwrite edit (not a splice).
-
For this example, add a simple dissolve between the two clips. In order to watch the results, you'll need to render the dissolve.
-
Click on the Step Out button to step out of the nested effect. Play the results (see Figure 11.16). Now the PIP has an edit inside of it.
Figure 11.16. The PIP moves across the screen and the image inside changes.
Forget trying to track a shot; this is the only effective method to perform this effect. Hopefully you're starting to sense the power of nesting.
Adding a Title to a Picture-in-Picture
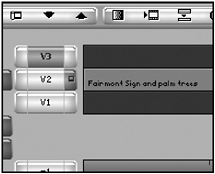
Another powerful aspect of nesting is the capability to add tracks inside a nest. This might boggle the mind as to why you would add a track inside of an effect, but a great example is the need to add a title to a PIP effect as it moves and becomes full screen. Attempting to add a new video track and have a title follow a PIP underneath is practically impossible . Even if you are able to follow a PIP effect, the results can look incorrect. Tracking an image is a very complex effect, but because Avid Xpress Pro has nesting, the process becomes quite simple. After you've created a PIP effect, simply nest into the PIP and add a new video track from the Clip menu. Inside the PIP, a new track will appear (see Figure 11.17).
Figure 11.17. You can add additional video tracks inside an effect.
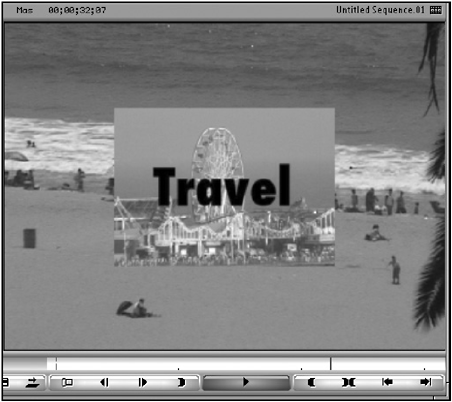
Open up the Title tool and create a new title. Add this title to the new video track inside the nest and step out to see the results. To play the effect in real time, you need to render it first. The title is now part of the PIP, not an independent item. As the PIP moves, so does the title (see Figure 11.18). Again, without nesting, this would be a very difficult effect to complete.
Figure 11.18. The PIP now includes a title.
| [ LiB ] |
- Step 1.1 Install OpenSSH to Replace the Remote Access Protocols with Encrypted Versions
- Step 2.1 Use the OpenSSH Tool Suite to Replace Clear-Text Programs
- Step 3.2 Use PuTTY / plink as a Command Line Replacement for telnet / rlogin
- Step 4.4 How to Generate a Key Using PuTTY
- Step 4.7 Using Public Key Authentication for Automated File Transfers